Content .. 1243 1244 1245 1246 ..
Mitsubishi Outlander GS45X. Manual - part 1245
CYLINDER HEAD AND VALVES
TSB Revision
ENGINE OVERHAUL <2.4L ENGINE>
11B-55
VALVE GUIDE
Measure clearance between the valve guide and valve stem. If
the clearance exceeds the limit, replace the valve guide or
valve, or both.
Standard value:
Intake 0.020
− 0.047 mm (0.0008 − 0.0019 inch)
Exhaust 0.030
− 0.054 mm (0.0012 − 0.0021 inch)
Limit:
Intake 0.10 mm (0.0039 inch)
Exhaust 0.11 mm (0.0043 inch)
.
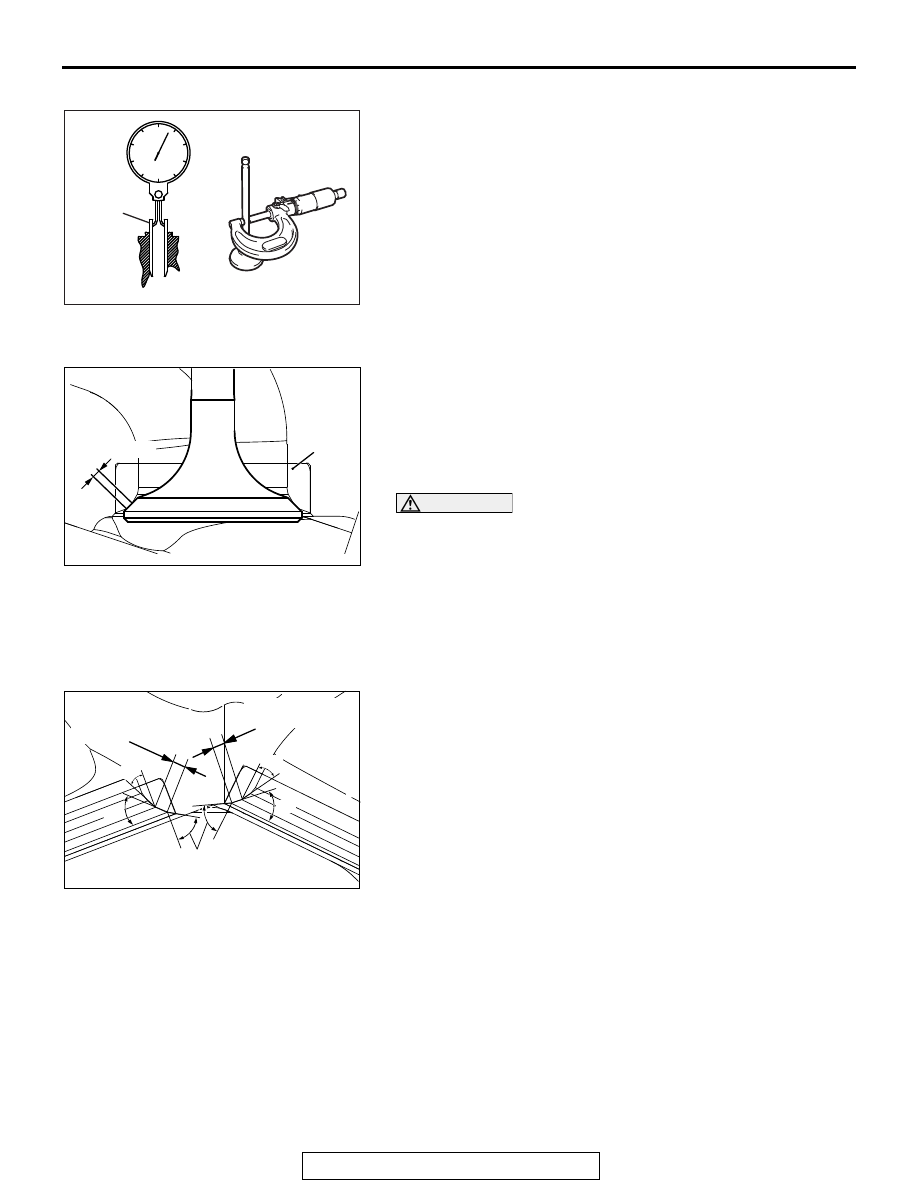
VALVE SEAT
Assemble the valve, then measure the contact width. If the
measurement exceeds the specified limit, replace the valve
seat.
Standard value
Intake: 1.16
− 1.46 mm (0.046 − 0.058 inch)
Exhaust: 1.35
− 1.65 mm (0.053 − 0.065 inch)
CAUTION
If the variation in the width exceeds 0.2 mm even if the
contact width is within the standard value, replace or cor-
rect the valve sheet.
REPAIR PROCEDURE OF VALVE SEAT
1. Check clearance between valve guide and valve and
replace the valve guide if necessary before repairing the
valve seat.
2. Repair the valve seat so that seat width and seat angle are
to the specified shape.
3. Lap valve and valve seat with lapping compound after
repairing valve seat.
AK300168
Guide inside diameter
Stem diameter
Valve
guide
AF
AK601281AD
Contact width
Valve seat
AK503333AE
30˚
60˚
30˚
1.16 – 1.46 mm
(0.046 – 0.058 in)
45˚
45˚
1.35 – 1.65 mm
(0.053 – 0.065 in)