Mitsubishi Outlander (2013+). Manual - part 500
WINDOW GLASS
BODY
42A-20
CAUTION
Before the next operation, leave the decreased
parts for 3 minutes or more to dry. Do not touch
the degreased parts.
2. Use parts cleaner (MZ100387 or equivalent) to
degrease the inside circumference of the quarter
window glass assembly and the body flanges.
ACB05679 AB
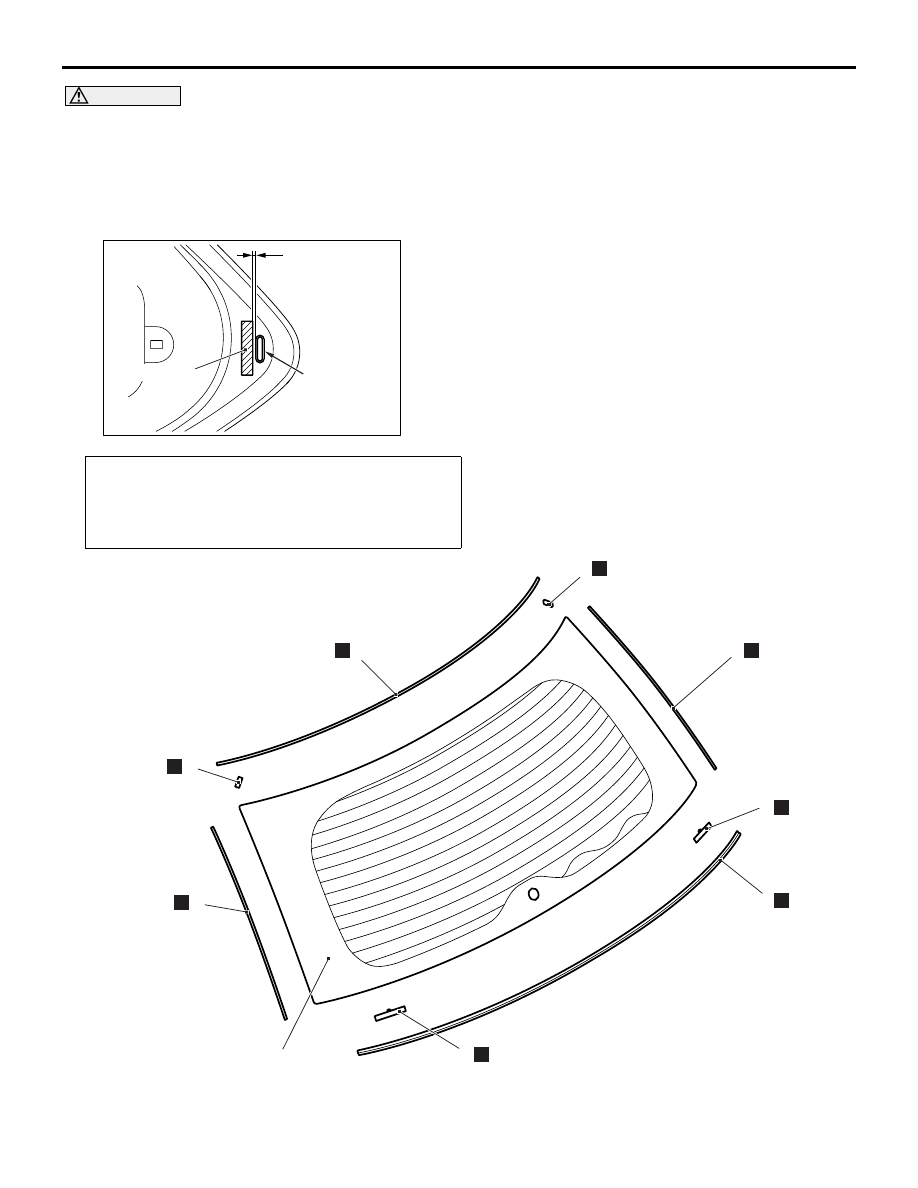
Fastener
Convex on the
body flange
2.1 mm
3. Install the fasteners to the specified positions on
the body flange.
4. Install the fasteners to the quarter window glass
assembly at the positions which correspond to the
fasteners on the body flange.
>>B<< QUARTER WINDOW GLASS
ASSEMBLY INSTALLATION
1. Apply the primer and adhesive.
2. Install the quarter window glass assembly by the
same procedures as for the windshield glass
(Refer to
).
TAILGATE WINDOW GLASS
REMOVAL AND INSTALLATION
M1422003701087
Pre-removal and post-installation operation
• Rear wiper blade and arm assembly removal and installa-
tion (Refer to GROUP 51
− Rear Wiper and Washer .)
• Tailgate trim removal and installation (Refer to GROUP
52A
− Tailgate Trim .)
ACB05727
N
N
N
1
4
N
2
N
5
N
2
N
5
6
3
AB
N
3