Mitsubishi Outlander (2013+). Manual - part 16
FRONT PILLAR
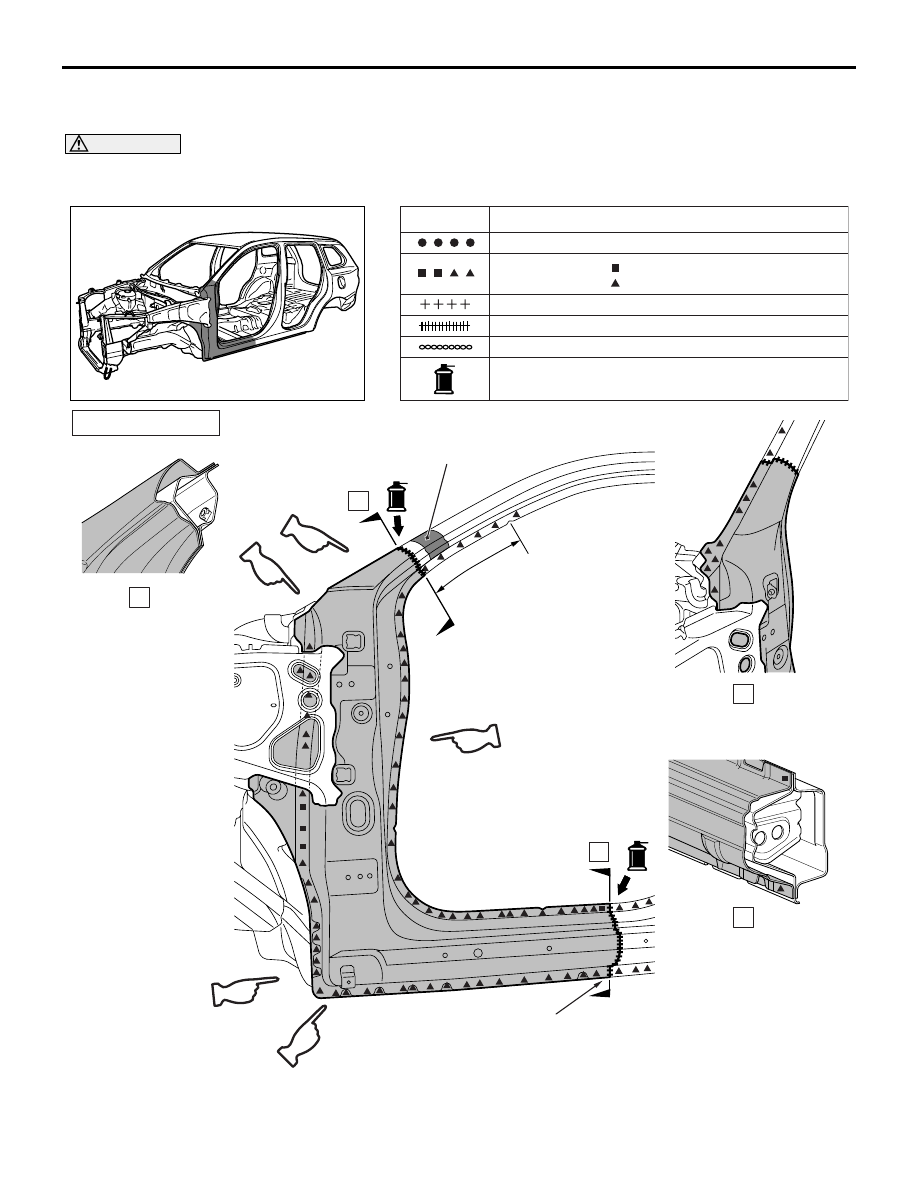
WELDED PANEL REPLACEMENT
3-9
FRONT PILLAR
M4030005002113
CAUTION
When repairing the area using sound dampening foam material do not use firing tools since the
sound dampening foam material may burn.
ABC99914
AB
Symbol
Operation description
Spot welding
MIG plug welding : indicates two panels to be welded
: indicates three panels to be welded
MIG spot welding
MIG arc welding (continuous)
Braze welding
Anti-corrosion agent application locations
(Use access holes to apply liberally to butt-welded joints.)
( )
ABB00889
A
B
C
270 mm
C
AB
B
E
D
A
G
F
Sound dampening
foam material
REPAIR WELDS
The same position as the
new front outer pillar parts