Mitsubishi Outlander (2003+). Manual - part 241
TROUBLESHOOTING
WHEEL AND TYRE
31-3
TROUBLESHOOTING
DIAGNOSIS
M1311000700363
Symptom
Probable cause
Remedy
Reference page
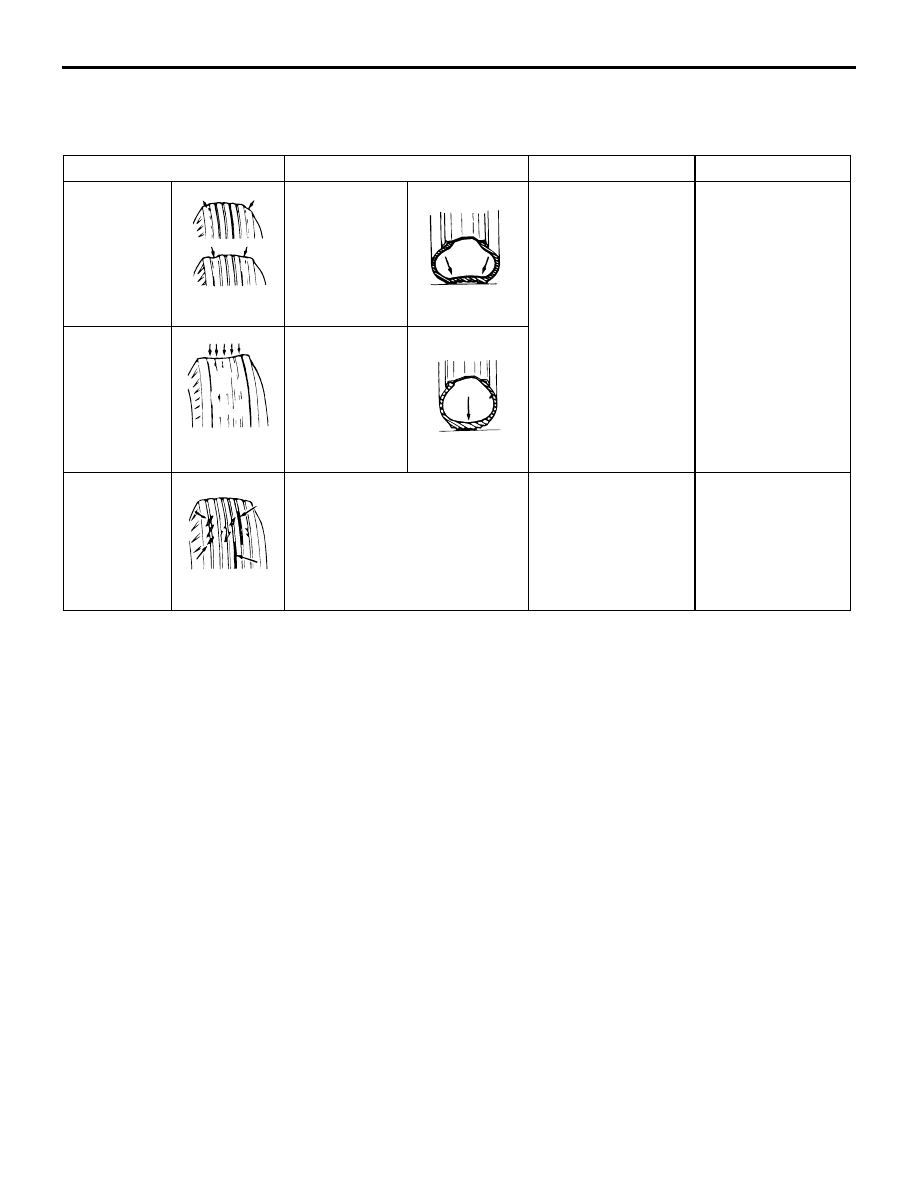
Rapid wear
at shoulders
Under-inflation
or lack of
rotation
Adjust the tyre
pressure.
For tyre inflation
pressure, refer to
the label on the
driver's side centre
pillar.
Rapid wear
at centre
Over-inflation
or lack of
rotation
Cracked
treads
Under-inflation
Adjust the tyre
pressure.
For tyre inflation
pressure, refer to
the label on the
driver's side centre
pillar.
ACX00923AB
ACX00924 AB
ACX00925AB
ACX00926AB
ACX00927AB