Mitsubishi Montero (2004+). Manual - part 679
DOOR
TSB Revision
BODY
42-47
AX0540CA
AX0541CA
AX0543CA
AX0544CA
AX0545CA
AX0542CA
AC203990
ADHESIVE TAPE:
DOUBLE-SIDED TAPE [23 mm (0.9 inch) WIDTH
AND 0.8 mm (0.03 inch) THICKNESS]
1
2
3
5
6
7
4
3
:SECTIONAL VIEW OF
CLIP POSITION
:SECTIONAL VIEW OF CLIP POSITION
:SECTIONAL VIEW OF CLIP POSITION
CLIP
2
2
3
3
3
CLIP
CLIP
CLIP
CLIP
AC
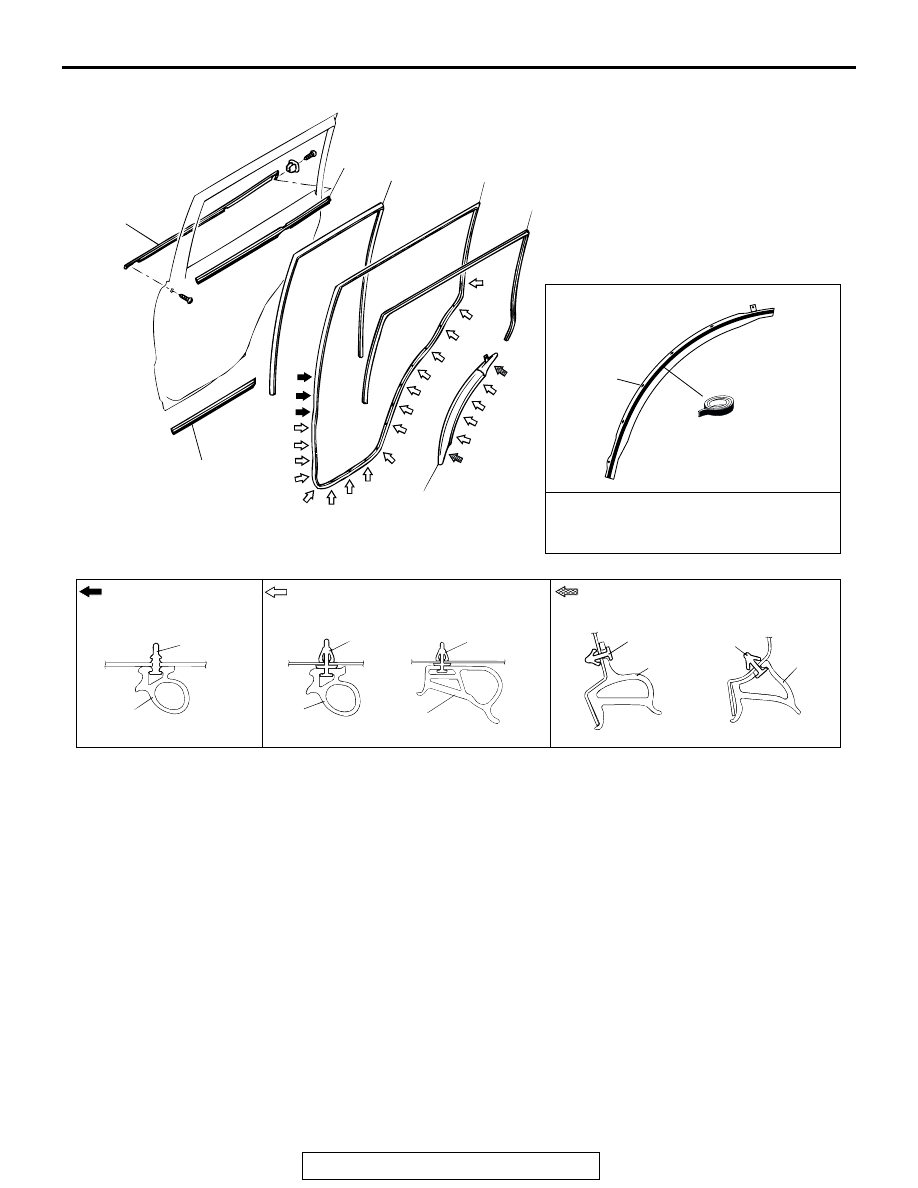
<REAR DOOR>
DOOR INNER OPENING
WEATHERSTRIP REMOVAL STEPS
>>B<<
1. DOOR INNER OPENING
WEATHERSTRIP
• CENTER PILLAR LOWER TRIM
(REFER TO GROUP 52A, TRIMS
DOOR OUTER OPENING
WEATHERSTRIP REMOVAL
• REAR DOOR CHECK MOUNTING
BOLT (DOOR SIDE) (REFER TO
.)
<<A>>
2. DOOR OUTER OPENING
WEATHERSTRIP
3. DOOR OUTER OPENING LOWER
WEATHERSTRIP
4. DOOR OUTER OPENING FRONT
WEATHERSTRIP
DOOR WINDOW GLASS
RUNCHANNEL REMOVAL STEPS
>>A<<
5. DOOR WINDOW GLASS
RUNCHANNEL
• REAR DOOR TRIM (REFER TO
6. DOOR BELTLINE INNER
WEATHERSTRIP
DOOR BELTLINE MOLDING REMOVAL
STEPS
7. DOOR BELTLINE MOLDING
DOOR OUTER OPENING
WEATHERSTRIP REMOVAL