Mitsubishi Galant. Manual - part 557
WINDOW GLASS
TSB Revision
BODY
42-11
Required Special ToolS:
•
MB990449: Window Molding Remover
•
MB990480: Glass Holder
AC000560
1
2
3
4
5
6
7
8
9
10
11
12
1
2
9, 10, 11
1
2
6, 7, 8
1
12
2
5
G
G
F
F
D
D
E
E
SECTION D – D
SECTION E – E
SECTION F – F
SECTION G – G
ADHESIVE TAPE: DOUBLE-SIDED
TAPE [6 mm (0.24 in) WIDE AND
0.125 mm (0.0049 in) THICK]
AB
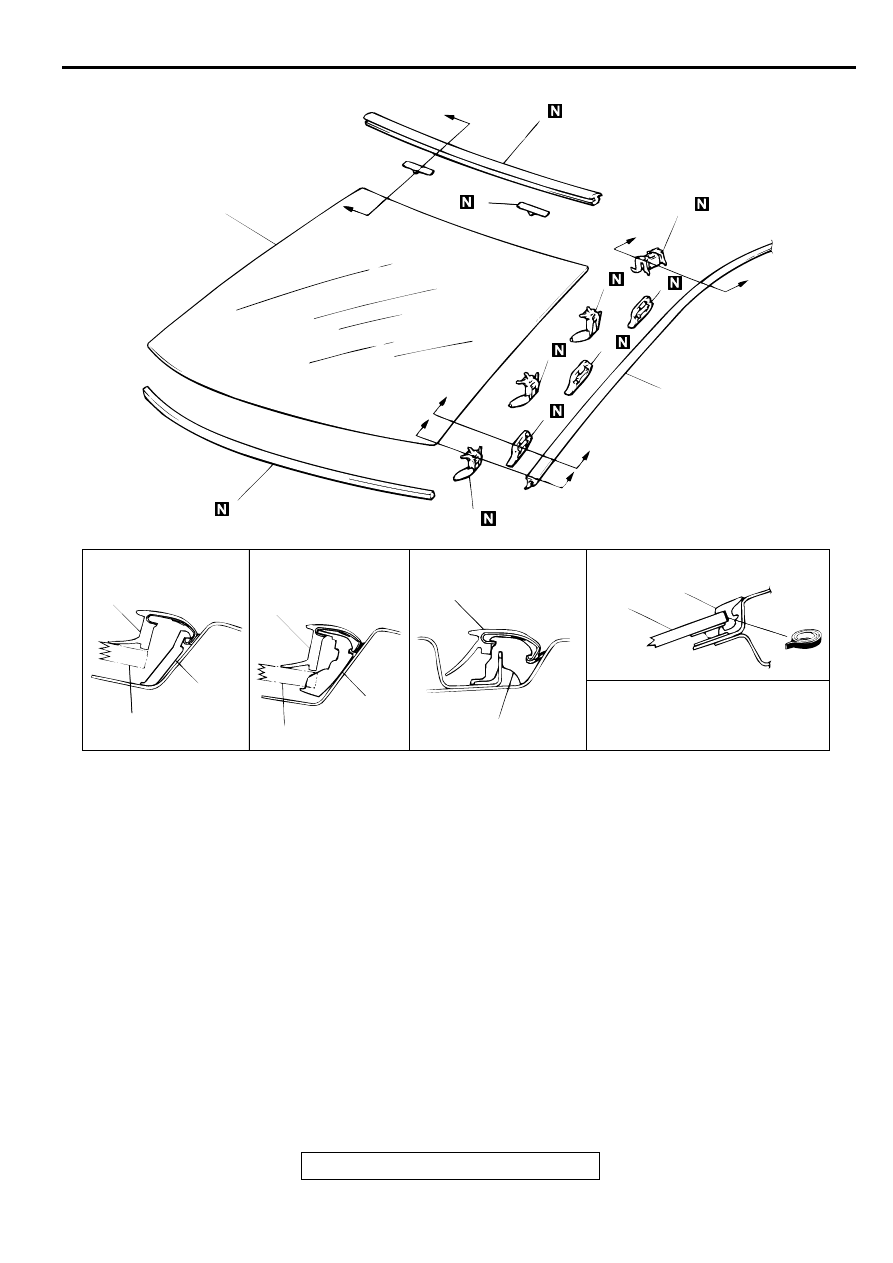
REMOVAL STEPS
<<A>> >>D<<
1. ROOF DRIP MOLDING
<<B>> >>C<<
2. WINDSHIELD
>>C<<
3. GLASS STOPPER
>>C<<
4. WINDOW SPACER
>>C<<
5. WINDSHIELD UPPER MOLDING
>>B<<
6. FRONT DRIP MOLDING CLIP A
>>B<<
7. FRONT DRIP MOLDING CLIP B
>>B<<
8. FRONT DRIP MOLDING CLIP C
>>A<<
9. DRIP MOLDING CLIP A
>>A<<
10. DRIP MOLDING CLIP B
>>A<<
11. DRIP MOLDING CLIP C
12. ROOFDRIP MOLDING CLIP
REMOVAL STEPS (Continued)