Mitsubishi Galant 9G. Manual - part 585
TIMING BELT
TSB Revision
ENGINE OVERHAUL <2.4L ENGINE>
11B-12
Required Special Tools:
• MB990767: End Yoke Holder
• MD998719: Pins
• MD998767: Tensioner Pulley Wrench
• MD998778: Crankshaft Sprocket Puller
• MD998781: Flywheel Stopper
• MD998785: Sprocket Stopper
REMOVAL SERVICE POINTS
.
<<A>> TIMING BELT REMOVAL
CAUTION
Water or oil on the belt shortens its life drastically, so the
removed timing belt, sprocket, and tensioner must be
washed or immersed in solvent. Replace parts if contami-
nated. If there is oil or water on any part, check the front
case oil seals, camshaft oil seal, and water pump for leaks.
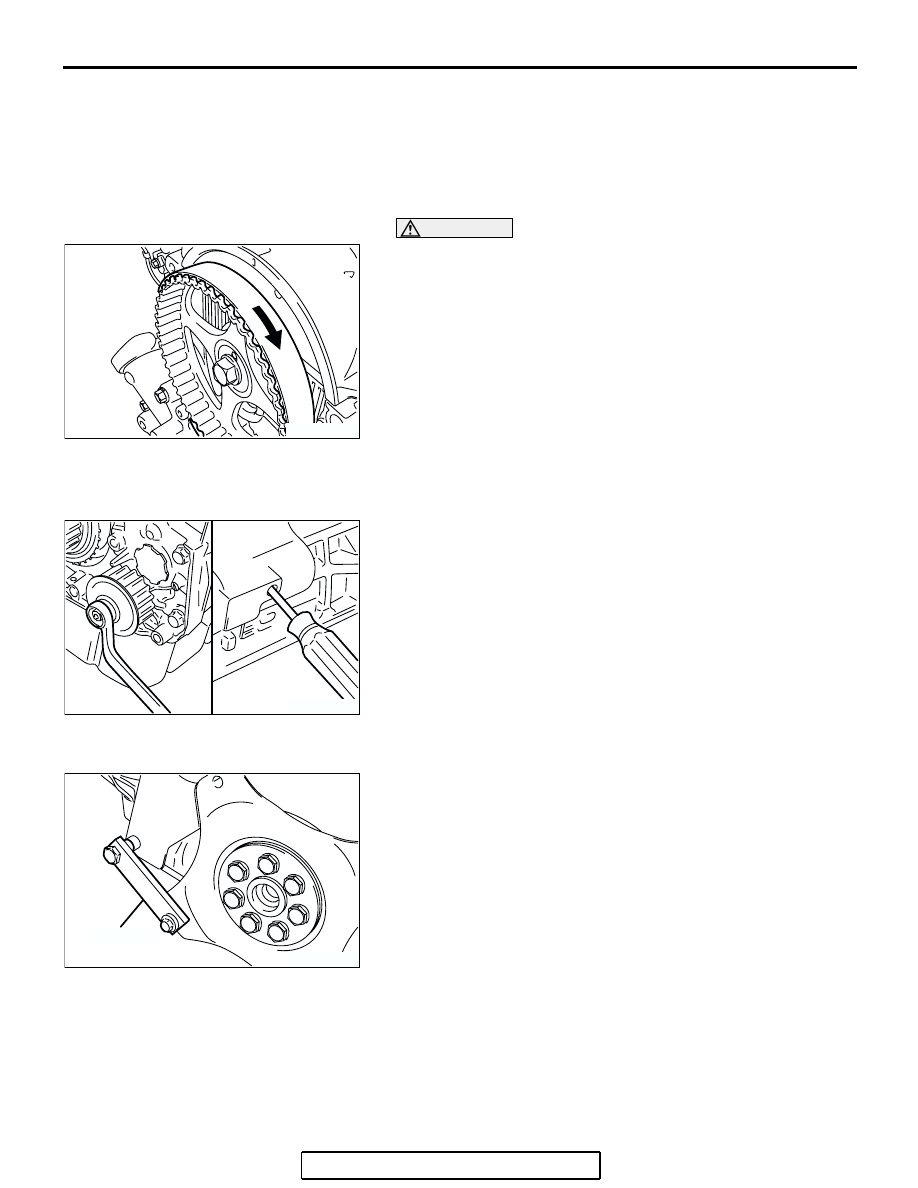
1. Mark the belt running direction for reinstallation.
2. Loosen the tensioner pulley bolt, and then remove the timing
belt.
.
<<B>> OIL PUMP SPROCKET REMOVAL
1. Remove the plug on the left side of the cylinder block.
2. Insert a Phillips screwdriver [shank diameter 8 mm (0.3
inch)] through the plug hole to block the left counterbalance
shaft.
3. Loosen the nut, and then remove the oil pump sprocket.
.
<<C>> CRANKSHAFT BOLT LOOSENING
1. Install special tool MD998781 to hold the drive plate.
2. Loosen and remove the crankshaft bolt and washer.
.
AK300133
AK300134
AK300135
MD998781
AC