Mitsubishi Galant 9G. Manual - part 404


  Index      Mitsubishi     Mitsubishi Galant 9G - service repair manual


Search            


Content   ..  402  403  404  405   ..


Mitsubishi Galant 9G. Manual - part 404


BASIC BRAKE SYSTEM DIAGNOSIS

TSB Revision

BASIC BRAKE SYSTEM

35A-8

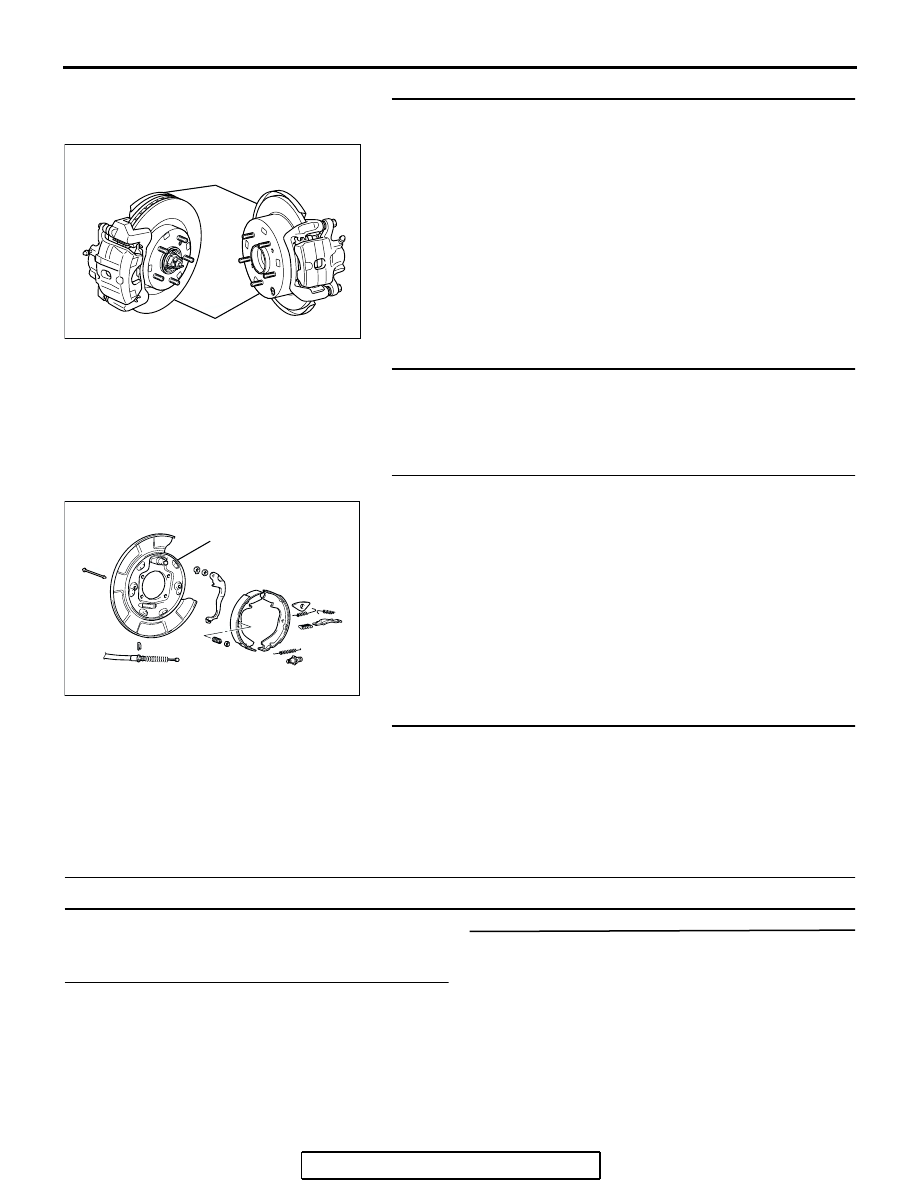
STEP 3. Check for interference between the dust cover and 
brake disc.
Q: Is there any interference?

YES : Repair or replace the part. Then go to Step 6.
NO :  Go to Step 4.

STEP 4. Check the brake drums or discs for cracks.
Q: Are there cracks?

YES : Repair or replace the part. Then go to Step 6.
NO :  Go to Step 5.

STEP 5. Check for bent backing plate(s).
Q: Is (Are) the backing plate(s) bent?

YES : Repair or replace the part. Then go to Step 6.
NO :  Go to Step 6.

STEP 6. Recheck symptom.
Q: Is the symptom eliminated?

YES : The procedure is complete.
NO :  Start over at step 1. If a new symptom surfaces, refer 

to the symptom chart.

INSPECTION PROCEDURE6: Squealing, Groaning or Chattering Noise when Brakes are Applied

.

DIAGNOSIS

STEP 1. Check the brake disc and pads for wear 
or cutting.

Q: Is there wear or cutting?

YES : 

Repair or replace the part. Then go to Step 

4.

NO : 

Go to Step 2.

STEP 2. Check the calipers for rust.

Q: Is  there any rust?

YES : 

Remove the rust. Then go to Step 4.

NO : 

Go to Step 3.

AC306518

DUST COVER

BRAKE DISC

AB

<FRONT>                     <REAR>

AC210519 AD

BACKING PLATE

<REAR>

BASIC BRAKE SYSTEM DIAGNOSIS

TSB Revision

BASIC BRAKE SYSTEM

35A-9

STEP 3. Adjust the brake pedal or brake booster 
pushrod.
Refer to 

P.35A-13

 or 

P.35A-26

.

Q: Are the brake pedal and the brake booster pushrod 

adjusted correctly?
YES : 

Go to Step 4.

NO : 

Adjust the brake pedal or the brake booster 
pushrod. Then go to Step 4.

STEP 4. Recheck symptom.

Q: Is the symptom eliminated?

YES : 

The procedure is complete.

NO : 

Start over at step 1. If a new symptom 
surfaces, refer to the symptom chart.

INSPECTION PROCEDURE 7: Squealing Noise when Brakes are not Applied

DIAGNOSIS

.

STEP 1. Check whether the backing plate is bent or loose 
and interfering with the drum.
Q: Is there a fault?

YES : Replace the part. Then go to Step 10.
NO :  Go to Step 2.

STEP 2. Check whether the drum is damaged due to 
interference with the backing plate or shoe.
Q: Is there any damage?

YES : Replace the part. Then go to Step 10.
NO :  Go to Step 3.

STEP 3. Check the brake drum for wear and the shoe 
spring for damage.
Q: Is there any wear or damage?

YES : Replace the part. Then go to Step 10.
NO :  Go to Step 4.

STEP 4. Check the brake discs for rust.
Q: Are the brake discs rusted?

YES : Remove the rust by using sand paper. If still rusted, 

turn the rotors with an on-the-car brake lathe. Then go 
to Step 10.

NO :  Go to Step 5.

STEP 5. Check the brake pads for correct installation.
Q: Are the pads installed incorrectly?

YES : Repair the pads. Then go to Step 10.
NO :  Go to Step 6.

STEP 6. Check the calipers for correct installation.
Q: Are the calipers installed incorrectly?

YES : Repair the calipers. Then go to Step 10.
NO :  Go to Step 7.

BASIC BRAKE SYSTEM DIAGNOSIS

TSB Revision

BASIC BRAKE SYSTEM

35A-10

STEP 7. Check the wheel bearings for end play.
(1) Remove the brake discs.
(2) Place a dial gauge as shown, and measure the end play 

while moving the hub in the axial direction.

Limit: 0.05 mm (0.002 inch)

Q: Does the measured end play exceed the limit?

YES : Replace the faulty hub assembly. Then go to Step 10.
NO :  Go to Step 8.

STEP 8. Check whether the brake booster or master 
cylinder return is insufficient.
Q: Is the brake booster or master cylinder return 

insufficient?
YES : 
Replace the part. Then go to Step 10.
NO :  Go to Step 9.

STEP 9. Adjust the brake pedal or brake booster pushrod.
Refer to 

P.35A-13

 or 

P.35A-26

.

Q: Are the brake pedal and the brake booster pushrod 

adjusted correctly?
YES : 
Go to Step 10.
NO :  Adjust the brake pedal or the brake booster pushrod. 

Then go to Step 10.

STEP 10. Recheck symptom.
Q: Is the symptom eliminated?

YES : The procedure is complete.
NO :  Start over at step 1. If a new symptom surfaces, refer 

to the symptom chart.

AC102438 AC

<FRONT>

AC205869AC

<REAR>

BASIC BRAKE SYSTEM DIAGNOSIS

TSB Revision

BASIC BRAKE SYSTEM

35A-11

INSPECTION PROCEDURE 8: Groaning, Clicking or Rattling Noise when Brakes are not Applied.

DIAGNOSIS

.

STEP 1. Check whether foreign material has entered the 
wheel covers.
Q: Is there any foreign material?

YES : Remove it. Then go to Step 5.
NO :  Go to Step 2.

STEP 2. Check for looseness of the wheel nuts.
Q: Are the wheel nuts loose?

YES : Tighten to 98 

± 10 N⋅m (73 ± 7 ft-lb). Then go to Step 

5 .

NO :  Go to Step 3.

STEP 3. Check for looseness of the caliper installation 
bolt.
Q: Is the caliper installation bolt loose?

YES : Tighten to 100 

± 10 N⋅m (74 ± 7 ft-lb) for the front 

caliper. Tighten to 60 

± 5 N⋅m (45 ± 3 ft-lb) for the rear 

caliper. Then go to Step 5.

NO :  Go to Step 4.

AC308605AB

<FRONT>

<REAR>


Content   ..  402  403  404  405   ..