Mitsubishi Galant 9G. Manual - part 390
 

  Index      Mitsubishi     Mitsubishi Galant 9G - service repair manual


Search            


Content   ..  388  389  390  391   ..


Mitsubishi Galant 9G. Manual - part 390


DOOR

TSB Revision

BODY

42-40

Required Special Tool:

• MB990784: Ornament Remover

AC306515

AC307259

AC306722

AC306724

AC206827

AB

NOTE
         : CLAW POSITIONS 

A

3

VIEW A

4

5

SECTION B – B

SECTION C – C

B

B

C

C

C

C

C

C

C

C

C

CLAW

CLAW

TRIM

TRIM

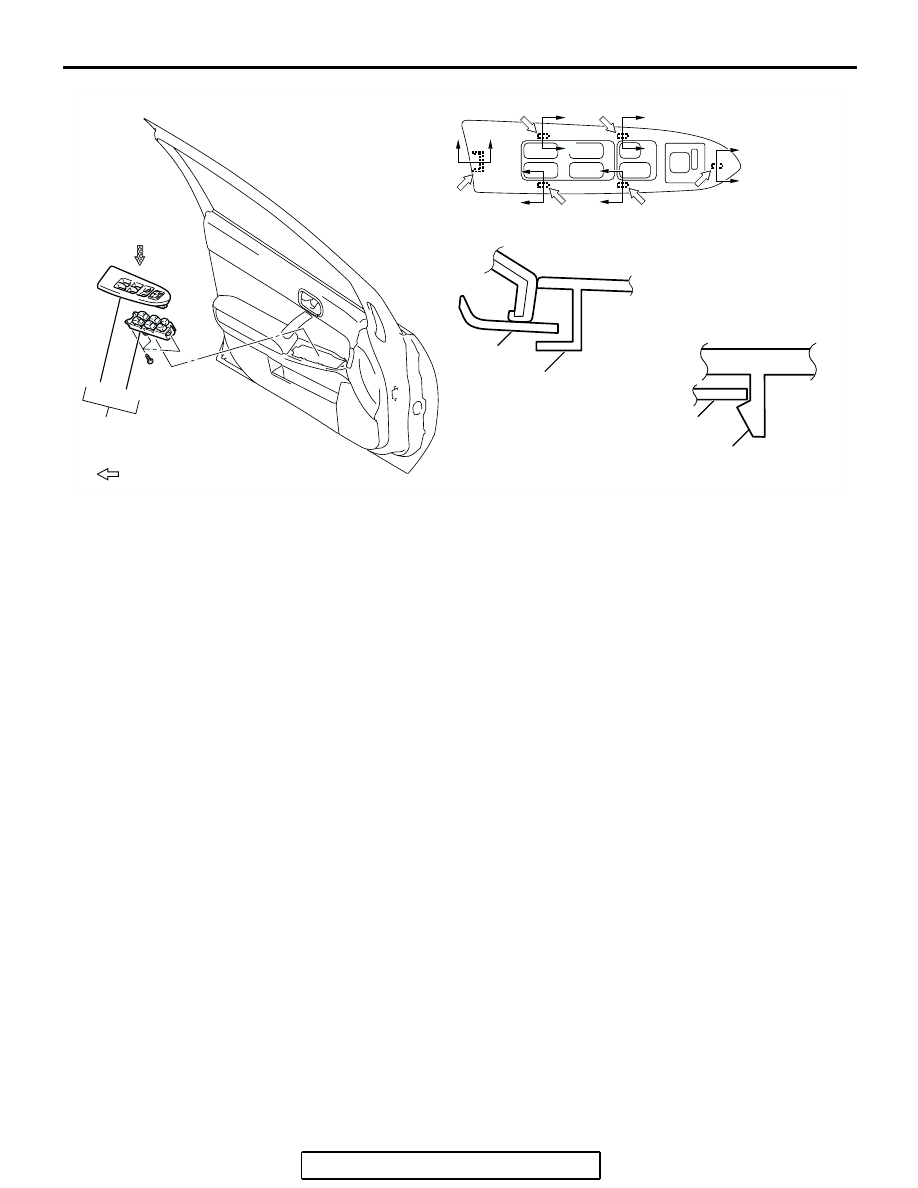
<FRONT DOOR POWER WINDOW SWITCH>

C

POWER WINDOW SWITCH 
REMOVAL STEPS

<<C>>

3. POWER WINDOW SWITCH PANEL 

ASSEMBLY

4. POWER WINDOW SWITCH PANEL
5. POWER WINDOW MAIN SWITCH 

(LH), POWER WINDOW SUB 
SWITCH (RH)

DOOR

TSB Revision

BODY

42-41

Required Special Tool:

• MB990480: Window Glass Holder

AC306512

AC306164

AC210317

AB

1

1

3

2

<REAR DOOR WINDOW REGULATOR ASSEMBLY>

DOOR WINDOW REGULATOR 
ASSEMBLY REMOVAL

<<A>>

1. WINDOW REGULATOR ASSEMBLY

DOOR WINDOW GLASS REMOVAL 
STEPS

• DOOR WINDOW GLASS 

RUNCHANNEL (REFER TO 

P.42-52

).

• DOOR BELTLINE MOLDING 

(REFER TO 

P.42-52

).

• LOWER SASH (REFER TO 

P.42-46

).

<<B>>

2. REAR DOOR STATIONARY 

WINDOW GLASS ASSEMBLY

3. DOOR WINDOW GLASS

DOOR WINDOW GLASS REMOVAL 
STEPS (Continued)

DOOR

TSB Revision

BODY

42-42

Required Special Tool:

• MB990784: Ornament Remover

REMOVAL SERVICE POINTS

.

<<A>> WINDOW REGULATOR ASSEMBLY 
REMOVAL

1. Remove the door window glass installation bolts.

CAUTION

If tinting film is adhered to the door window glass, attach 
special tool MB990480 to the outside of the glass to pre-
vent the film from peeling off.
2. Lift the door window glass, and attach special tool 

MB990480 to the glass as shown to prevent the glass from 
falling.

3. Remove the window regulator assembly and power window 

motor assembly.

.

AC307260

AC306516

AC306723

AC306724

AC206827

AB

NOTE
         : CLAW POSITIONS 

A

3

VIEW A

4

5

SECTION B – B

SECTION C – C

B

B

C

C

C

C

C

C

C

C

C

CLAW

CLAW

TRIM

TRIM

C

C

C

<REAR DOOR POWER WINDOW SWITCH>

POWER WINDOW SWITCH 
REMOVAL STEPS

<<C>>

4. POWER WINDOW SWITCH PANEL 

ASSEMBLY

5. POWER WINDOW SWITCH PANEL
6. POWER WINDOW SUB SWITCH

AC308968

AB

MB990480

DOOR

TSB Revision

BODY

42-43

<<B>> REAR DOOR STATIONARY WINDOW 
GLASS ASSEMBLY REMOVAL

Remove the mounting screw of the top of the rear door station-
ary window glass assembly (the screw is hidden by the mold-
ing).

.

<<C>> POWER WINDOW SWITCH PANEL 
ASSEMBLY REMOVAL

Insert special tool MB990784 as shown to remove the power 
window switch panel assembly.

INSPECTION

M1429001400293

POWER WINDOW SWITCH CONTINUITY CHECK

Remove the power window switch. (Refer to 

P.42-39

.)

.

Power window main switch's front <LH> switch 
check

Connect terminal number 13 to the battery positive (+) post, 
and connect terminal number 12 to the battery negative (

−) 

post.
Main switch

AC306498 AB

SCREW

AC306721

MB990784

POWER WINDOW SWITCH 
PANEL ASSEMBLY

AB

SWITCH POSITION

TESTER 
CONNECTION

SPECIFIED 
CONDITION

FRONT 
(LH)

UP

− 13, 9 − 12,

Less than 2 ohms

OFF

− 12, 9 − 12

Less than 2 ohms

DOWN 9 

− 13, 8 − 12

Less than 2 ohms

FRONT 
(RH)

UP

− 13, 11 − 12*

Less than 2 ohms

OFF

− 11, 3 − 12*, 11 − 

12*

Less than 2 ohms

DOWN 11 

− 13, 3 − 12*

Less than 2 ohms

AC210745

12

7

1

8

2

10

9

3

11

13

5

4

14

6


Content   ..  388  389  390  391   ..