Mitsubishi Pajero Pinin. Manual - part 290
 

  Index      Mitsubishi     Mitsubishi Pajero Pinin - service repair manual 2001 year


Search            


Content   ..  288  289  290  291   ..


Mitsubishi Pajero Pinin. Manual - part 290


2

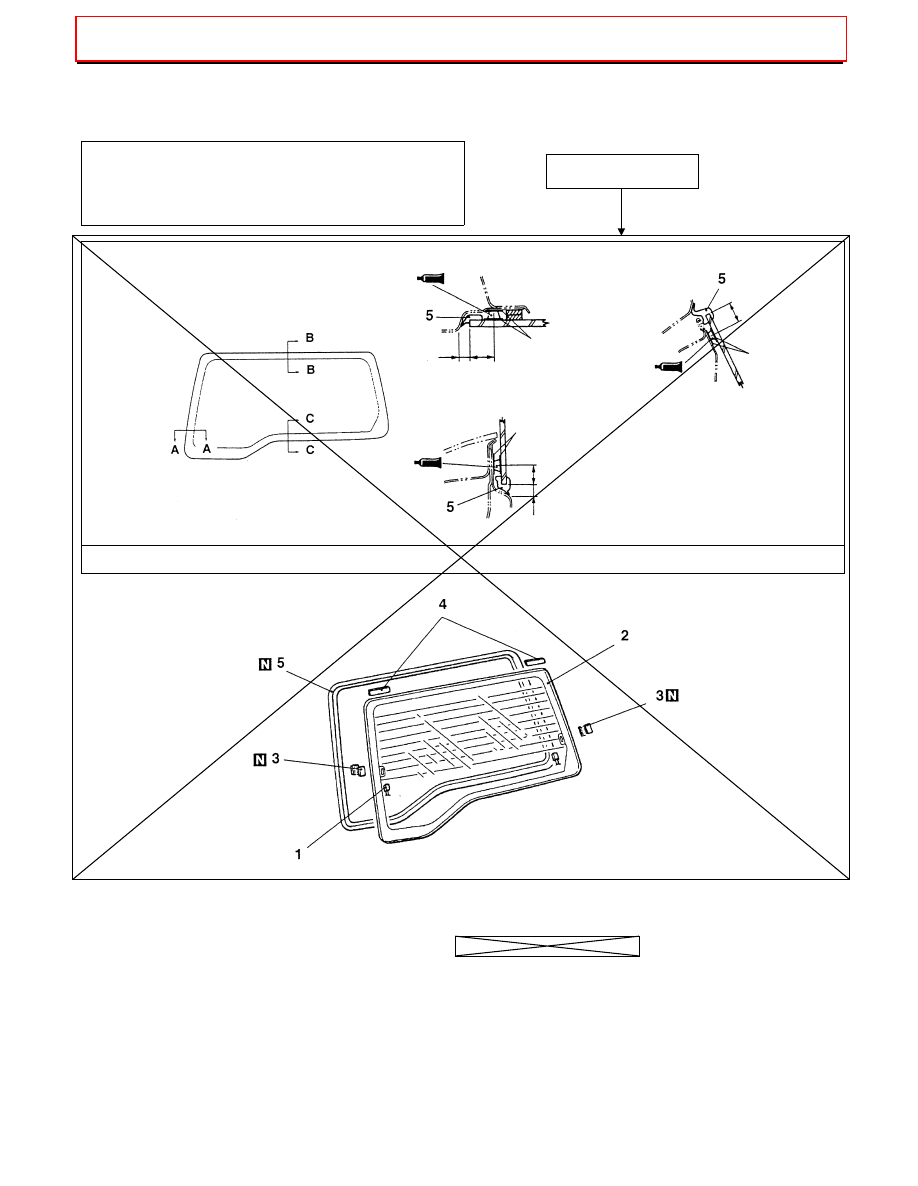
BACK DOOR GLASS

REMOVAL AND INSTALLATION

Pre-removal and Post-installation Operation


High-mounted Stop Lamp Assembly Removal and
Installation (Refer to GROUP 52A).


Back Door Trim Removal and Installation (Refer to
P. 42-34).

Adhesive: 3M ATD Part No. 8609 Super Fast Urethane Auto Glass Sealant or equivalent

Removal steps
1. Harness 

connector

2. Back 

door 

glass

3. Dual 

lock 

fastener

4. Glass 

stopper

5. 

Window dam

3. Details:

42-16

BODY – Window Glass

A

A

A

A

A

W0393AL

00008895

Primer

Primer

Primer

Section A - A

Section B - B

Section C - C

mm

5.5

12.5

12.5

5.5

12.5

18H0004

<Deleted>

<Incorrect>

See next page.

3

Adhesive: 3M ATD Part No. 8609 Super Fast Urethane Auto Glass Sealant or equivalent

<Correct>

Primer

Primer

Primer

Section A - A

Section B - B

Section C - C

mm

5.5

12.5

12.5

5.5

12.5

AY0365AL

AY0093AL

4

REMOVAL SERVICE POINT

BACK DOOR GLASS REMOVAL

Remove the back door glass in the same manner as for the
windshield. (Refer to P 42-11.)

INSTALLATION SERVICE POINT

WINDOW DAM/DUAL LOCK FASTENER/GLASS 
STOPPER/BACK DOOR GLASS INSTALLATION

1.  Use a isopropyl alcohol to decrease the glass and body

surfaces where the window dam, dual lock fasteners and glass
stoppers are installed.

2.  Install the window dam.

3.  Install the dual lock fasteners to the concavities on the body

panel and the glass stoppers to the hole on the body panel
respectively.

4.  Install the dual lock fasteners to the windshield in the positions

corresponding to the ones on the body panel where the dual
lock fasteners have been installed.

5. Apply 

the 

primer 

and 

adhesive.

6.  Install the glass in the same manner as for the windshield.

(Refer to P.42 – 12.)

BODY – Window Glass

42-17

A

A

<Incorrect>

See next page.

Concavity

Concavity

Glass stopper installation holes

Dual lock fastener

AW0394AL

5

REMOVAL SERVICE POINT

BACK DOOR GLASS REMOVAL

1.  Put matchmarks on the back door and the back door glass.
2.  For protection of painted surface of the back door, apply cloth

tape all around the back door on which the back door glass is
fitted.

3.  Using a pointed drill, make a hole in the bonded portion of the

back door.

4.  From inside the vehicle, pass the piano wire through the hole.

5.  Put the piano wire along the bonded surface from outside the

vehicle, and hold it at its end.

6.  Slowly pull the piano wire inside the vehicle in the direction in

which the piano wire outside the vehicle is held, and remove
the adhesive in the numerical order as shown.

(1) 

From left up to left down direction, pull the piano wire
inside the vehicle, and remove the adhesive.

(2) 

From left up to right up direction, pull the piano wire inside
the vehicle, and remove the adhesive.

(3) 

From right up to right down to left down direction, pull the
piano wire inside the vehicle, and remove the adhesive.

(4) 

Pass the piano wire outside the vehicle through the inside
of the vehicle, pull both ends of the piano wire toward the
inside of the vehicle, and remove the adhesive.

Caution
When the adhesive is removed, do not alternately pull the
piano wires. This may give damage to the moulding.

7.  Remove the back door glass from the back door panel.
8.  Remove the body to windshield adhesive by the same

procedure as for the windshield. (Refer to P.42 – 11.)

INSTALLATION SERVICE POINT

GLASS STOPPER/DUAL LOCK FASTENER/BACK 
DOOR GLASS INSTALLATION

1.  Using unleaded gasoline, degrease the glass and body surface

on which the dual lock fasteners and the glass stoppers are
installed.

2.  Install the dual lock fasteners correctly on the specified

locations of the body flange (convexities on the body panel).

3.  Install the dual lock fasteners and the glass stoppers on the

back door glass at the positions that correspond to those of the
body flange on which the dual lock fasteners and the glass
stoppers are installed.

4.  Using the sponge saturated with primer, apply primer evenly to

the specified areas around entire surface of the back door glass
and the body.

5.  Install the back door glass by the same procedures as for the

windshield. (Refer to P.42 – 12.)

<Correct>

A

Moulding

Cloth tape

Back door glass

Piano wire

Adhesive

Back door panel

AY0063AL

A

Concavity

Concavity

Glass stopper installation holes

Dual lock fastener

AW0394AL

AY0118AL

Moulding

Back door panel

Piano wire

Back door glass

Adhesive

Hold like this.


Content   ..  288  289  290  291   ..