Mitsubishi Pajero Pinin. Manual - part 198


  Index      Mitsubishi     Mitsubishi Pajero Pinin - service repair manual 2001 year


Search            


Content   ..  196  197  198  199   ..


Mitsubishi Pajero Pinin. Manual - part 198


FRONT AXLE – 

On-vehicle Service

26-11

FRONT AXLE GEAR OIL LEVEL CHECK

Top up the specified gear oil if the gear oil level does not
reach the bottom of the filler plug.

Specified gear oil:


Hypoid gear oil API classification GL-5 or
higher, SAE viscosity No.90, 80W

NOTE
SAE 90 for 10 

°

C or higher, SAE80 for 10

°

C or

lower

Capacity: 

Front differential: Approx. 0.83 

ȏ

Free-wheeling clutch: 0.12 

ȏ

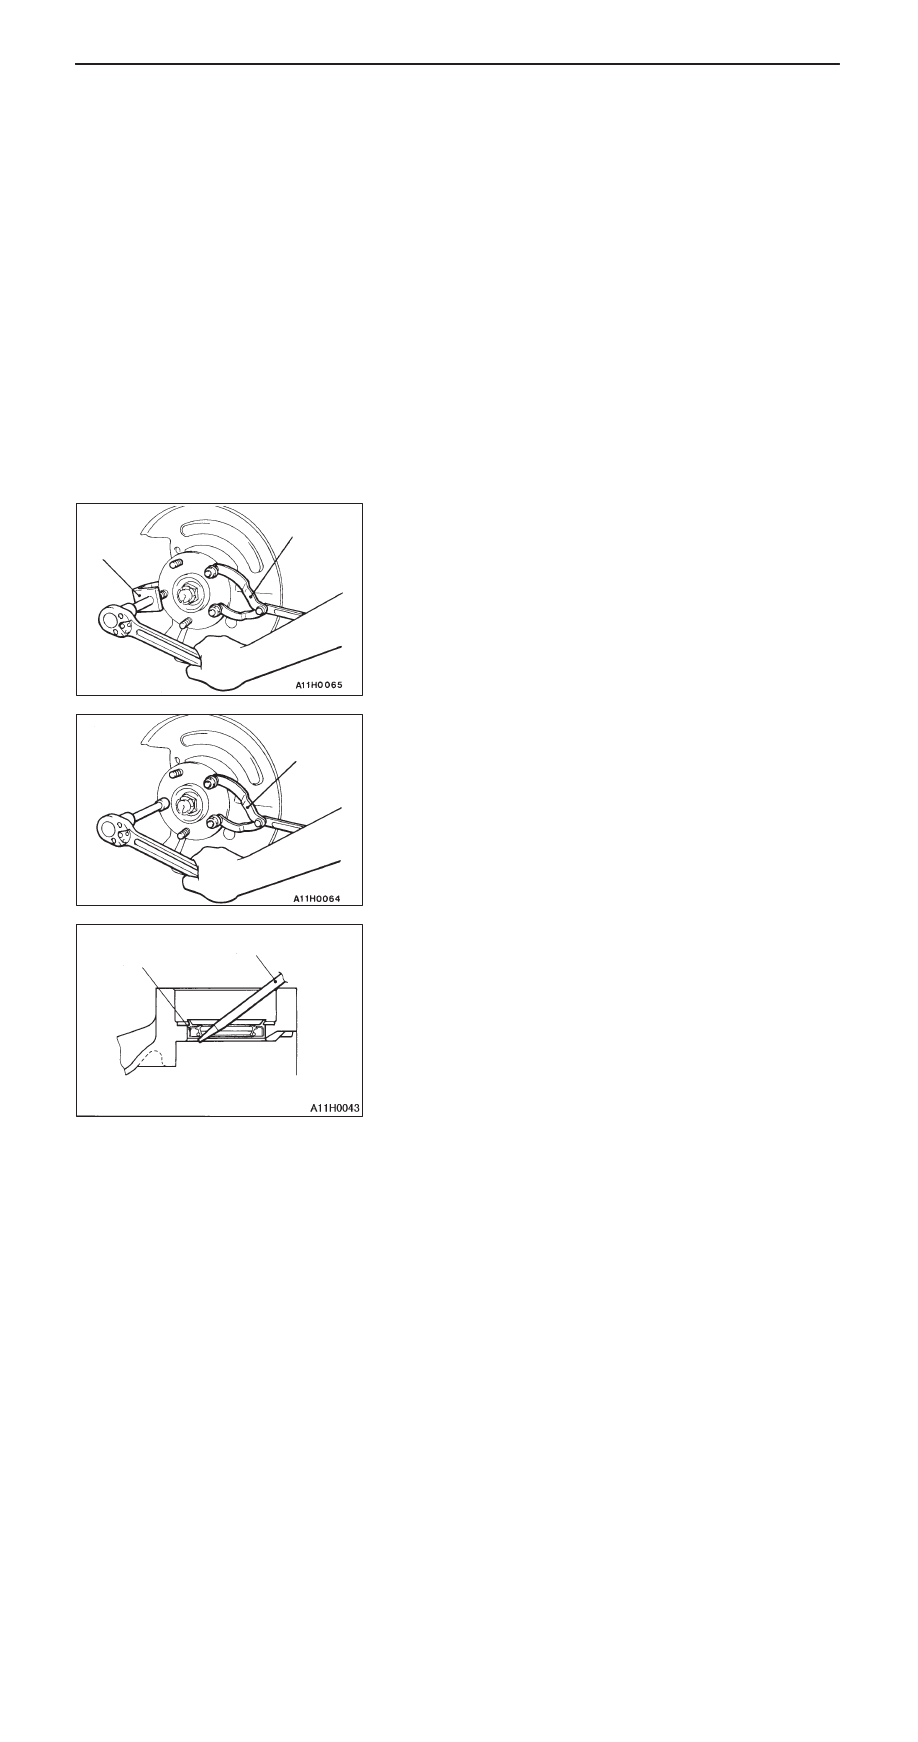
HUB BOLT REPLACEMENT

1.

Rotate the hub to align each hub bolt with the cutout
section of the dust cover, and push out each hub bolt
while locking the hub with the special tool.

2.

To press in the hub bolt, install each hub bolt at the
cutout section of the dust cover, and tighten the hub
bolt with the hub nut as shown.

DIFFERENTIAL CARRIER OIL SEAL
REPLACEMENT

1.

Remove the front housing assembly. (Refer to P.26-26.)

2.

Remove the drive shaft <RH>. (Refer to P.26-19.)

3.

Use a flat-tipped screwdriver or the like to remove the
oil seal.

MB991618

MB990767

MB990767

Flat-tipped screwdriver

Oil seal

FRONT AXLE – 

On-vehicle Service

26-12

4.

Use the special tools to install a new oil seal.

5.  Apply multi-purpose grease to the oil seal lip, and then

install the right drive shaft (Refer to P.26-19) and the
front housing assembly (Refer to P.26-26).

Caution
(1) Be careful not to scratch the oil seal lip.
(2) Always replace the circlip, which is installed on

the D.O.J.-side spline of the right drive shaft, with
a new one.

SOLENOID VALVE OPERATION CHECK

1.

Remove the vacuum hoses (blue stripe, yellow stripe)
from the solenoid valves.

2.

Disconnect the harness connectors.

3.

Connect a hand vacuum pump to solenoid valve A, and
carry out the following inspections.
(1) When battery voltage is not applied to any terminals,

the negative pressure is not be held.

(2) The negative pressure is not held when battery voltage

is applied to solenoid valve A. However, when the
vacuum hose of solenoid valve B is restricted by
bending it, the pressure is held.

(3) The negative pressure is held when battery voltage

is applied to solenoid valves A and B.

MB991115

MB990938

Solenoid valve B

Solenoid valve A

Check valve

Vacuum tank

Vacuum
hose

Solenoid valve B

Solenoid
valve A

FRONT AXLE – 

On-vehicle Service

26-13

4.

Connect a hand vacuum pump to solenoid valve B. Apply
negative pressure and carry out the following inspections.
(9) When battery voltage is not applied to any terminals,

the negative pressure is held.

(10)When battery voltage is applied to solenoid valve

B, the negative pressure is not held.

(11) When battery voltage is applied to solenoid valve

A, the negative pressure is not held.

5.

Measure the resistance of solenoid valves A and B.

Standard value: 36 – 46 

Check valve

Vacuum tank

Solenoid
valve A

Solenoid valve B

FRONT AXLE – 

Hub and Knuckle Assembly

26-14

HUB AND KNUCKLE ASSEMBLY

REMOVAL AND INSTALLATION

Post-installation Operation
Press the Dust Cover with a Finger to Check Whether
the Dust Cover is Cracked or Damaged.

7

3

196 – 255 Nm

4

2

1

5

6

8

9

10

11

108 – 127 Nm

59 – 71 Nm

59 – 71 Nm

90 – 110 Nm

9 Nm

Removal steps

1. Disc brake assembly
2. Brake disc
3. Wheel speed sensor <Vehicles with

ABS>

4. Dust cover

A

A

" "

A

A

5. Castle nut

"

A

A

6. Washer

A

B

"

7. Lower arm and hub/knuckle 

assembly connection

A

B

"

8. Tie rod end and hub/knuckle 

assembly connection

A

C

"

9. Drive shaft and hub/knuckle 

assembly connection

10. Strut assembly and hub/knuckle 

assembly connection

11. Hub/knuckle assembly

REMOVAL SERVICE POINTS

A

A

"

CASTLE NUT REMOVAL

Caution
Never apply the vehicle weight to the wheel bearing while
the castle nut is loosened. If the vehicle weight is applied,
the wheel bearing will be damaged.

MB990767


Content   ..  196  197  198  199   ..