Mitsubishi Lancer. Manual - part 238
SIDE AIR DAM
EXTERIOR
51-14
SIDE AIR DAM
ADHESIVE
M1511000500437
Item
Specification
Side air dam
Double-sided tape: Generic products
4 mm width and 1.2 mm thickness
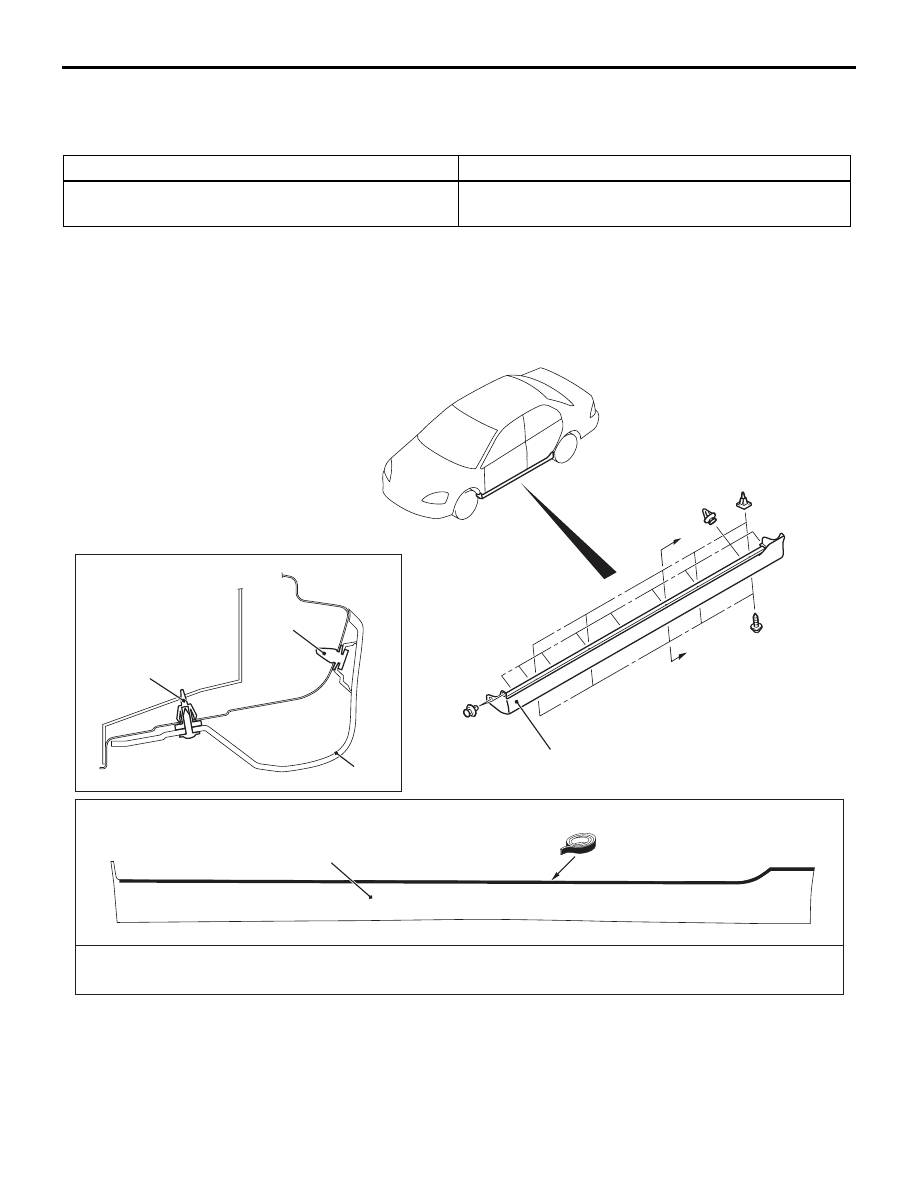
SIDE AIR DAM
REMOVAL AND INSTALLATION
M1511005500238
AC303877
Clip
Clip
Section A – A
AE
1
A
A
Adhesive tape affixed location
Double-sided tape:
Generic products [ 4 mm width and 1.2 mm thickness ]
1
1
Removal step
<<
A
>> >>
A
<< 1. Side air dam