Mitsubishi Eclipse / Eclipse Spyder (2000-2002). Service and repair manual - part 617


  Index      Mitsubishi     Mitsubishi Eclipse / Eclipse Spyder (2000-2002). Service and repair manual


Search            


Content   ..  615  616  617  618   ..


Mitsubishi Eclipse / Eclipse Spyder (2000-2002). Service and repair manual - part 617


WINDOW GLASS

TSB Revision

BODY

42-15

REMOVAL SERVICE POINTS

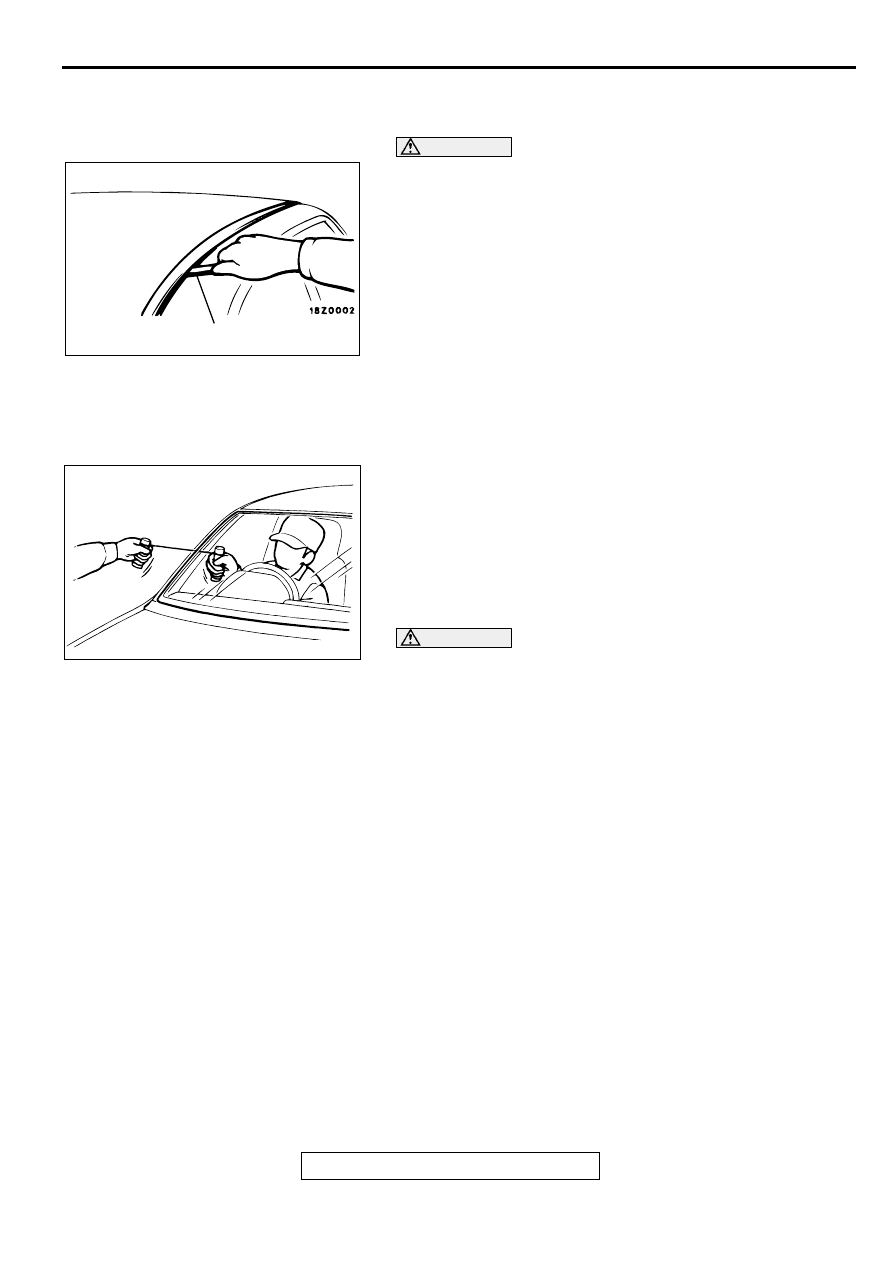
<<A>> ROOF DRIP MOLDING REMOVAL

CAUTION

If the roof drip molding has become warped, should be 
replaced (do not re-use).
Use special tool MB990449 to lever out the roof drip moulding.

<<B>> WINDSHIELD REMOVAL
1. To protect the body (paint surface), apply cloth tape to all 

body areas around the installed 

2. Using piano wire

(1) Using a sharp-point drill, make a hole in the windshield 

adhesive.

(2) Pass the piano wire from the inside of the vehicle through 

the hole.

(3) Using a sharp-point drill, make a hole in the windshield 

adhesive.

(4) Pass the piano wire from the inside of the vehicle through 

the hole.

CAUTION

Do not let the piano wire touch the edge of the windshield.

(5) Pull the piano wire alternately from the inside and outside 

along the windshield to cut the adhesive.

AC003626AB

MB990449

ACX00474 AB

WINDOW GLASS

TSB Revision

BODY

42-16

CAUTION

Putting glass adhesive knife too deeply into windshield 
adhesive may damage windshield.
3. Using glass adhesive knife

Keep glass adhesive knife at right angles with the 
windshield edge, and put the blade at windshield edge and 
surface. Then cut away adhesive along the windshield edge.

4. Make mating marks on the windshield and body.

5. Use special tool MB990480 to remove the windshield.

CAUTION

Be careful not to remove more adhesive than is 
necessary.

Be careful also not to damage the paintwork on the 
body surface with the knife. If the paintwork is 
damaged, repair the damaged area with repair paint or 
anti-rust agent.

6. Use a knife to cut away the remaining adhesive so that the 

thickness is within 2 mm (0.08 inch) around the entire 
circumference of the body flange.

7. Finish the flange surfaces so that they are smooth.

CAUTION

Allow the cleaned area to dry for at least three minutes. Do 
not touch any surface that has been cleaned.
8. When reusing the windshield, remove the adhesive still 

adhering to the windshield, and clean with 3M

 AAD Part 

number 8906 or equivalent.

9. Clean the body side in the same way.

AC002060

AC002059AB

GLASS ADHESIVE

KNIFE

ACX00475AB

MB990480

ACX00476 AB

WINDOW GLASS

TSB Revision

BODY

42-17

INSTALLATION SERVICE POINTS

>>A<< DRIP MOLDING CLIP A/DRIP MOLDING CLIP B 
INSTALLATION
1. The drip molding clips A and B differ according to where 

they are used, so check the identification color before 
installation.

2. After installing the clip to outer front pillar in alignment with 

its section A, cut from section B.

>>B<< FRONT DRIP MOLDING CLIP A/FRONT DRIP 
MOLDING CLIP B INSTALLATION
Clips A and B differ according to where they are used, so check 
the identification color before installation.

>>C<< WINDSHIELD UPPER MOLDING/SPACER/WINDOW 
SPACER/GLASS STOPPER/WINDSHIELD INSTALLATION
1. When replacing the windshield, temporarily set the 

windshield against the body, and place a mating mark on the 
windshield and body.

2. Use 3M

 AAD Part number 8906 or equivalent to de grease 

the inside and outside of the windshield and the body 
flanges.

CAUTION

The primer strengthens the adhesive, so be sure to 
apply it evenly around the entire circumference. 
However, a too thick application will weaken the 
adhesive.

Do not touch the coated surface.

3. Soak a sponge in the primer, and apply evenly to the 

windshield and the body in the specified places.

APPLICABLE LOCATION

IDENTIFICATION COLOR

Drip molding clips A

Gray

Drip molding clips B

Green

AC003629

FRONT PILLAR
OUTER

SECTION
 B

SECTION A

AB

APPLICABLE LOCATION

IDENTIFICATION COLOR

Front drip molding clips A 
<LH>

Gray

Front drip molding clips A 
<RH>

Yellow

Front drip molding clips B

Violet

WINDOW GLASS

TSB Revision

BODY

42-18

4. Apply the primer, and then let it dry for 3 to 30 minutes, 

depending on ambient temperature and humidity.

5. Install the windshield upper molding to the windshield.

6. Install the glass stopper to the windshield.

7. Place the window spacer to the windshield so that it inclines 

toward the windshield and its right and left clearances are 
equal. Then install the spacer firmly so that it is firmly 
anchored.

8. Fill a sealant gun with adhesive. Then apply the adhesive 

evenly around the windshield within 30 minutes after 
applying the primer.

NOTE: Cut the tip of the sealant gun nozzle into a V shape 
to simplify adhesive application.

9. Align the mating marks on the windshield and the body, and 

lightly press the windshield evenly so that it adheres 
completely.

10.Use a spatula or similar tool to remove any excessive 

adhesive. Clean the surface with 3M

 AAD Part number 

8906 or equivalent. Avoid moving the vehicle until the 
adhesive sets.

CAUTION

Do not move the vehicle unless absolutely necessary.

When testing for water leakage, do not pinch the end of 
the hose to spray the water.

11.Wait 30 minutes or more, and then test for water leakage.

AC000457

AC001776

AC001775

AC001774

AC002209AB

303 mm

(12 in)

303 mm

(12 in)

CENTER

GLASS STOPPER

A

A

SECTION A – A

GLASS END LINE

20.5 mm

(0.80 in)

SECTION B – B

SECTION C – C

70 mm

(3 in)

38 mm

(1.5 in)

33 mm

(1.3 in)

12 mm

(0.5 in)

B

B

C

C

WINDOW SPACER

WINDOW SPACER

WINDOW SPACER

END MARK

SPACER

ACX00480

10 mm

(0.4 in)

15 mm

(0.6 in)

AB


Content   ..  615  616  617  618   ..