Mitsubishi Eclipse / Eclipse Spyder (2000-2002). Service and repair manual - part 559
REAR SUSPENSION ASSEMBLY
TSB Revision
REAR SUSPENSION
34-9
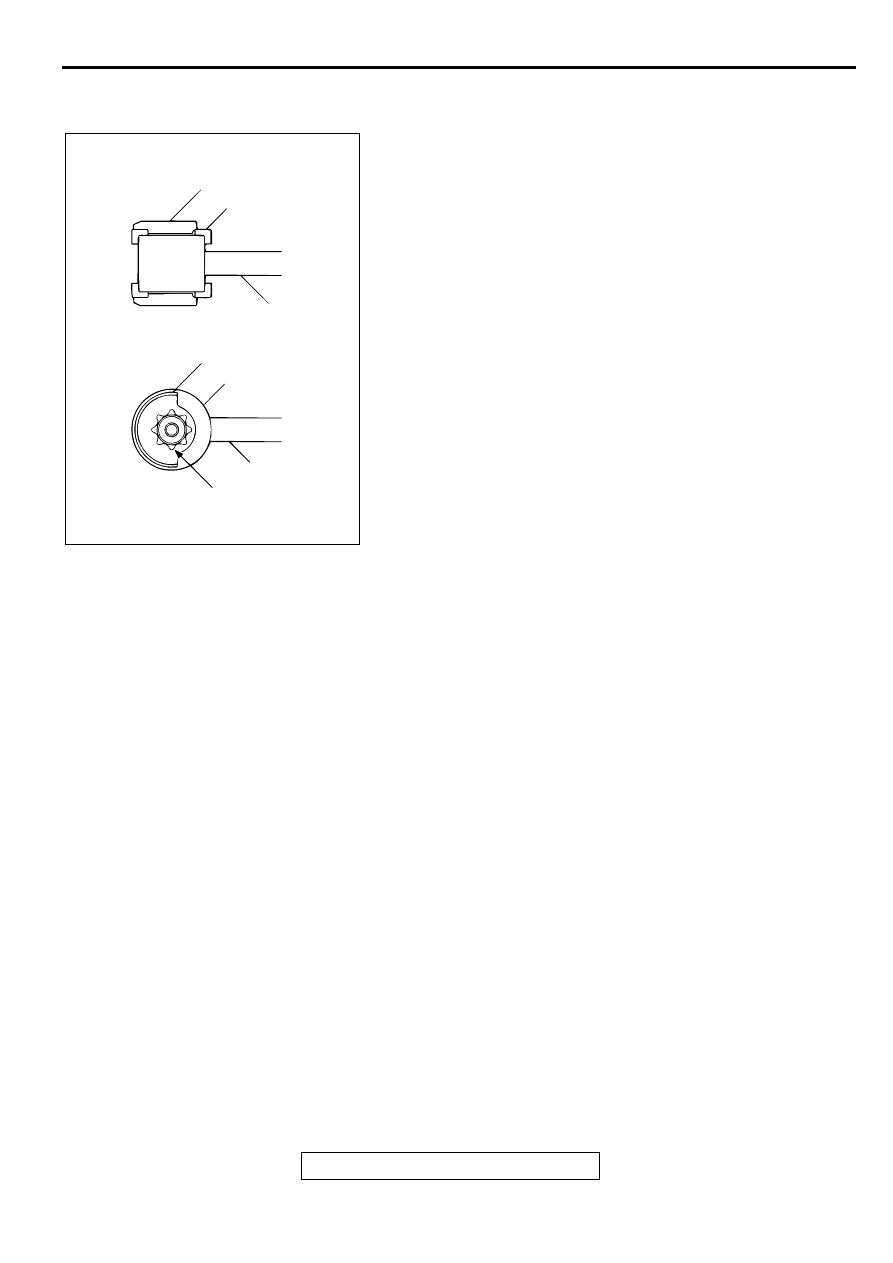
INSTALLATION SERVICE POINT
>>A<< STOPPER B/STOPPER A INSTALLATION
1. Install stopper B in the shown direction.
2. Install stopper A in the shown direction while checking that
the notches on stopper A are engaged with the projections
on the trailing arm bushing.
INSPECTION
M1341001100033
Check crossmember for cracks or other damage.
AC001059
STOPPER A
STOPPER A
STOPPER B
STOPPER B
TRAILING ARM
TRAILING ARM
NOTCHES AND PROJECTIONS
AB