Mitsubishi Eclipse / Eclipse Spyder (2000-2002). Service and repair manual - part 285


  Index      Mitsubishi     Mitsubishi Eclipse / Eclipse Spyder (2000-2002). Service and repair manual


Search            


Content   ..  283  284  285  286   ..


Mitsubishi Eclipse / Eclipse Spyder (2000-2002). Service and repair manual - part 285


MULTIPORT FUEL INJECTION (MFI) DIAGNOSIS

TSB Revision

MULTIPORT FUEL INJECTION (MFI) <3.0L ENGINE>

13B-339

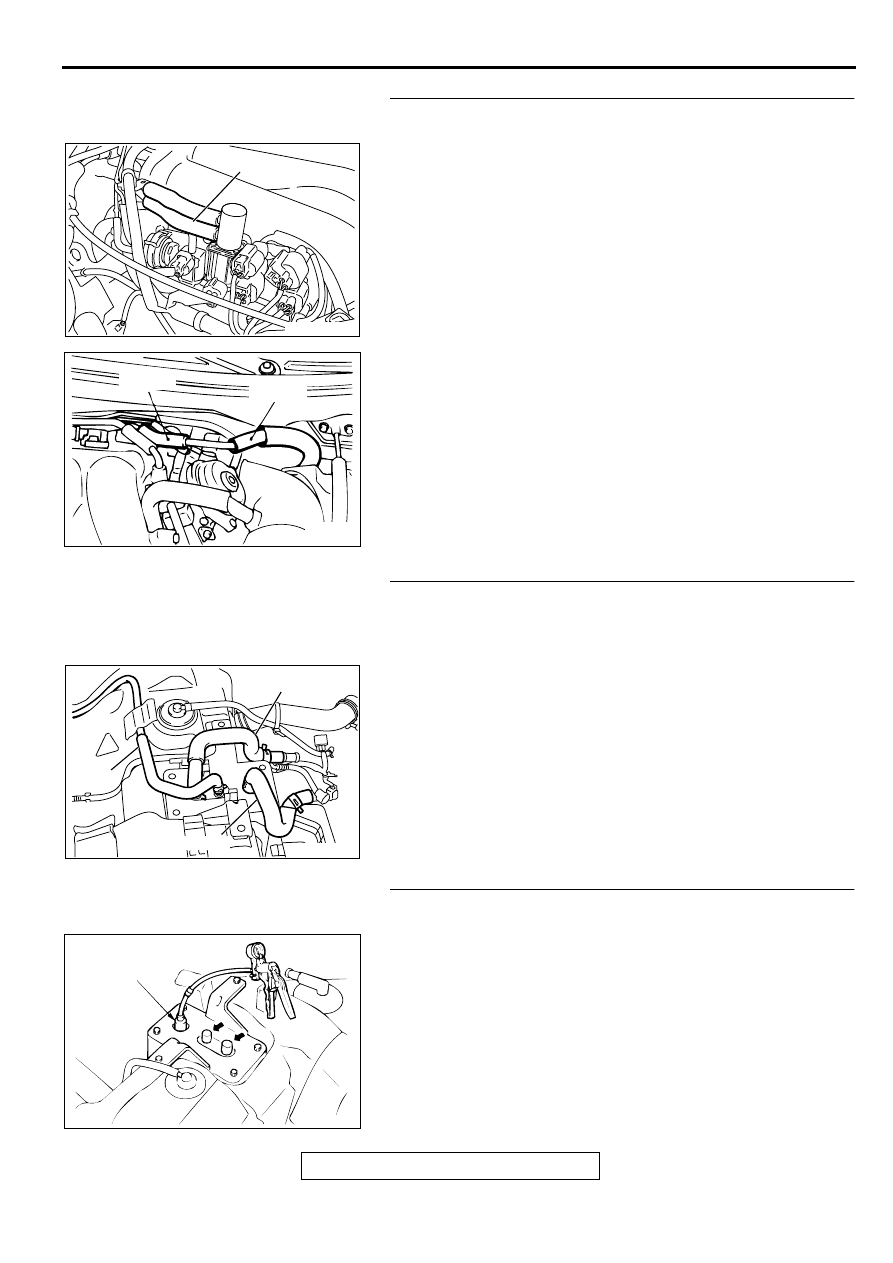
STEP 9. Check for leaks in the evaporator line hose C to 
hose E.
(1) The leakage test with a hand vacuum pump on each hose 

from hose C.

Q: Can the leaks be pinpointed?

YES : Replace that hose. Then go to Step 32.
NO :  Go to Step 10.

STEP 10. Check for leaks in the evaporator line from hose 
F to hose H.
(1) Remove the fuel tank. (Refer to GROUP 13C, Fuel Tank 

P.13C-6

.)

(2) The leakage test with a hand vacuum pump on each hose 

from hose F to hose H.

Q: Can the leaks be pinpointed?

YES : Replace that hose, reinstall the fuel tank. Then go to 

Step 32.

NO :  Go to Step 11.

STEP 11. Check for leaks in the evaporative emission 
canister.
(1) Connect a hand vacuum pump to the vent nipple of the 

evaporative emission canister.

(2) Plug the other two nipples or loop a hose between the other 

nipples.

(3) Apply a vacuum with the hand vacuum pump, and confirm 

that the applied vacuum does not fluctuate.

Q: Does the vacuum pump gauge reading fluctuate?

YES : Replace the evaporative emission canister, and 

reinstall the fuel tank. Then go to Step 32.

NO :  Reinstall the fuel tank, then go to Step 32.

AC002074

HOSE C

AC

AC002284 AB

HOSE D

HOSE E

AC002037

HOSE F

HOSE H

AB

HOSE G

AC000191AB

VENT
NIPPLE

MULTIPORT FUEL INJECTION (MFI) DIAGNOSIS

TSB Revision

MULTIPORT FUEL INJECTION (MFI) <3.0L ENGINE>

13B-340

STEP 12. Check for leaks in the evaporator line hose I, L, 
M, N and hose O.
(1) Remove the filler neck assembly. (Refer to GROUP 13C, 

Fuel tank 

P.13C-6

.)

(2) Sequentially apply vacuum with a hand vacuum pump 

connected to hose I, L, M, N and hose O.

Q: Can the leaks be pinpointed?

YES : Replace that hose, reinstall the filler neck assembly. 

Then go to Step 30.

NO :  Go to Step 13.

STEP 13. Check the check valve A.
(1) Only when you blow the check valve from the direction 

shown, it should pass air.

(2) When you blow the check valve, on air should leak from the 

check valve body.

Q: Is there any failure?

YES : Replace it, reinstall the filler neck assembly. Then go 

to Step 32.

NO :  Go to Step 14.

STEP 14. Check the check valve B.
(1) When you blow the check valve from the arrow direction 

shown above, it should pass more air.

(2) When you blow the check valve from the arrow direction 

shown below, it should pass less air.

(3) When you blow the check valve, on air should leak from the 

check valve body.

Q: Is there any failure?

YES : Replace it, reinstall the filler neck assembly and filler 

neck protector. Then go to Step 32.

NO :  Go to Step 15.

AC002032

AB

HOSE I

AB

AC002039

AB

AB

HOSE O

HOSE L

HOSE N

HOSE M

AC002076 AB

CHECK VALVE A

AC002078

CHECK VALVE B

AB

MULTIPORT FUEL INJECTION (MFI) DIAGNOSIS

TSB Revision

MULTIPORT FUEL INJECTION (MFI) <3.0L ENGINE>

13B-341

STEP 15. Check for leaks in the evaporator line from hose 
J to hose K.
(1) Disconnect hose J at the liquid separator side, and then 

connect a hand vacuum pump to the hose.

(2) Disconnect hose K at the fuel tank side, and then plug the 

hose.

(3) Apply vacuum by using the hand vacuum pump.

Q: Is the vacuum maintained inside the evaporator line?

YES : Go to Step 16.
NO :  Go to Step 19.

STEP 16. Check for leaks in the evaporator line from hose 
P.
(1) Remove the fuel tank. (Refer to GROUP 13C, Fuel Tank 

P.13C-6

.)

(2) The leakage test with a hand vacuum pump on each hose 

from hose P.

Q: Can the leaks be pinpointed?

YES : Replace that hose. Then go to Step 32.
NO :  Go to Step 17.

AC02040 AB

HOSE J

AC002038 AB

HOSE K

AC000195AB

HOSE P

MULTIPORT FUEL INJECTION (MFI) DIAGNOSIS

TSB Revision

MULTIPORT FUEL INJECTION (MFI) <3.0L ENGINE>

13B-342

STEP 17. Check for leaks in the fuel tank.
(1) Visually check for cracks and leaks, etc.

NOTE: Carefully check the fuel pump assembly and the 
inner pressure sensor installation section in the fuel tank.

(2) Connect an evaporative emission system pressure pump to 

the leveling valve nipple.

(3) Plug the filler hose, feed pipe, return pipe and rollover valve 

nipple connected to the fuel tank.

NOTE: If these items are not securely plugged here, the 
fuel could leak in the next step.

(4) Apply pressure with the evaporative emission system 

pressure pump.

(5) In the pressurized state, check for the leak by applying soap 

water, etc. to each section.

Q: Can the leaks be pinpointed?

There is leaks at the fuel pump assembly or the inner 
pressure sensor installation section : 
Reassemble the 

parts, check again that there are no leaks, reinstall 
the fuel tank. Then go to Step 32.

There is leaks at another section : Go to Step 18.

STEP 18. Visually check for cracks in the fuel tank filler 
neck.
(1) Visually check for cracks in the fuel tank filler neck.

Q: Can the leaks be found out?

YES : Replace the fuel tank filler neck assembly and 

reinstall the fuel tank. Then go to Step 32.

NO :  Reinstall the fuel tank. Then go to Step 32.

AC000196

AC000197

AC000198


Content   ..  283  284  285  286   ..