Mitsubishi Grandis. Manual - part 984
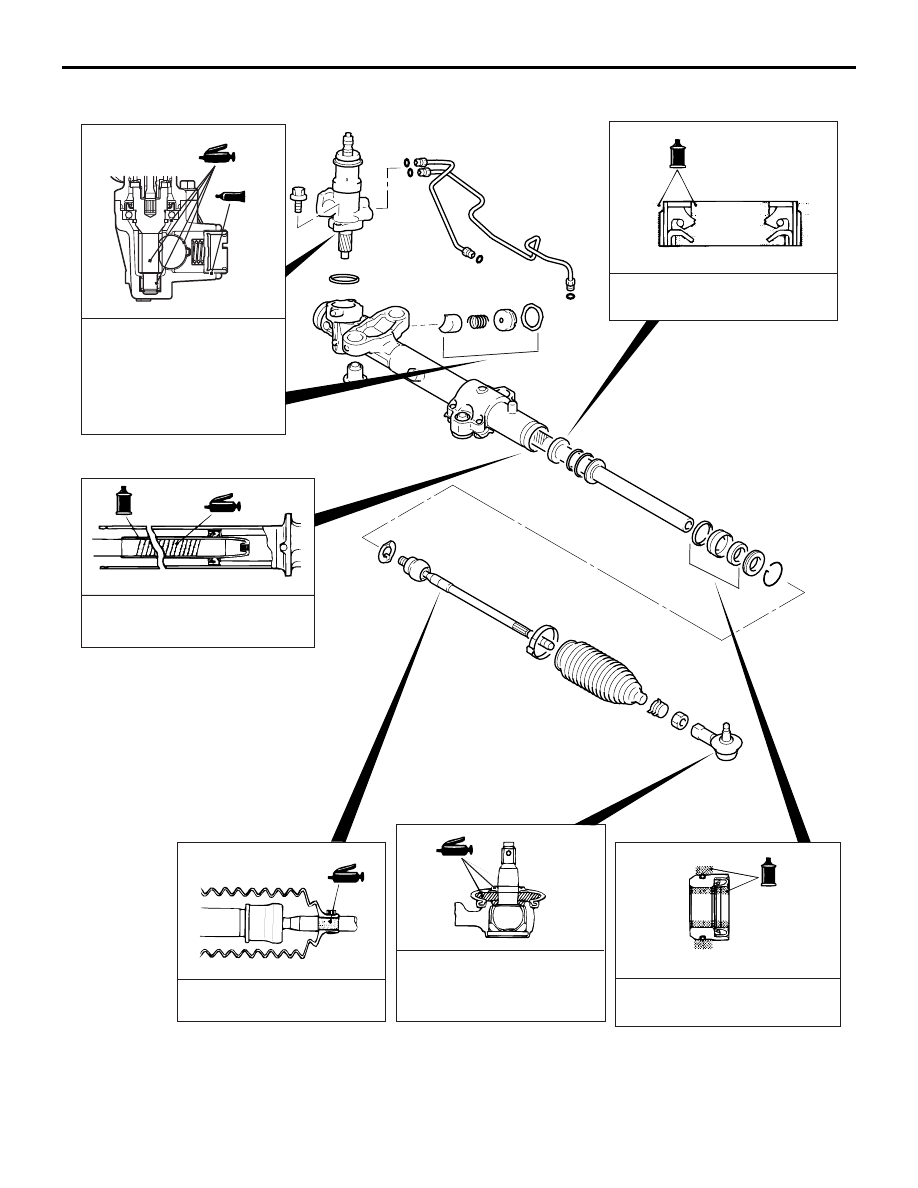
POWER STEERING GEAR BOX AND LINKAGE
POWER STEERING
37-26
LUBRICATION AND SEALING POINTS
DISASSEMBLY SERVICE POINTS
<<A>> RACK SUPPORT COVER
REMOVAL
AC313223AB
Grease: Silicone grease
Fluid:
ATF DXRON III or
DEXRON II
Grease: Repair kit grease
Fluid:
ATF DXRON III or
DEXRON II
Sealant:
3M ATD Part No. 8661, 8663
or equivalent
Grease:
Multipurpose grease
SAE J310, NLGI No.2
or equivalent
Fluid:
ATF DXRON III or
DEXRON II
Grease: Repair kit grease
Fluid:
ATF DXRON III or DEXRON II