Mazda B2300 (2003 year). Instruction - part 5


  Index      Mazda     Mazda B2300 - instruction 2003 year in english


Search            


Content   ..  3  4  5  6   ..


Mazda B2300 (2003 year). Instruction - part 5


WARNING: It is extremely dangerous to ride in a cargo area,
inside or outside of a vehicle. In a collision, people riding in
these areas are more likely to be seriously injured or killed. Do
not allow people to ride in any area of your vehicle that is not
equipped with seats and safety belts. Be sure everyone in your
vehicle is in a seat and using a safety belt properly.

WARNING: In a rollover crash, an unbelted person is
significantly more likely to die than a person wearing a safety
belt.

WARNING: Each seating position in your vehicle has a specific
safety belt assembly which is made up of one buckle and one
tongue that are designed to be used as a pair. 1) Use the
shoulder belt on the outside shoulder only. Never wear the
shoulder belt under the arm. 2) Never swing the safety belt
around your neck over the inside shoulder. 3) Never use a
single belt for more than one person.

WARNING: On four-door Cab Plus 4 vehicles, do not open the
rear door when the rear seat belt is still buckled.

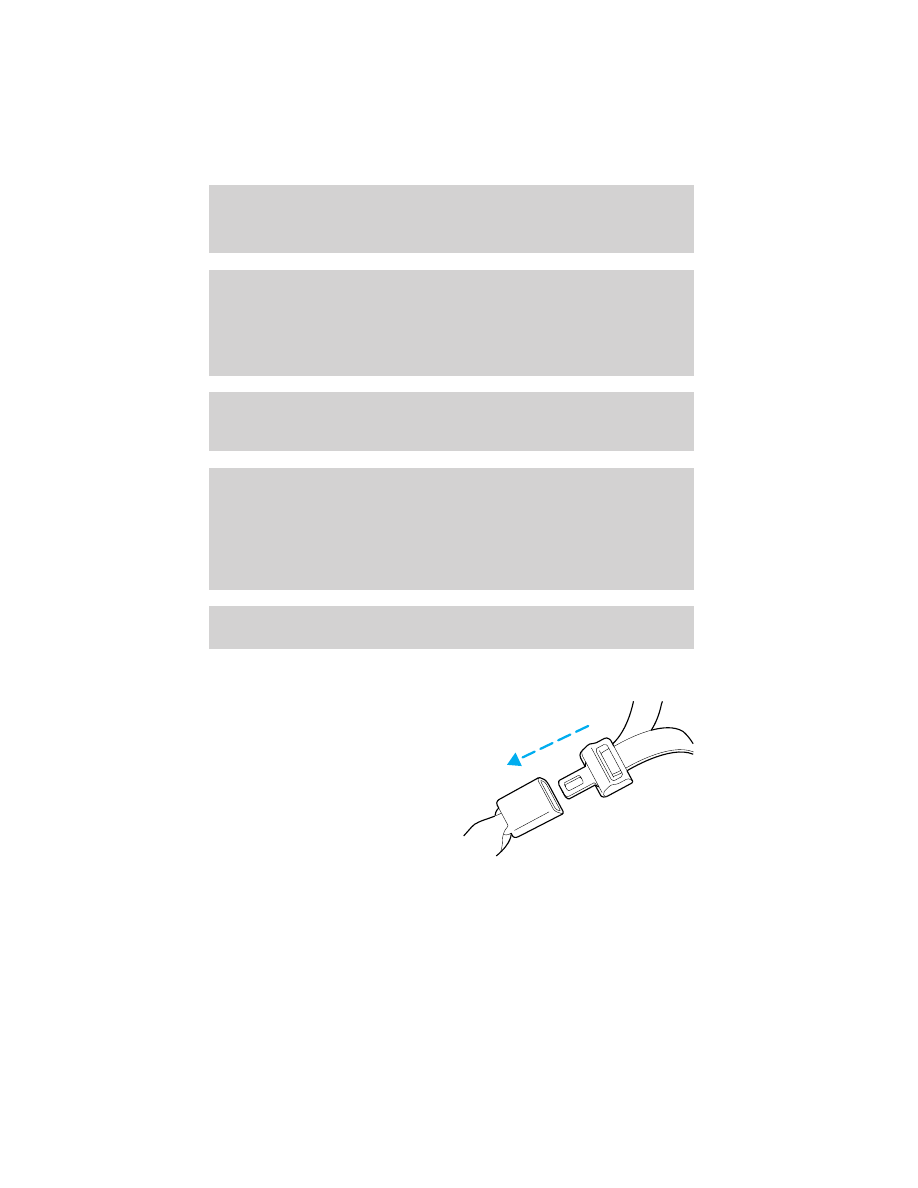
Combination lap and shoulder belts

1. Insert the belt tongue into the

proper buckle (the buckle
closest to the direction the
tongue is coming from) until
you hear a snap and feel it
latch. Make sure the tongue is
securely fastened in the buckle.

Seating and Safety Restraints

70

2. To unfasten, push the release

button and remove the tongue
from the buckle.

The front outboard safety restraints in the vehicle are combination lap
and shoulder belts. The front passenger outboard safety belt has two
types of locking modes described below:

Energy Management Feature

• This vehicle has a seat belt system with an energy management

feature at the front outboard seating positions to help further reduce
the risk of injury in the event of a head-on collision.

• This seat belt system has a retractor assembly that is designed to pay

out webbing in a controlled manner. This feature is designed to help
reduce the belt force acting on the occupant’s chest.

Vehicle sensitive mode

This is the normal retractor mode, which allows free shoulder belt length
adjustment to your movements and locking in response to vehicle
movement. For example, if the driver brakes suddenly or turns a corner
sharply, or the vehicle receives an impact of approximately 8 km/h
(5 mph) or more, the combination safety belts will lock to help reduce
forward movement of the driver and passengers.

Automatic locking mode (outboard front passenger seating
position only) for use with child safety seats

In this mode, the shoulder belt is automatically pre-locked. The belt will
still retract to remove any slack in the shoulder belt.

The automatic locking mode is not available on the driver safety belt.

When to use the automatic locking mode

• Any time a child safety seat is installed in a passenger front seat.

Refer to Safety Restraints for ChildrenSafety Seats for Children,
or Passenger air bag On/Off switch later in this chapter.

Seating and Safety Restraints

71

How to use the automatic locking mode (Outboard front passenger
seating position only) for use with child safety seats

• Buckle the combination lap and

shoulder belt.

• Grasp the shoulder portion and

pull downward until the entire
belt is pulled out.

• Allow the belt to retract. As the belt retracts, you will hear a clicking

sound. This indicates the safety belt is now in the automatic locking
mode.

How to disengage the automatic locking mode

Disconnect the combination lap/shoulder belt and allow it to retract
completely to disengage the automatic locking mode and activate the
vehicle sensitive (emergency) locking mode.

WARNING: After any vehicle collision, the entire seat belt
system should be checked for proper operation by a qualified
technician. Verify that the

(automatic locking retractors” in all

outboard seating positions are functioning properly.
Additionally check that the

(automatic locking modefeature

for child safety seat in the passenger outboard seating position
is functioning properly.

Seating and Safety Restraints

72

WARNING: BELT AND RETRACTOR ASSEMBLY MUST BE
REPLACED if the seat belt assembly “automatic locking
retractor” feature or any other seat belt function is not
operating properly when checked according to the procedures in
Workshop Manual.

WARNING: Failure to replace the Belt and Retractor assembly
could increase the risk of injury in collisions.

Safety belt pretensioner

Your vehicle is equipped with safety belt pretensioners at the driver and
front outboard passenger seating positions.

The safety belt pretensioners are designed to activate during certain
frontal or near-frontal collisions with sufficient longitudinal deceleration.
A safety belt pretensioner is a device which tightens the webbing of the
lap and shoulder belts in such a way that they fit more snugly against
the body.

The driver and front outboard passenger safety belt system (including
retractors, buckle assembly, pretensioner assembly with seat and height
adjusters) must be replaced if the vehicle is involved in a collision that
results in the activation of the safety belt pretensioners. Refer to the
Safety belt maintenance section in this chapter.

WARNING: Failure to replace the safety belt assembly under
the above conditions could result in severe personal injuries in
the event of a collision.

Front safety belt height adjustment

Your vehicle has safety belt height adjustments for the driver and front
passenger. Adjust the height of the shoulder belt so the belt rests across
the middle of your shoulder.

Seating and Safety Restraints

73

• Regular Cab and 4–door Cab Plus

• 2–door Cab Plus

To lower the shoulder belt height, push the button and slide the height
adjuster down. To raise the height of the shoulder belt, slide the height
adjuster up. Pull down on the height adjuster to make sure it is locked in
place.

WARNING: Position the safety belt height adjusters so that the
belt rests across the middle of your shoulder. Failure to adjust
the safety belt properly could reduce the effectiveness of the
seat belt and increase the risk of injury in a collision.

Lap belts

Adjusting the center lap belt

The lap belt does not adjust automatically.

WARNING: The lap belts should fit snugly and as low as
possible around the hips, not around the waist. Failure to
position the lap belt correctly may cause serious injury in an
accident.

Seating and Safety Restraints

74

Insert the tongue into the correct
buckle (the buckle closest to the
direction the tongue is coming
from). To lengthen the belt, turn the
tongue at a right angle to the belt
and pull across your lap until it
reaches the buckle.

To tighten the belt, pull the loose
end of the belt through the tongue
until it fits snugly across the hips.

Shorten and fasten the belt when not in use to keep the belt
away from door openings and available after unfolding the seats.

Adjusting the rear center facing jump seat lap belt (if equipped)

The center facing rear jump seat lap belt will adjust automatically. To
fasten, grasp the tongue, and with a continuous motion, pull out enough
webbing to buckle the tongue into the correct buckle. If you did not pull
out enough webbing to reach the buckle, allow the tongue to retract fully
before trying to pull it out again.

WARNING: The lap belts should fit snugly and as low as
possible around the hips, not around the waist. Failure to
position the lap belt correctly may cause serious injury in an
accident.

If you need to lengthen the belt, unfasten it and repeat the procedure
above.

To unfasten the belt, push in the release button prior to opening the rear
door.

Seating and Safety Restraints

75

Safety belt extension assembly

If the safety belt assembly is too short for you, even when fully
extended, 20 cm (8 inches) can be added to the safety belt assembly by
adding a safety belt extension assembly. Safety belt extension assemblies
can be obtained from your authorized Mazda dealership.

Use only extensions manufactured by the same supplier as the safety
belt. Manufacturer identification is located at the end of the webbing on
the label. Also, use the safety belt extension only if the safety belt is too
short for you when fully extended.

NOTE: Do not use extensions to change the fit of the shoulder belt
across the torso.

Safety belt warning light and indicator chime

The safety belt warning light illuminates in the instrument cluster and a
chime sounds to remind the occupants to fasten their safety belts.

Conditions of operation

If...

Then...

The driver’s safety belt is not
buckled before the ignition
switch is turned to the ON
position...

The safety belt warning light
illuminates 1-2 minutes and the
warning chime sounds 4-8 seconds.

The driver’s safety belt is
buckled while the indicator
light is illuminated and the
warning chime is sounding...

The safety belt warning light and
warning chime turn off.

The driver’s safety belt is
buckled before the ignition
switch is turned to the ON
position...

The safety belt warning light and
indicator chime remain off.

Seating and Safety Restraints

76

BeltMinder

The BeltMinder feature is a supplemental warning to the safety belt
warning function. This feature provides additional reminders to the
driver that the driver’s safety belt is unbuckled by intermittently
sounding a chime and illuminating the safety belt warning lamp in the
instrument cluster.

If...

Then...

The driver’s safety belt is not
buckled before the vehicle has
reached at least 5 km/h (3 mph)
and 1-2 minutes have elapsed
since the ignition switch has
been turned to ON...

The BeltMinder feature is activated -
the safety belt warning light
illuminates and the warning chime
sounds for 6 seconds every 30
seconds, repeating for approximately
5 minutes or until driver’s safety belt
is buckled.

The driver’s safety belt is
buckled while the safety belt
indicator light is illuminated
and the safety belt warning
chime is sounding...

The BeltMinder feature will not
activate.

The driver’s safety belt is
buckled before the ignition
switch is turned to the ON
position...

The BeltMinder feature will not
activate.

Seating and Safety Restraints

77

The following are reasons most often given for not wearing safety belts:
(All statistics based on U.S. data)

Reasons given...

Consider...

9Crashes are rare events9

36,700 crashes occur every day.
The more we drive, the more we are
exposed to

9rare9 events, even for

good drivers. 1 in 4 of us will be
seriously injured in a crash during
our lifetime.

9I’m not going far9

3 of 4 fatal crashes occur within 25
miles of home.

9Belts are uncomfortable9

Safety belts are designed to enhance
comfort. If you are uncomfortable -
try different positions for the safety
belt upper anchorage and seatback
which should be as upright as
possible; this can improve comfort.

9I was in a hurry9

Prime time for an accident. Safety
Belt Warning Chime reminds us to
take a few seconds to buckle up.

9Seat belts don’t work9

Safety belts, when used properly,
reduce risk of death to front seat
occupants by 45% in cars, and by
60% in light trucks.

9Traffic is light9

Nearly 1 of 2 deaths occur in
single-vehicle crashes, 
many when
no other vehicles are around.

9Belts wrinkle my clothes9

Possibly, but a serious crash can do
much more than wrinkle your clothes,
particularly if you are unbelted.

9The people I’m with don’t
wear belts

9

Set the example, teen deaths occur 4
times more often in vehicles with
TWO or MORE people. Children and
younger brothers/sisters imitate
behavior they see.

Seating and Safety Restraints

78

Reasons given...

Consider...

9I have an air bag9

Air bags offer greater protection when
used with safety belts. Frontal airbags
are not designed to inflate in rear and
side crashes or rollovers.

9I’d rather be thrown clear9

Not a good idea. People who are
ejected are 40 times more likely
to DIE. 
Safety belts help prevent
ejection, WE CAN’T

9PICK OUR

CRASH

9.

WARNING: Always wear the safety belt. Do not be tempted to
sit on top of the belt to fool police or to defeat the warning
system. The safety belt and safety belt warning system are
there to protect your life.

One time disable

Any time the safety belt is buckled and then unbuckled during an
ignition ON cycle, BeltMinder will be disabled for that ignition cycle only.

Deactivating/activating the BeltMinder feature

Read steps 1 - 9 thoroughly before proceeding with the
deactivation/activation programming procedure.

The BeltMinder feature can be deactivated/activated by performing the
following procedure:

Before following the procedure, make sure that:

• The parking brake is set.
• The gearshift is in P (Park) (automatic transmission) or the neutral

position (manual transmission).

• The ignition switch is in the OFF position.
• All vehicle doors are closed.
• The driver’s safety belt is unbuckled.
• The parklamps/headlamps are in OFF position (If vehicle is equipped

with Autolamps, this will not affect the procedure).

Seating and Safety Restraints

79

WARNING: To reduce the risk of injury, do not
deactivate/activate the Belt Minder feature while driving the
vehicle.

BeltMinder activation and deactivation procedure

1. Turn the ignition switch to the RUN (or ON) position. (DO NOT

START THE ENGINE.)

2. Wait until the safety belt warning light turns off. (Approximately 1–2

minutes.)

• Steps 3–5 must be completed within 60 seconds or the procedure will

have to be repeated.

3. Buckle then unbuckle the safety belt three times, ending with the

safety belt unbuckled. This can be done before or during BeltMinder
warning activation.

4. Turn on the parklamps/headlamps, turn off the

parklamps/headlamps.

5. Buckle then unbuckle the safety belt three times, ending with the

safety belt unbuckled.

• After step 5 the safety belt warning light will be turned on for three

seconds.

6. Within seven seconds of the safety belt warning light turning off,

buckle then unbuckle the safety belt.

• This will disable BeltMinder if it is currently enabled, or enable

BeltMinder if it is currently disabled.

7. Confirmation of disabling BeltMinder is provided by the safety belt

warning light flashing four times per second for three seconds.

8. Confirmation of enabling BeltMinder is provided by:

• The safety belt warning light flashing four times per second for three

seconds.

• Followed by three seconds with the safety belt warning light off.
• Once again, the safety belt warning light will flash four times per

second for three seconds.

9. After receiving confirmation, the deactivation/activation procedure is

complete.

Safety belt maintenance

Inspect the safety belt systems periodically to make sure they work
properly and are not damaged.

Seating and Safety Restraints

80

NOTE: If unsure about the proper procedures, bring your vehicle to an
authorized Mazda dealership for inspection. Inspect the safety belts to
make sure there are no nicks, tears or cuts, replacing if necessary. Check
all automatic locking retractors on all outboard seating positions as well as
the automatic locking mode for child safety seats on the passenger front
belt. All safety belt assemblies, including retractors, buckles, front seat
belt buckle assemblies, buckle support assemblies (slide bar-if equipped),
shoulder belt height adjusters (if equipped), shoulder belt guide on
seatback (if equipped), child safety seat tether bracket assemblies (if
equipped), LATCH child seat tether anchors and lower anchors (if
equipped), and attaching hardware, should be inspected after a collision.
Mazda recommends that all safety belt assemblies used in vehicles
involved in a collision be replaced. However, if the collision was minor and
an authorized Mazda technician finds that the belts do not show damage
and continue to operate properly, they do not need to be replaced. Safety
belt assemblies not in use during a collision should also be inspected and
replaced if either damage or improper operation is noted.

The energy absorbing functions may have been activated in a collision so
the restraints should be examined; if the front air bags have deployed,
the pretensioners have also deployed and must be replaced — regardless
of whether there was an occupant in the passenger seat or not.

WARNING: Failure to inspect and if necessary replace the
safety belt assembly under the above conditions could result in
severe personal injuries in the event of a collision.

Refer to Interior in the Cleaning chapter.

Seating and Safety Restraints

81

AIR BAG SUPPLEMENTAL RESTRAINT SYSTEM (SRS)

Important supplemental restraint system (SRS) precautions

The supplemental restraint system is designed to work with the safety
belt to help protect the driver and right front passenger from certain
upper body injuries.

WARNING: Air bags DO NOT
inflate slowly or gently and the
risk of injury from a deploying
air bag is greatest close to the
trim covering the air bag
module. Always wear your
safety belt.

Seating and Safety Restraints

82

WARNING: Airbags have been known to kill or injure a child in
front facing child restraints. When placing a child safety seat in
a front seating position including the center (if equipped), you
should turn off the passenger airbag switch after being certain
the child is properly restrained. If the child safety seat is in the
outboard seating position, slide the seat all the way back.

WARNING: Do not install a
child seat in a center facing
jump seat.

WARNING: Rear facing child seats should NEVER be placed in
the front seats unless the passenger airbag switch is turned off.
See Passenger airbag ON/OFF switch 
in this chapter.

WARNING: All occupants of the vehicle, including the driver,
should always properly wear their safety belts, even when an
air bag (SRS) is provided.

WARNING: National Highway Traffic Safety Administration
(NHTSA) recommends a minimum distance of at least 25 cm
(10 inches) between an occupant’s chest and the driver air bag
module.

WARNING: Never place your arm or feet over the air bag
module as a deploying air bag can result in serious arm
fractures or other injuries.

WARNING: Never place a rear facing infant seat in the front
seat unless the passenger air bag is turned off.

Steps you can take to properly position yourself away from the airbag:
• Move your seat to the rear as far as you can while still reaching the

pedals comfortably.

Seating and Safety Restraints

83

• Recline the seat slightly (one or two degrees) from the upright

position.

WARNING: Do not put anything on or over the air bag module
including hands or feet. Placing objects on or over the air bag
inflation area may cause those objects to be propelled by the
air bag into your face and torso causing serious injury.

WARNING: Do not attempt to service, repair, or modify the Air
Bag Supplemental Restraint System or its fuses. See your
authorized Mazda dealership.

WARNING: Modifications to the front end of the vehicle,
including frame, bumper, front end body structure, tow hooks
and snow plows may effect the performance of the air bag
sensors increasing the risk of injury. Do not modify the front
end of the vehicle.

WARNING: Additional equipment may effect the performance
of the air bag sensors increasing the risk of injury. Consult your
authorized Mazda dealership before installation of additional
equipment.

WARNING: The front passenger air bag is not designed to offer
protection to an occupant in the center front seating position.

Children and air bags

For additional important safety information, read all information on
safety restraints in this guide.

Seating and Safety Restraints

84

WARNING: Never place a rearward facing child safety restraint
in front of an airbag. Airbags have been known to kill or injure
children in front facing child safety restraints. Whenever
placing a child safety seat in a front seating position (including
center if equipped), turn off the passenger side air bag switch
after being certain the child is properly restrained. If using a
forward facing child safety restraint in the front outboard seat,
slide the seat all the way back, and turn off the passenger air
bag. If using a rear facing child safety seat in the front
outboard seating position, make sure the passenger airbag is
turned off and slide the passenger seat all the way forward
until the safety seat rests on the dashboard. See Passenger air
bag on/off switch

in this chapter.

WARNING: Do not install a
child seat in a center facing
jump seat.

WARNING: An air bag can kill
or injure a child in a child
seat. Child seats should never
be placed in the front seats,
unless passenger air bag
switch is turned off. See
Passenger air bag on/off
switch

in this chapter.

WARNING: Rear facing child seats should NEVER be placed in
the front seats unless the passenger airbag switch is turned off.

WARNING: Booster seats must be installed only in seating
positions equipped with a combination lap/shoulder belt.

WARNING: To reduce the risk of injury, make sure children sit
where they can be properly restrained.

Seating and Safety Restraints

85


Content   ..  3  4  5  6   ..