Mazda CX-9 Grand Touring. Manual - part 605


  Index      Mazda     Mazda CX-9 Grand Touring - service repair manual 2008 year


Search            


Content   ..  603  604  605  606   ..


Mazda CX-9 Grand Touring. Manual - part 605


QUARTER WINDOW GLASS INSTALLATION 

1. Remove sealant along the perimeter of the glass using a razor or scraper, (when reusing the glass)  

2. Clean and degrease the ceramic part along the perimeter of the glass.  

3. Inspect the glass for cracks. If it is cracked, chamfer it using sandpaper.  

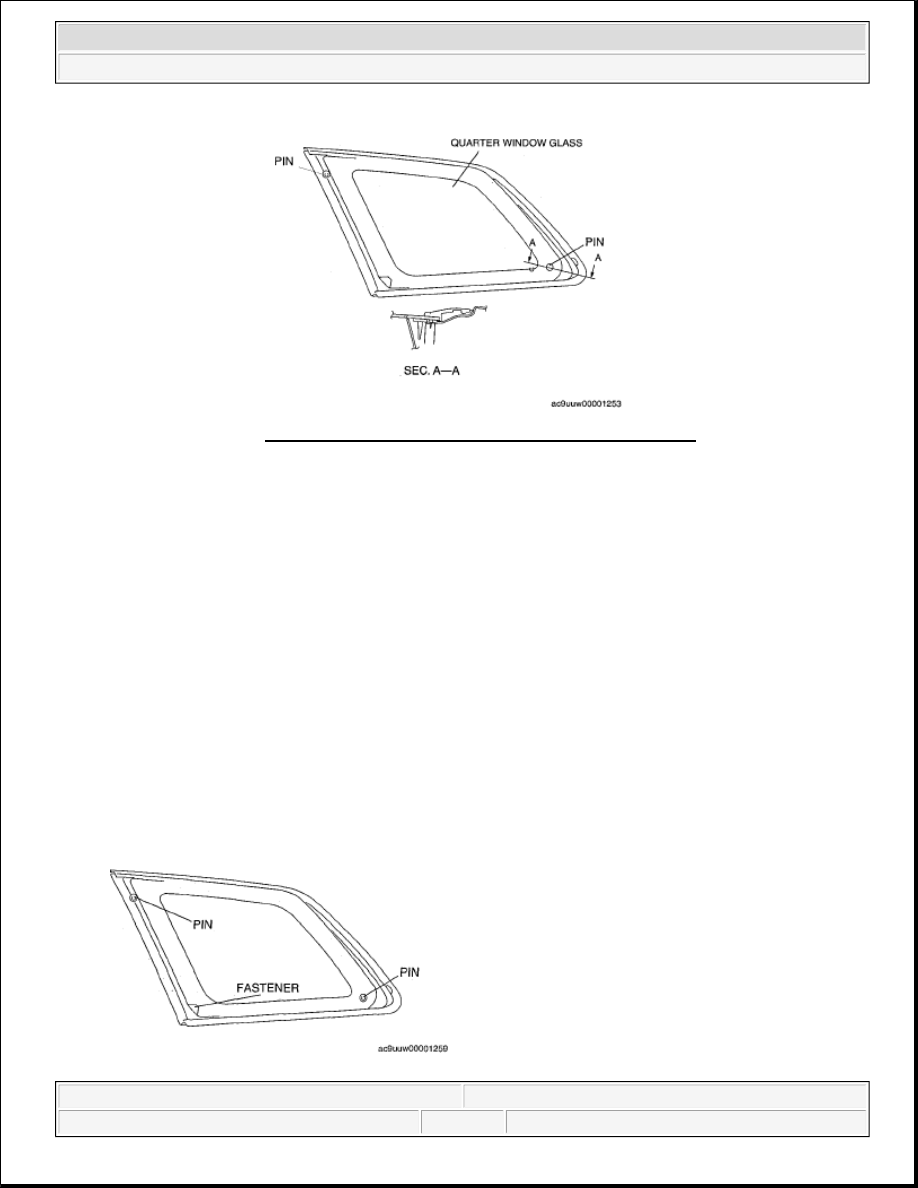
4. If the glass is reused, attach the pins and fastener to the glass as shown in the figure. Align with the 

alignment marks marked before removing the glass. 

Fig. 53: Identifying Quarter Window Glass And Pin 
Courtesy of MAZDA MOTORS CORP. 

WARNING:

Using a razor with bare hands can cause injury. Always wear gloves 
when using a razor.  

CAUTION:

If a door is opened or closed when all the window glass is closed, the 
resulting change in air pressure could cause the sealant to crack 
preventing the proper installation of the glass. Keep the door glass 
open until the quarter window glass installation is completed.  


2008 Mazda CX-9 Grand Touring 

2008 BODY & ACCESSORIES Glass/Windows/Mirrors - Mazda CX-9


Microsoft 


Sunday, November 15, 2009 10:36:16 AM

Page 38 

© 2005 Mitchell Repair Information Company, LLC. 

Fig. 54: Identifying Pin & Fastener
Courtesy of MAZDA MOTORS CORP.
 

5. Apply glass primer along the hollowed marks in the ceramic coating on the new glass, along the sealant 

tracks on the reused glass, then allow it to dry for approx. 30 min. 

6. Cut away the old sealant using a razor or scraper so that 1-2 mm {0.04-0.079 in} thickness of sealant 

remains along the perimeter of the frame.  

7. If the sealant has come off completely in any one place, apply some primer after degreasing, and allow it 

approx. 30 min to dry. Then apply 2 mm {0.079 in} thickness of new sealant.  

8. Clean and degrease the bonding surface along the perimeter of the body.  

9. Apply body primer on the body as shown in the figure, then allow it to dry for approx. 30 min. 

CAUTION:

To prevent weakening of the primer adhesion, keep the bonding 
surface free of dirt, moisture, and grease. Do not touch the 
surface with your hand.  

NOTE:

Apply primer to the hollowed marks in the ceramic coating. 

Fig. 55: Applying Primer To Hollowed Marks In Ceramic Coating 
Courtesy of MAZDA MOTORS CORP. 

CAUTION:

To prevent weakening of the primer adhesion, keep the bonding s
free of dirt, moisture, and grease. Do not touch the surface with y
hand. 


2008 Mazda CX-9 Grand Touring 

2008 BODY & ACCESSORIES Glass/Windows/Mirrors - Mazda CX-9


Microsoft 


Sunday, November 15, 2009 10:36:16 AM

Page 39 

© 2005 Mitchell Repair Information Company, LLC. 

10. After the primer has dried, apply 11 mm {0.43 in} in thickness, 5 mm {0.20 in} in width of sealant using 

a sealant gun. Where it is not applied properly, correctly apply it using a spatula. 

Fig. 57: Applying In Thickness In Width Of Sealant 
Courtesy of MAZDA MOTORS CORP. 

11. Align the window side fastener with the bead on the body and adhere.  

12. Press the quarter window glass until the quarter window glass fastener and stud pin are locked, and then 

install the quarter window glass.  

13. Install the following parts: 

1. D-pillar trim (See D-PILLAR TRIM REMOVAL/INSTALLATION .)  

2. Third-row seat belt upper anchor installation bolt (See REAR SCUFF PLATE 

REMOVAL/INSTALLATION .)  

3. C-pillar trim (See D-PILLAR TRIM REMOVAL/INSTALLATION .)  

Fig. 56: Applying Body Primer On Body 
Courtesy of MAZDA MOTORS CORP. 


2008 Mazda CX-9 Grand Touring 

2008 BODY & ACCESSORIES Glass/Windows/Mirrors - Mazda CX-9


Microsoft 


Sunday, November 15, 2009 10:36:16 AM

Page 40 

© 2005 Mitchell Repair Information Company, LLC. 

4. Roof side trim (See ROOF SIDE TRIM REMOVAL/INSTALLATION .) 

Fig. 58: Identifying Bead And Fastener 
Courtesy of MAZDA MOTORS CORP. 

5. Second-row seat belt upper anchor installation bolt (See SECOND-ROW SEAT BELT 

REMOVAL/INSTALLATION .)  

6. Trunk side trim (See TRUNK SIDE TRIM REMOVAL/INSTALLATION .)  

7. Rear scuff plate inner (See REAR SCUFF PLATE REMOVAL/INSTALLATION .)  

8. Third-row seat belt lower anchor installation bolt (See REAR SCUFF PLATE 

REMOVAL/INSTALLATION .)  

9. Third-row seat (See THIRD-ROW SEAT REMOVAL/INSTALLATION .)  

10. Trunk end trim (See TRUNK END TRIM REMOVAL/INSTALLATION .)  

11. Seat side box (See SEAT SIDE BOX REMOVAL/INSTALLATION .)  

12. Trunk box (See TRUNK BOX REMOVAL/INSTALLATION .)  

14. Allow the sealant to harden completely. 

Sealant hardening time: 24 h  

FILAMENT INSPECTION 

1. Turn the ignition switch to the ON position.  

2. Turn the rear window defroster switch on. 

CAUTION:

Directly touching the rear window defroster filament with the 
lead of the tester could damage it. Wrap aluminum foil around 
the end of the lead and inspect the filament by touching it with 
the foil. 


2008 Mazda CX-9 Grand Touring 

2008 BODY & ACCESSORIES Glass/Windows/Mirrors - Mazda CX-9


Microsoft 


Sunday, November 15, 2009 10:36:17 AM

Page 41 

© 2005 Mitchell Repair Information Company, LLC. 


Content   ..  603  604  605  606   ..