Mazda CX-9 Grand Touring. Manual - part 450


  Index      Mazda     Mazda CX-9 Grand Touring - service repair manual 2008 year


Search            


Content   ..  448  449  450  451   ..


Mazda CX-9 Grand Touring. Manual - part 450


contaminated.  

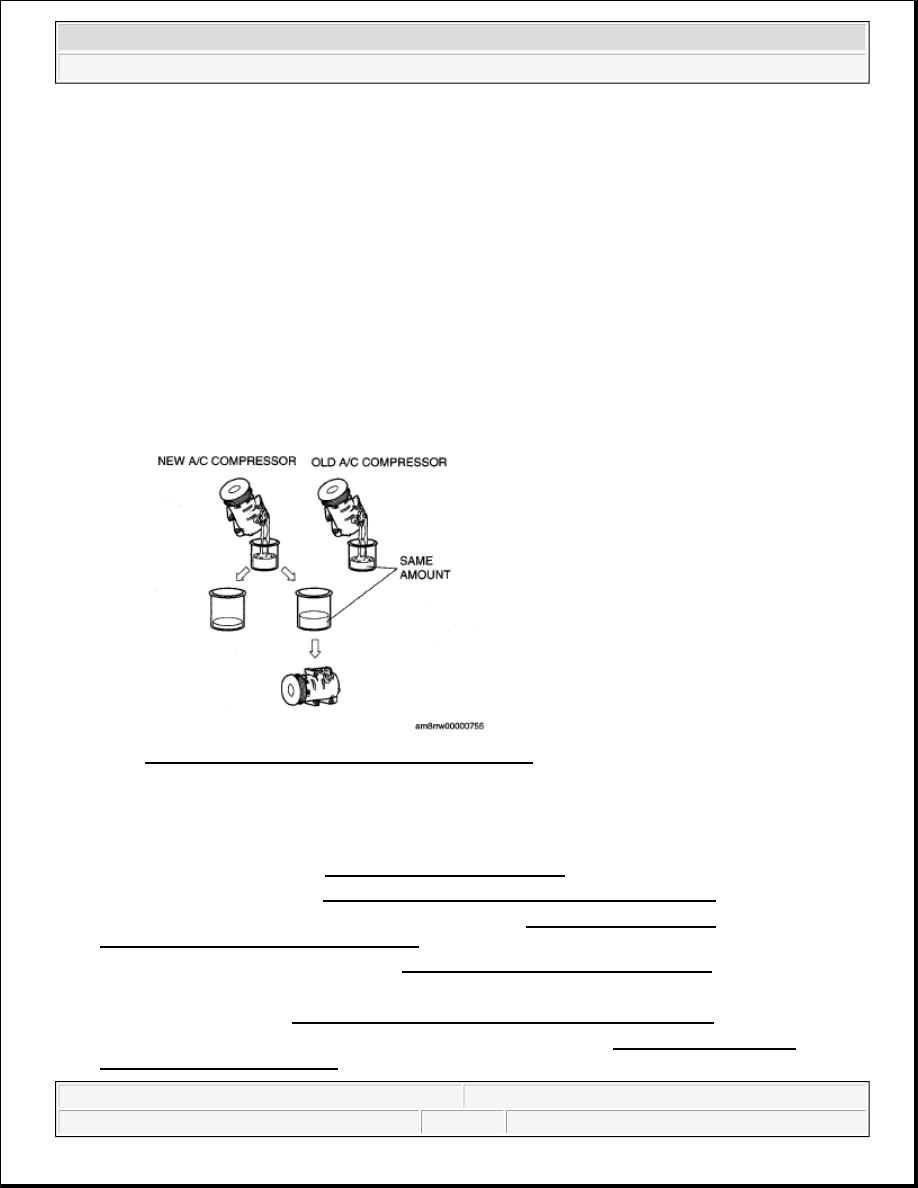
2. Rotate old A/C compressor shaft six to eight revolutions while collecting refrigerant oil in a separate, 

clean measuring device.  

3. Compare those oil amounts. The amount of the oil drained from the new A/C compressor should be 

greater than the old one.  

4. Pour the same amount oil of drained from the old A/C compressor back into the new A/C compressor. 

A/C compressor oil type  

DENSO OIL8  

A/C compressor oil sealed volume (approx. quantity)  

160 ml {160 cc, 5.41 fl oz} 

Fig. 25: Comparing A/C Compressor Oil Amounts 

CONDENSER REMOVAL/INSTALLATION 

1. Disconnect the negative battery cable.  

2. Discharge the refrigerant. (See REFRIGERANT CHARGING .)  

3. Drain the engine coolant. (See ENGINE COOLANT REPLACEMENT [MZI-3.7] .)  

4. Remove the air cleaner and fresh air duct component. (See INTAKE-AIR SYSTEM 

REMOVAL/INSTALLATION [MZI-3.7] .)  

5. Remove the cooling fan component. (See FAN MOTOR INSPECTION [MZI-3.7] .)  

6. Disconnect the ATF oil cooler hose from the radiator.  

7. Remove the radiator. (See RADIATOR REMOVAL/INSTALLATION [MZI-3.7] .)  

8. Remove the nut and disconnect front cooler pipes No.3 and No.4. (See REFRIGERANT LINE 

REMOVAL/INSTALLATION.)  


2008 Mazda CX-9 Grand Touring 

2008 HVAC Basic System - Mazda CX-9


Microsoft 


Sunday, November 15, 2009 10:11:59 AM

Page 20 

© 2005 Mitchell Repair Information Company, LLC. 

9. Remove the front cooler pipe No.3 bracket. (See REFRIGERANT LINE 

REMOVAL/INSTALLATION.)  

10. Remove the bolts and two condenser brackets.  

11. Remove in the order indicated in the table. Do not allow remaining compressor oil in the refrigerant line 

to spill. 

12. Install in the reverse order of removal.  

13. Refill the engine coolant. (See ENGINE COOLANT REPLACEMENT [MZI-3.7] .)  

14. Inspect for engine coolant leakage. (See ENGINE COOLANT LEAKAGE INSPECTION [MZI-

3.7] .)  

15. Inspect the ATF level. (See AUTOMATIC TRANSAXLE FLUID (ATF) INSPECTION [AW6A-EL, 

AW6AX-EL] .)  

16. Perform the refrigerant system performance test. (See REFRIGERANT SYSTEM PERFORMANCE 

TEST .)  

CONDENSER INSPECTION 

1. Inspect the condenser for cracks, damage, and oil leakage. 

If there is any malfunction, replace the condenser.  

2. Visually inspect the fins for clogging of foreign material. 

If any fins are clogged, remove the foreign material.  

3. Visually inspect the fins for bending. 

CAUTION:

If moisture or foreign material enters the refrigeration cycle, cool
ability will be lowered and abnormal noise or other malfunction c
occur. Always plug open fittings immediately after removing any 
refrigeration cycle parts. 

Fig. 26: Identifying Condenser Components & Torque Specificatio


2008 Mazda CX-9 Grand Touring 

2008 HVAC Basic System - Mazda CX-9


Microsoft 


Sunday, November 15, 2009 10:11:59 AM

Page 21 

© 2005 Mitchell Repair Information Company, LLC. 

If there is any bending, use the end of a flathead screwdriver to straighten fins.  

HEATER PIPE AND HOSE COMPONENT REMOVAL/INSTALLATION 

1. Remove the battery. (See BATTERY REMOVAL/INSTALLATION [MZI-3.7] .)  

2. Drain the engine coolant. (See ENGINE COOLANT REPLACEMENT [MZI-3.7] .)  

3. Remove the following parts: 

1. Windshield wiper arm and blade. (See WINDSHIELD WIPER ARM AND BLADE 

REMOVAL/INSTALLATION .)  

2. Cowl grille (See COWL GRILLE REMOVAL/INSTALLATION .)  

3. Windshield wiper motor (See WINDSHIELD WIPER MOTOR 

REMOVAL/INSTALLATION .)  

4. Cowl panel (See COWL PANEL REMOVAL/INSTALLATION .)  

4. Remove in the order indicated in the table. 

Fig. 27: Identifying Heater Pipe, Hose Component Removal/Installation Order & Torque 
Specifications
 

5. Jack up the vehicle.  

6. Under guard (LH) (See CHARCOAL CANISTER, CANISTER VENT (CV) SOLENOID VALVE, 

AIR FILTER COMPONENT REMOVAL/INSTALLATION [MZI-3.7] ) 


2008 Mazda CX-9 Grand Touring 

2008 HVAC Basic System - Mazda CX-9


Microsoft 


Sunday, November 15, 2009 10:11:59 AM

Page 22 

© 2005 Mitchell Repair Information Company, LLC. 

Fig. 28: Identifying Front Heater Pipe, Hose Removal/Installation Order & Torque Specifications 

7. Install in the reverse order of removal.  

8. Inspect for engine coolant leakage. (See ENGINE COOLANT LEAKAGE INSPECTION [MZI-

3.7] .)  

HEATER PIPE AND HOSE INSTALLATION NOTE 

Insert the heater pipe into the heater hose until the hose reaches the bracket or the protrusion on the pipe.  

When the rear heater pipe is removed, bleed the air from the rear heater pipe thoroughly after refilling the 
engine coolant to prevent air from being trapped in the rear heater pipe. 


2008 Mazda CX-9 Grand Touring 

2008 HVAC Basic System - Mazda CX-9


Microsoft 


Sunday, November 15, 2009 10:11:59 AM

Page 23 

© 2005 Mitchell Repair Information Company, LLC. 


Content   ..  448  449  450  451   ..