Mazda CX-9 Grand Touring. Manual - part 393


  Index      Mazda     Mazda CX-9 Grand Touring - service repair manual 2008 year


Search            


Content   ..  391  392  393  394   ..


Mazda CX-9 Grand Touring. Manual - part 393


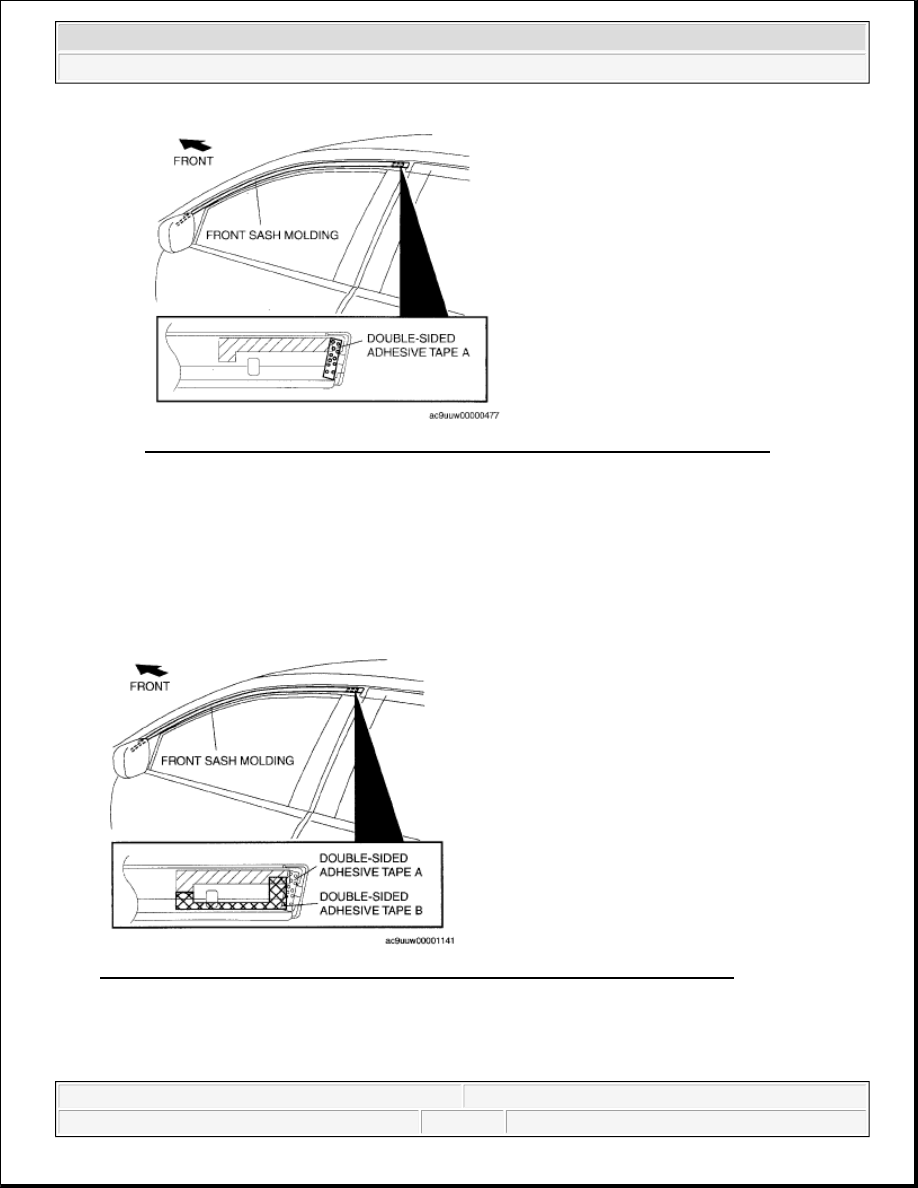
Fig. 33: Identifying Double-Sided Adhesive Tape Applyin To Front Sash Molding 
Courtesy of MAZDA MOTORS CORP. 

5. Affix double-sided adhesive tape B to the front sash molding as shown in the figure. 

3. Peel off the backing of the double-sided adhesive tape. 

Fig. 34: Identifying Double-Sided Adhesive Tape Applying To Front Sash Molding 
Courtesy of MAZDA MOTORS CORP. 

4. Hook tab A to the body in the position where tabs B align with the sash holes.  

5. Press the front sash molding in the direction of the arrow and install tabs B to the body. 

NOTE:

As for the double-sided adhesive tape, use beta tape 5078 (1 
mm {0.04 in} thickness) or equivalent.  


2008 Mazda CX-9 Grand Touring 

2008 ACCESSORIES & BODY, CAB Exterior Trim - Mazda CX-9


Microsoft 


Sunday, November 15, 2009 10:44:03 AM

Page 24 

© 2005 Mitchell Repair Information Company, LLC. 

6. Press the front sash molding from the vehicle rear in the direction shown in the arrow and install tab C. 

DOOR SASH FILM INSTALLATION 

1. Remove any grease or dirt from the affixing surface of the door.  

2. Cut away the unused portion along the dotted lines. 

Fig. 36: Identifying Door Sash Film Area 
Courtesy of MAZDA MOTORS CORP.

CAUTION:

Do not press the front sash molding in any place other than the 
rubber areas.  

NOTE:

After installing the front sash molding, verify that tabs A and B are 
connected properly to the body. 

Fig. 35: Identifying Double-Sided Adhesive Tape And Front Sash 
Molding 
Courtesy of MAZDA MOTORS CORP. 


2008 Mazda CX-9 Grand Touring 

2008 ACCESSORIES & BODY, CAB Exterior Trim - Mazda CX-9


Microsoft 


Sunday, November 15, 2009 10:44:03 AM

Page 25 

© 2005 Mitchell Repair Information Company, LLC. 

3. Peel off the backing paper and attach the door sash film onto the door as shown in the figure. 

Fig. 37: Attaching Door Sash Film Onto Door 
Courtesy of MAZDA MOTORS CORP. 

Standard clearance  

a: 2.0 mm or more {0.08 in or more}  

b: 3.0-5.0 mm {0.12-0.19 in}  

4. Peel off the transparent protective film on the door sash film.  

5. Install the following parts: 

1. Rear door garnish (See REAR DOOR GARNISH REMOVAL/INSTALLATION.) 


2008 Mazda CX-9 Grand Touring 

2008 ACCESSORIES & BODY, CAB Exterior Trim - Mazda CX-9


Microsoft 


Sunday, November 15, 2009 10:44:03 AM

Page 26 

© 2005 Mitchell Repair Information Company, LLC. 

2. Rear sash molding (See REAR SASH MOLDING INSTALLATION.)  

3. Front sash molding (See FRONT SASH MOLDING INSTALLATION.)  

4. Rear beltline molding (See REAR BELTLINE MOLDING REMOVAL/INSTALLATION.)  

5. Front beltline molding (See FRONT BELTLINE MOLDING REMOVAL/INSTALLATION.  

6. Rear door trim (See REAR DOOR TRIM REMOVAL/INSTALLATION .)  

7. Inner sail garnish (See INNER SAIL GARNISH REMOVAL/INSTALLATION .)  

8. Front door trim (See FRONT DOOR TRIM REMOVAL/INSTALLATION .)  

9. Inner garnish (See INNER GARNISH REMOVAL/INSTALLATION .)  

REAR SASH MOLDING REMOVAL 

1. Press tab C in the direction of the arrow and remove it.  

2. While cutting the double-sided adhesive tape using a flathead screwdriver or a razor, separate the rear 

sash molding from the body.  

3. Remove the tab D.  

4. Rotate the rear sash molding in the direction of the arrow and remove tab A.  

5. Rotate the rear sash molding in the direction of the arrow and remove tab B.  

6. Remove the rear sash molding. 

Fig. 38: Identifying Rear Sash Molding And Double-Sided Adhesive Tape Location 
Courtesy of MAZDA MOTORS CORP. 

EXTRACTOR CHAMBER REMOVAL/INSTALLATION

WARNING:

Using a razor with bare hands can cause injury. Always wear gloves 
when using a razor.  


2008 Mazda CX-9 Grand Touring 

2008 ACCESSORIES & BODY, CAB Exterior Trim - Mazda CX-9


Microsoft 


Sunday, November 15, 2009 10:44:03 AM

Page 27 

© 2005 Mitchell Repair Information Company, LLC. 


Content   ..  391  392  393  394   ..