Mazda CX 7. Manual - part 260


  Index      Mazda     Mazda CX 7 - service repair manual 2007 year


Search            


Content   ..  258  259  260  261   ..


Mazda CX 7. Manual - part 260


AUTOMATIC TRANSAXLE [AW6A-EL, AW6AX-EL]

05-17–29

05-17

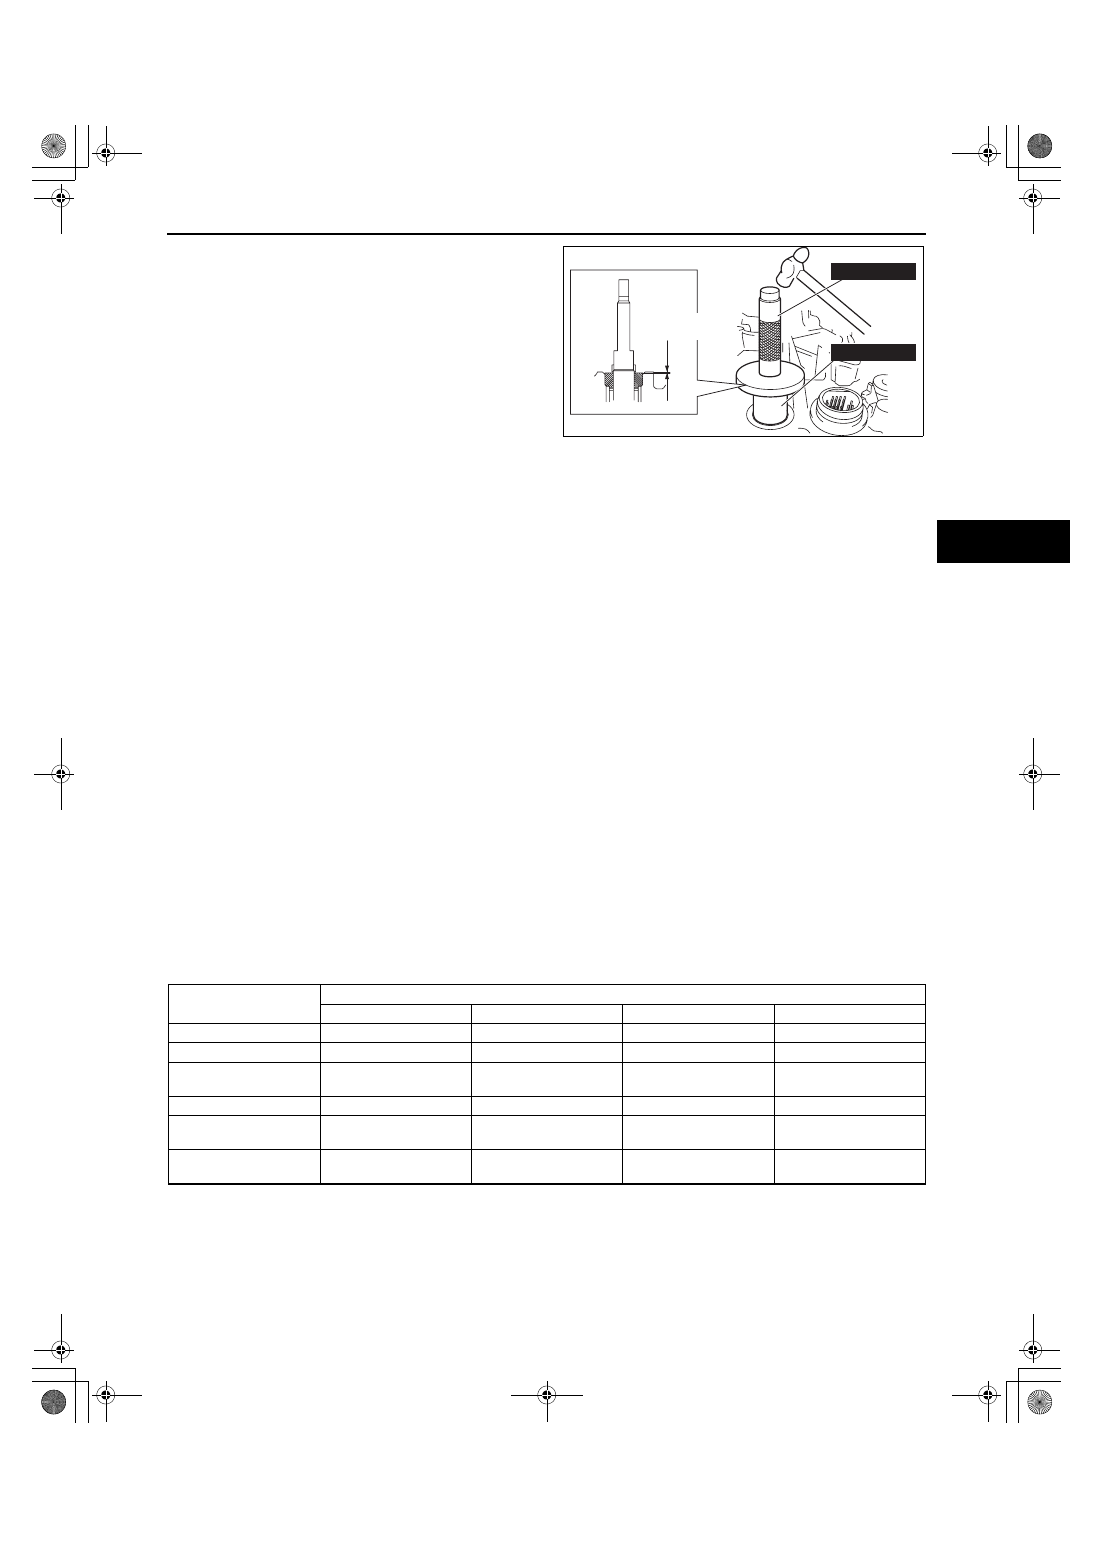
5. Using the SST and a hammer, tap a new oil seal 

so that the specified oil seal position is obtained.
Substitution SST

• 49 F026 102

Outer diameter: 27 mm {1.06 in} or more
Inner diameter: 15— 18 mm {0.60— 0.70 in}

6. Install the TCM. (See 05-17-25 TCM REMOVAL/

INSTALLATION[AW6A-EL, AW6AX-EL].)

7. Install the air cleaner component. (See 01-13-5 

INTAKE AIR SYSTEM REMOVAL/
INSTALLATION[L3 WITH TC].)

8. Connect the negative battery cable.

End Of Sie

AUTOMATIC TRANSAXLE REMOVAL/INSTALLATION[AW6A-EL, AW6AX-EL]

id051723802400

1. Disconnect the negative battery cable.
2. Remove the following parts.

(1) Battery and battery tray (See 01-17-2 BATTERY REMOVAL/INSTALLATION[L3 WITH TC].)
(2) Air cleaner component (See 01-13-5 INTAKE AIR SYSTEM REMOVAL/INSTALLATION[L3 WITH TC].)
(3) Engine cover
(4) Charge air cooler (See 01-13-5 INTAKE AIR SYSTEM REMOVAL/INSTALLATION[L3 WITH TC])
(5) Windshield wiper arm and blade (See 09-19-3 WINDSHIELD WIPER ARM AND BLADE REMOVAL/

INSTALLATION.)

(6) Cowl grille (See 09-16-11 COWL GRILLE REMOVAL/INSTALLATION.)
(7) Front wheel
(8) Splash shield
(9) Under cover
(10)Side cover
(11)Propeller shaft (transfer side) (See 03-15-3 PROPELLER SHAFT REMOVAL/INSTALLATION.)
(12)Transfer oil cooler (See 03-16-3 TRANSFER OIL COOLER REMOVAL/INSTALLATION.)

3. Drain the ATF. (See 05-17-11 AUTOMATIC TRANSAXLE FLUID (ATF) REPLACEMENT[AW6A-EL, AW6AX-

EL].)

Warning

• Improperly jacking a transaxle is dangerous. It can slip off the jack and may cause serious injury.

Caution

• To prevent the torque converter and transaxle from separating, remove the transaxle without 

tilting it toward the torque converter.

4. Remove in the order shown in the figure.
5. Install in the reverse order of removal.
6. Add ATF to the specified level. (See 05-17-11 AUTOMATIC TRANSAXLE FLUID (ATF) 

REPLACEMENT[AW6A-EL, AW6AX-EL].)

7. Perform the mechanical system test. (See 05-17-3 MECHANICAL SYSTEM TEST[AW6A-EL, AW6AX-EL].)

X : Test to be performed after the service work

-0.3

0.4 mm           

{-0.0118

0.0157 in}

49 G030 797

49 F026 102

acxuuw00000534

Service item

Test item

Line pressure test

Stall test

Time lag test

Time lag test

ATX replacement

X

ATX overhaul

X

X

X

X

Torque converter 
replacement

X

X

Oil pump replacement

X

Control valve body 
component

X

Clutch system 
replacement

X

X

X

1871-1U-06B(05-17).fm  29 ページ  2006年3月15日 水曜日 午前11時20分

AUTOMATIC TRANSAXLE [AW6A-EL, AW6AX-EL]

05-17–30

.

A

A

D

D

B

C

R

R

R

6

6

5

4

3

2

19

19

18

16

17

14

14

12

12

25

23

22

11

20

26

11

24

15

21

1

R

38—51 
{3.9—5.2, 29—37}

N·m {kgf·m, ft·lbf}

42—62 
{4.3—6.3, 31—45}

8—11 N·m 
{82—112 kgf·cm, 
71—97 in·lbf}

40.5—54.7 
{4.13—5.57, 
29.9—40.3}

42—62 
{4.3—6.3, 
31—45}

7.8—10.8 N·m 
{80—110 kgf·cm, 
70—95 in·lbf}

37—52
{3.8—5.3, 
28—38}

25.5—34.5
{2.61—3.51, 
18.9—25.4}

74.5—104.9
{7.60—10.69, 55.0—77.3}

66.6—93.1
{6.80—9.49, 
49.2—68.6}

37—52
{3.8—5.3, 28—38}

93.1—131.3
{9.50—13.38, 
68.7—96.8}

93.1—131.3
{9.50—13.38, 
68.7—96.8}

119.6—154.8
{12.20—15.78, 
88.3—114.1}

42.3—60.1
{4.32—6.12, 
31.2—44.3}

119.6—154.8
{12.20—15.78, 
88.3—114.1}

42.3—60.1
{4.32—6.12, 
31.2—44.3}

47.0—59.0
{4.80—6.01, 
34.7—43.5}

47.0—59.0
{4.80—6.01, 
34.7—43.5}

38—51 
{3.9—5.2, 
29—37}

43.1—58.8
{4.40—5.99, 
31.8—43.3}

43.1—58.8
{4.40—5.99, 
31.8—43.3}

93.1—116.6 
{9.50—11.88, 
68.7—85.9}

85.3—116.6
{8.70—11.88,
62.9—85.9}

119.6—154.8
{12.2—15.7,
88.3—114.1}

119.6—154.8
{12.2—15.7,
88.3—114.1}

119.6—154.8
{12.2—15.7,
88.3—114.1}

119.6—154.8
{12.2—15.7,
88.3—114.1}

7

18.6

26.5 

{1.9

2.7, 

14

19}

9

8

9

8

B

C

10

10

13

4.2—6.2 N·m 
{43—63 kgf·cm, 
38—54 in·lbf}

7.8—10.8 N·m 
{80—110 kgf·cm, 
70—95 in·lbf}

7.8—10.8 N·m 
{80—110 kgf·cm, 
70—95 in·lbf}

7.8—10.8 N·m 
{80—110 kgf·cm, 
70—95 in·lbf}

acxuuw00000614

1871-1U-06B(05-17).fm  30 ページ  2006年3月15日 水曜日 午前11時20分

AUTOMATIC TRANSAXLE [AW6A-EL, AW6AX-EL]

05-17–31

05-17

.

1

TCM connector

2

Wiring harness bracket

3

Selector  cable
(See05-17-35 Selector Cable Installation Note.)

4

Oil filter tube, Dipstick, breather hose

5

Wiring harness bracket (HO2S)

6

Transaxle mounting bolt (Upper side)

7

Steering shaft
(See 06-14-6 STEERING WHEEL AND COLUMN 
REMOVAL/INSTALLATION.)

8

Stabilizer control link

9

Tie-rod end ball joint
(See 02-13-10 FRONT CROSSMEMBER 
REMOVAL/INSTALLATION.)

10

Lower arm ball joint
(See 02-13-7 FRONT LOWER ARM REMOVAL/
INSTALLATION.)

11

No.1 engine mount bracket
(See05-17-34 No.1 Engine Mount Installation Note.)

12

Crossmember bracket

13

Crossmember
(See 02-13-10 FRONT CROSSMEMBER 
REMOVAL/INSTALLATION.)

14

Drive shaft
(See 03-13-12 FRONT DRIVE SHAFT REMOVAL/
INSTALLATION.)

15

Joint shaft (2WD)
(See 03-13-3 JOINT SHAFT REMOVAL/
INSTALLATION[2WD].)

16

Transfer bracket (AWD)

17

WU-TWC bracket (AWD)

18

Heat shield (AWD)

19

Oil hose
(See 05-17-47 OIL COOLER REMOVAL/
INSTALLATION[AW6A-EL, AW6AX-EL].)

20

Starter
(See 01-19-2 STARTER REMOVAL/
INSTALLATION[L3 WITH TC].)

21

Endplate cover

22

Torque converter installation nuts
(See05-17-32 Torque Converter Nuts Removal 
Note.)
(See05-17-35 Torque Converter Nuts Installation 
Note.)

23

No.4 engine mount bracket
(See05-17-32 No.4 Engine Mount Bracket Removal 
Note.)
(See05-17-34 No.4 Engine Mount Bracket 
Installation Note.)

24

Resistor

25

Transaxle mounting bolt (lower side)

26

Transaxle (2WD)
(See05-17-34 Transaxle Removal Note.)
(See05-17-34 Transaxle Installation Note.)

Transaxle, transfer and Joint shaft (AWD)
(See05-17-34 Transaxle Removal Note.)
(See05-17-34 Transaxle Installation Note.)

27

28

29

30

N·m {kgf·m, ft·lbf}

19—27 
{2.0—2.7, 15—19}

6.9—9.8 N·m 
{71—99 kgf·cm, 
62—86 in·lbf}

64—89 
{6.6—9.0, 48—65}

64—89 
{6.6—9.0, 48—65}

acxuuw00000615

27

Joint shaft (AWD)
(See 03-13-4 JOINT SHAFT REMOVAL/
INSTALLATION[AWD].)

28

Transfer (AWD)

29

Cable bracket

30

Transaxle

1871-1U-06B(05-17).fm  31 ページ  2006年3月15日 水曜日 午前11時20分

AUTOMATIC TRANSAXLE [AW6A-EL, AW6AX-EL]

05-17–32

Torque Converter Nuts Removal Note

1. Align the holes by turning the torque converter.
2. Insert a flathead screwdriver through the 

converter housing service hole, and lock the drive 
plate.

3. Remove the torque converter nuts.

No.4 Engine Mount Bracket Removal Note

1. Install the SST using the following procedure.

Caution

• Refer to the SST instruction manual for 

the basic handing procedure.

acxuuw00000622

NUT

acxuuw00000632

MAIN FRAME

SIDE BAR

REAR SHAFT

FRONT SHAFT

FRONT FOOT No.2 
(ADAPTER FOR FRONT SHAFT)

FRONT FOOT No.1 
(ADAPTER FOR FRONT SHAFT)

acxuuw00000223

1871-1U-06B(05-17).fm  32 ページ  2006年3月15日 水曜日 午前11時20分


Content   ..  258  259  260  261   ..