Mazda CX 7. Manual - part 259
AUTOMATIC TRANSAXLE [AW6A-EL, AW6AX-EL]
05-17–25
05-17
End Of Sie
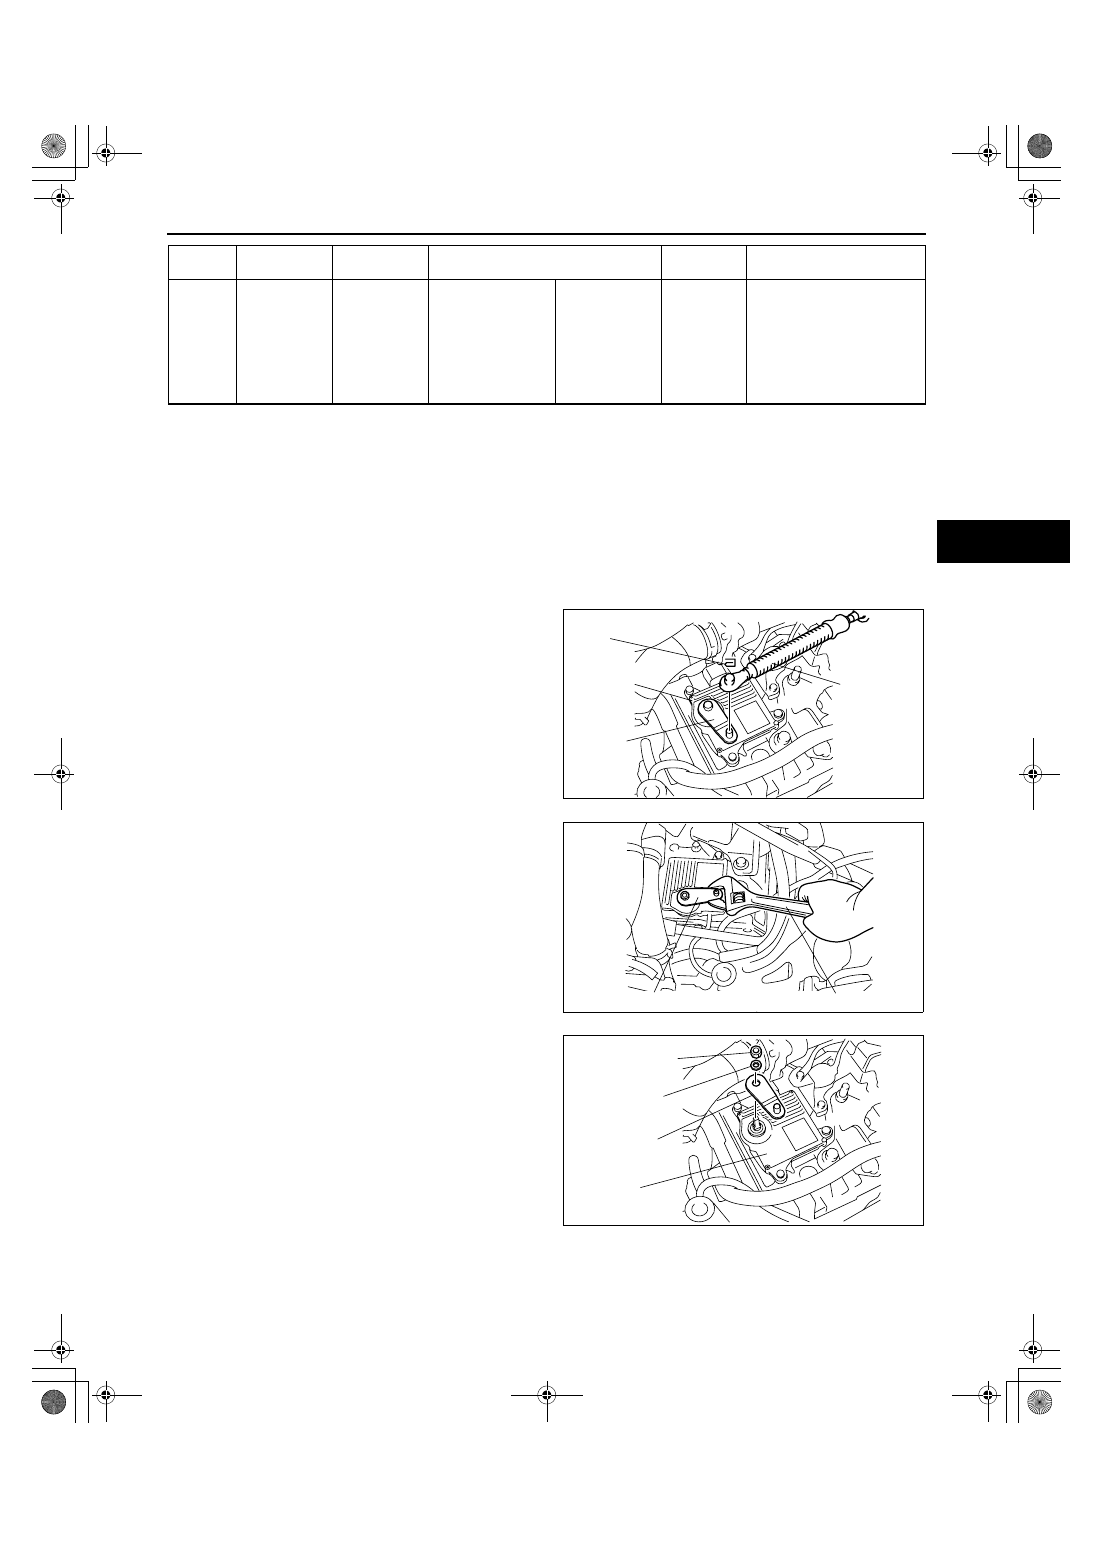
TCM REMOVAL/INSTALLATION[AW6A-EL, AW6AX-EL]
id051723800400
Caution
• Water or foreign material entering the connector can cause a poor connection or corrosion. Be
sure not to allow water or foreign material on the connector when disconnecting.
1. Disconnect the negative battery cable.
2. Remove the air cleaner component. (See 01-13-5 INTAKE AIR SYSTEM REMOVAL/INSTALLATION[L3 WITH
TC].)
3. Disconnect the TCM connector.
4. Remove the clip and disconnect the selector
cable.
Caution
• Do not use an impact wrench. Hold the
manual shaft lever when removing the
manual shaft nut, or the transaxle may be
damaged.
5. Set the adjustable wrench as shown in the figure
to hold the manual shaft lever.
6. Remove the manual shaft nut and washer.
B22
Shift solenoid
E control GND
Shift solenoid
E
• Inspect
resistance
between couple
component
terminals
B14and B22
(wiring harness-
side).
ATF
temperature:
20
°C {68°F}
5.0— 5.6
(ohms)
• Inspect shift solenoid E
(See 05-17-20
SOLENOID VALVE
INSPECTION[AW6A-EL,
AW6AX-EL])
• Inspect related harness
Terminal
Signal
Connected to
Test Condition
Continuity/
Resistance
Inspection item (s)
TCM
SELECTOR
CABLE
CLIP
MANUAL
SHAFT
LEVER
acxuuw00000523
MANUAL SHAFT LEVER
ADJUSTABLE WRENCH
acxuuw00000524
TCM
MANUAL
SHAFT NUT
WASHER
MANUAL
SHAFT
LEVER
acxuuw00000525
1871-1U-06B(05-17).fm 25 ページ 2006年3月15日 水曜日 午前11時20分