Mazda 5. Manual - part 32


  Index      Mazda     Mazda 5 - service repair manual


Search            


Content   ..  30  31  32  33   ..


Mazda 5. Manual - part 32


05–17–48

AUTOMATIC TRANSAXLE 

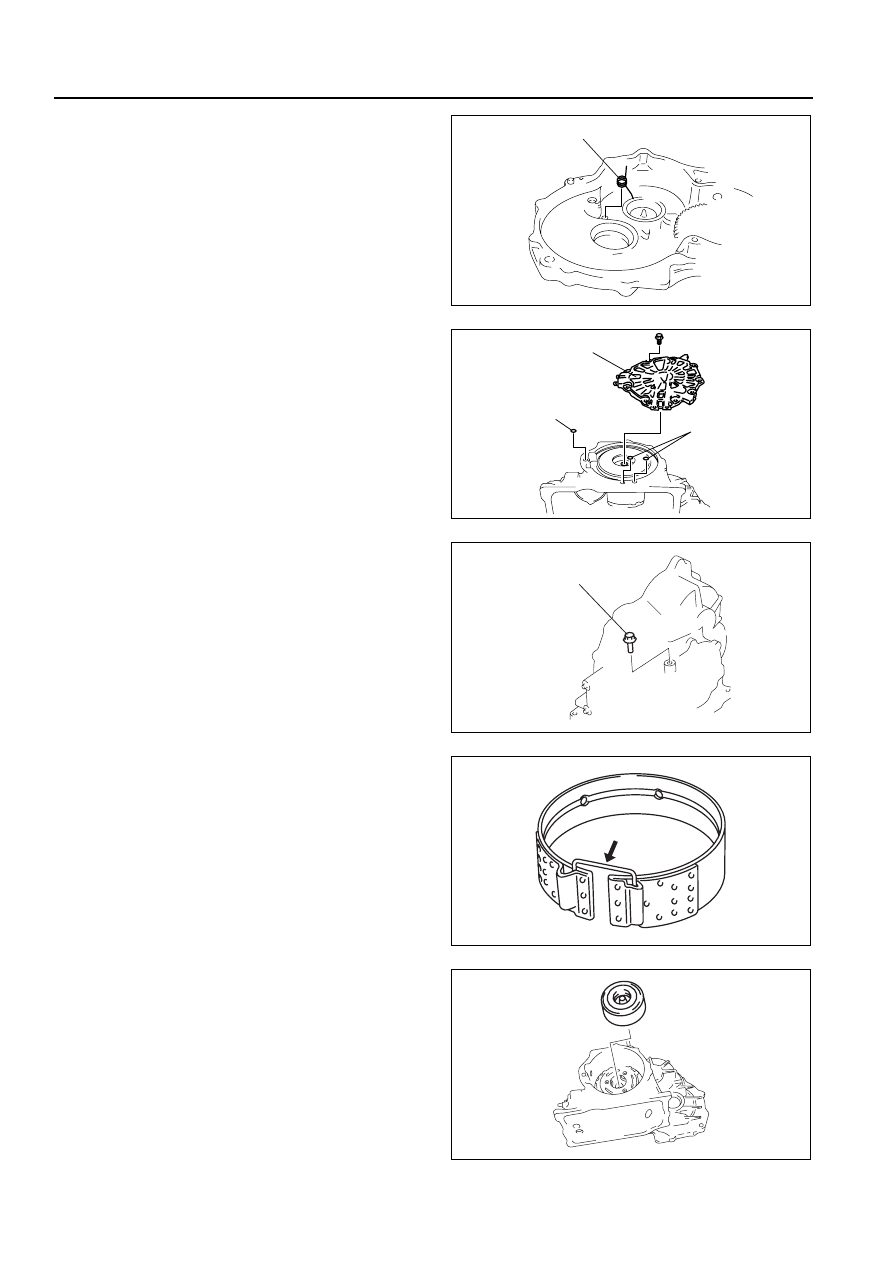
34. Remove the pawl return spring.
35. Remove the end cover.

36. Remove the O-ring from the transaxle case.

37. Remove the band strut.

38. Remove the 2–4 brake band, and hold it together 

using a piece of wire as shown in the figure.

39. Remove the clutch component.

PAWL RETURN SPRING

B3E0517A220

O-RING

O-RING

END COVER

B3E0517A221

BAND STRUT

B3E0517A222

B3E0517A223

B3E0517A224

AUTOMATIC TRANSAXLE 

05–17–49

05

40. Remove the snap ring.

41. Remove the rear planetary gear component.

42. Remove the front sun gear by tapping its end with 

a flathead screwdriver or similar tool. as shown in 
the figure.

43. Remove the forward clutch hub.

44. Remove the front planetary gear component.

45. Remove the front internal gear and one-way 

clutch component.

46. Remove the locknut.

B3E0517A225

B3E0517A226

FRONT SUN GEAR

FORWARD CLUTCH HUB

B3E0517A227

FRONT PLANETARY
GEAR COMPONENT

BEARING

B3E0517A228

B3E0517A229

05–17–50

AUTOMATIC TRANSAXLE 

(1) Knock the crimped portion of the locknut 

outward by using a small chisel and a 
hammer.

(2) Install the SST to the primary gear in the 

order shown.

Tightening torque

19—25 N·m {1.9—2.6 kgf·m, 14—18 ft·lbf}

(3) Install the SST to the locknut in the order 

shown.

(4) Remove the locknut.

47. Remove the primary gear by tapping it with a 

flathead screwdriver, etc. as shown in the figure.

LOCKNUT

B3E0517A230

49 B019 019

49 B019 020

1

2

CONVERTER HOUSING SIDE

B3E0517A231

49 B019 021

49 B019 022

2

3

1

EXTENSION BAR

END COVER SIDE

B3E0517A232

B3E0517A233

PRIMARYGEAR

B3E0517A234

AUTOMATIC TRANSAXLE 

05–17–51

05

48. Remove the bearing and distance piece.

Caution

• Removing the bearing race using a 

flathead screwdriver can damage the 
inside of the bearing race. Handle the 
flathead screwdriver carefully.

49. Remove torx screws from the converter housing 

side.

50. Remove the bearing race.

51. Remove the bearing race using the SST as 

shown in the figure.

52. Tap the funnel at the areas indicated in the figure 

using a flathead screwdriver, etc. to make gaps 
big enough to install the SST. Then remove the 
bearing race.

53. Remove the funnel.

Caution

• Removing the oil pipe using a flathead 

screwdriver can damage the oil pipe.
Handle the flathead screwdriver carefully.

54. Remove the oil pipe.

End Of Sie

BEARING

DISTANCE
PIECE

B3E0517A235

TORX 
SCREW

BEARING 
RACE

B3E0517A334

49 W032 2A0

B3E0517A238

49 W032 2A0

BEARING RACE

FUNNEL

B3E0517A239

B3E0517A240


Content   ..  30  31  32  33   ..