Range Rover Sport. Manual - part 20


  Index      Land Rover     Range Rover Sport - service repair manual 2005-2009 year


Search            


Content   ..  18  19  20  21   ..


Range Rover Sport. Manual - part 20


Upper Arm Bushing (60.35.32) 

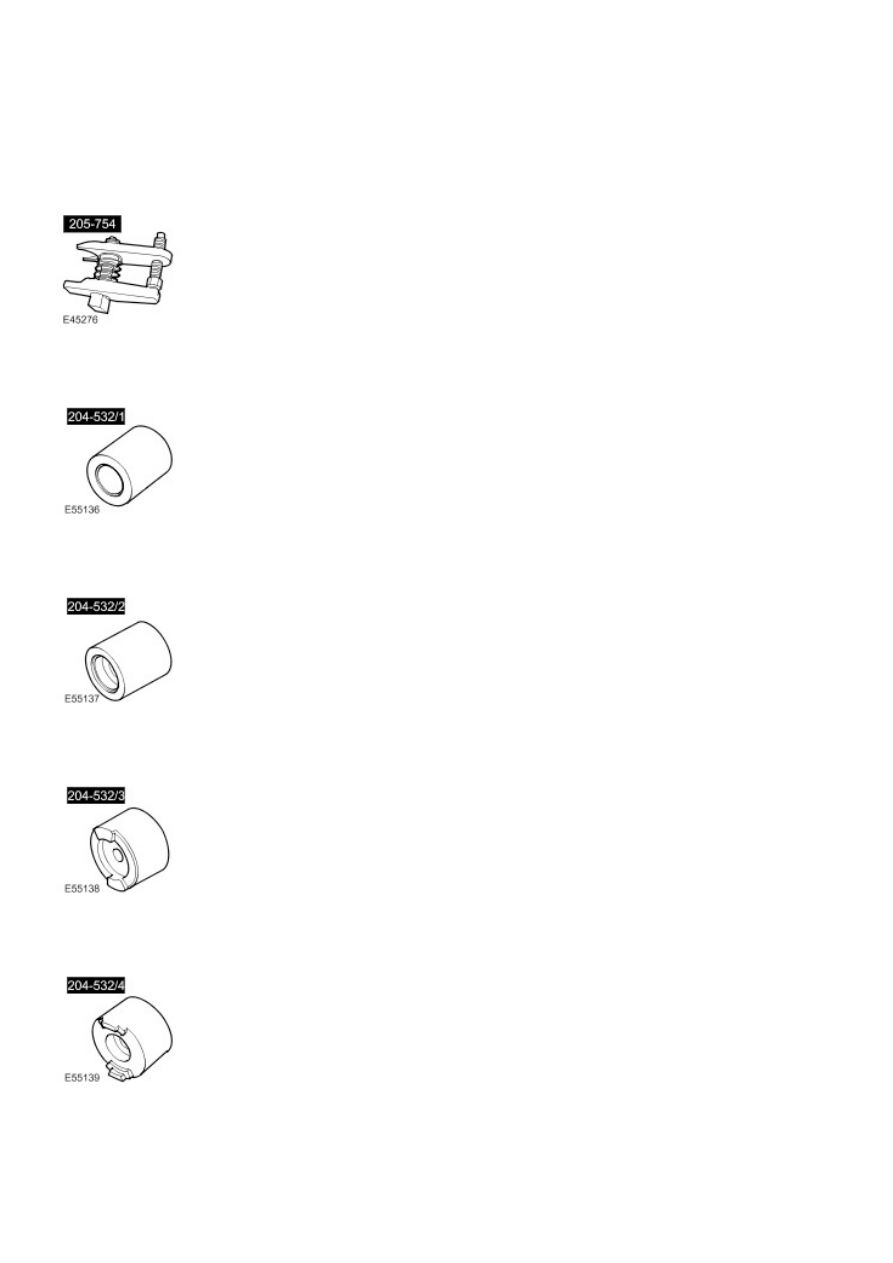
Special Service Tools

Ball joint separator 
205-754 (LRT-54-027) 

Receiver cup upper arm bushes 
204-532/1 

Remover upper arm bushes 
204-532/2 

Installer upper arm front bush 
204-532/3 

Installer upper arm rear bush 
204-532/4 

NOTE: 


The bushings must be replaced in pairs, LH and RH sides.

1
.

  WARNING: Do not work on or under a vehicle supported only by a jack. Always support the vehicle

on safety stands.

Raise and support the vehicle.

2 . Remove the front wheels and tires.

3 . Remove the LH upper arm. 

For additional information, refer to 

Upper Arm (60.35.01)

4 . Release the heat shield for access to the upper arm bolts.


Remove the retaining nut and two bolts.

5 . Loosen the upper arm bolts. 

6 . Disconnect the height sensor link. 

  CAUTION: Use a Torx socket to prevent the ball joint rotating whilst removing the nut.

  CAUTION: Note the position of the hardened steel washer. The hardened steel washer must be

installed between the stabilizer bar link and the upper arm. Failure to follow this instruction may result in
damage to the vehicle.

Remove the stabilizer bar link nut.


Discard the nut.

8
.

  CAUTION: To prevent the wheel knuckle falling outwards and disconnection of the halfshaft inner

joint, support the wheel knuckle.

Loosen the upper arm retaining nut. 

9 . Using the special tool, release the upper arm ball joint.


Remove and discard the retaining nut.

11 . Release the wheel speed sensor lead from the upper arm.

12 . Remove the RH upper arm. 

13 . Note the position of the bushing in relation to the upper arm.

14 .

  CAUTION: The bush flanges need to be removed to allow bush removal.

Using a suitable tool, bend over the bush flanges. 

15 . Using a hacksaw, remove the flange from the bushing, making sure the upper arm is not damaged.

16 . Using the special tools, remove and discard the upper arm bushings. 


Content   ..  18  19  20  21   ..