Content .. 1375 1376 1377 1378 ..
Jeep Liberty KJ. Manual - part 1377
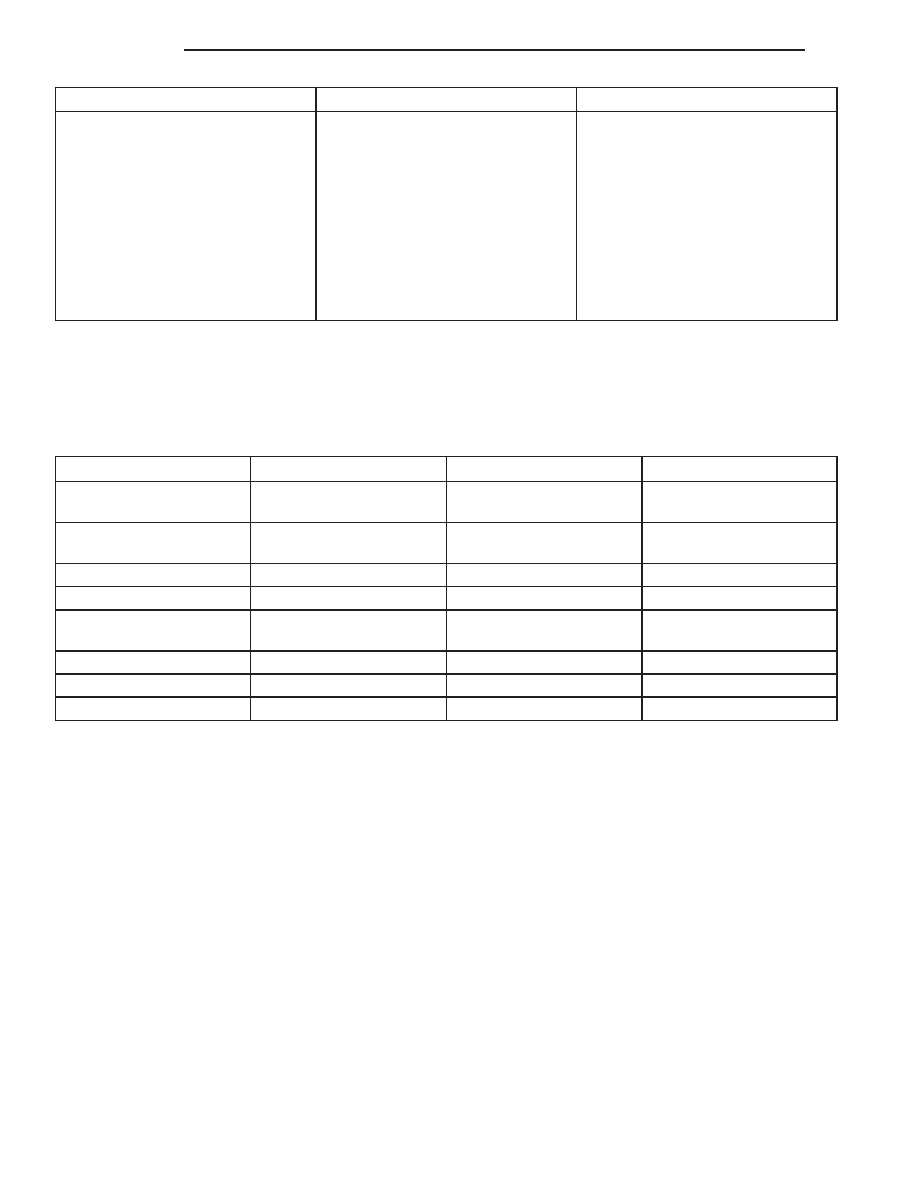
CONDITION
POSSIBLE CAUSES
CORRECTION
Partial engagement of clutch disc.
One side of disc is worn and the
other side is glazed and lightly
worn.
1. Clutch pressure plate position
incorrect.
1. Replace clutch disc and cover.
2. Clutch cover, spring, or release
fingers bent or distorted.
2. Replace clutch disc and cover.
3. Clutch disc damaged or
distorted.
3. Replace clutch disc.
4. Clutch misalignment.
4. Check alignment and runout of
flywheel, disc, pressure plate, and
clutch housing. Correct as
necessary.
SPECIFICATIONS
CLUTCH
TORQUE SPECIFICATIONS
DESCRIPTION
N·m
Ft. Lbs.
In. Lbs.
Pressure Plate Bolts -
3.7L
50
37
-
Pressure Plate Bolts -
2.5L Diesel
54
40
-
Clutch Cylinder Bolts
23
-
200
Flywheel Bolts - 3.7L
81
60
-
Flywheel Bolts - 2.5L
Diesel
45
33
-
Master Cylinder Nuts
38
28
-
Slave Cylinder Nuts
23
17
-
Pedal Bracket Nuts
39
29
-
6 - 6
CLUTCH
KJ