Content .. 1589 1590 1591 1592 ..
Jeep Grand Cherokee WK. Manual - part 1591
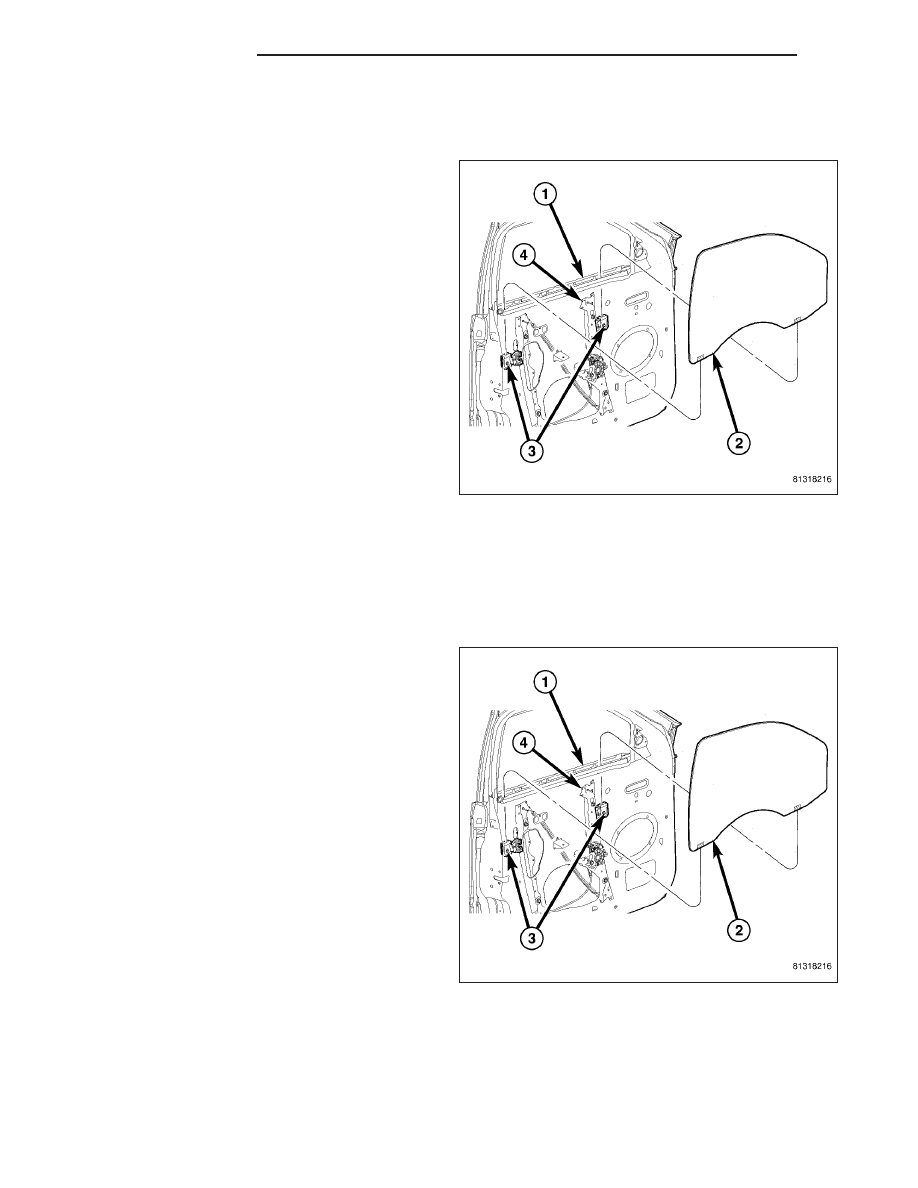
GLASS
REMOVAL
1. Remove the outer belt weatherstrip (1) from the
front door.
2. Remove the trim panel from the inside of the front
door (Refer to 23 - BODY/DOOR - FRONT/TRIM
PANEL - REMOVAL).
3. Remove the speaker from the inside of the front
door (Refer to 8 - ELECTRICAL/AUDIO/SPEAKER
- REMOVAL).
4. Remove the watershield from the inside of the front
door (Refer to 23 - BODY/DOOR - FRONT/WA-
TERSHIELD - REMOVAL).
5. Using the regulator (4), move the front door glass
(2) up or down as required to access the two win-
dow regulator glass clamp bolts (3).
6. Loosen the bolt in each of the window regulator
glass clamps far enough to release the door glass
from the clamps.
7. Disengage the door glass from the window regula-
tor glass clamps.
8. Lower the regulator down as required for access to remove the door glass.
9. Carefully rotate the door glass within the window opening and remove the glass from the door through the win-
dow opening.
INSTALLATION
1. Carefully lower the door glass (2) into the door
through the window opening.
2. Rotate the door glass into position and engage it to
the window regulator glass clamps.
3. Using the regulator (4), move the front door glass
up or down as required to access to the two win-
dow regulator glass clamp bolts (3).
4. Tighten the bolts in each of the window regulator
glass clamps to 10 N·m (90 in. lbs.).
5. Install the watershield onto the inside of the front
door (Refer to 23 - BODY/DOOR - FRONT/WA-
TERSHIELD - INSTALLATION).
6. Install the speaker onto the inside of the front door
(Refer to 8 - ELECTRICAL/AUDIO/SPEAKER -
INSTALLATION).
7. Install the trim panel onto the inside of the front
door (Refer to 23 - BODY/DOOR - FRONT/TRIM
PANEL - INSTALLATION).
8. Install the outer belt weatherstrip (1) onto the front door.
23 - 22
DOOR - FRONT
WK