Jaguar X-Type Sedan and Estate (Wagon). Manual - part 696


  Index      Jaguar     Jaguar X-Type Sedan and Estate (Wagon) (2.0 L, 2.5 L and 3.0 L Gasoline; 2.0 L and 2.2 L, Diesel) - manual 2001-2009 year


Search            


Content   ..  694  695  696  697   ..


Jaguar X-Type Sedan and Estate (Wagon). Manual - part 696


Published: 11-May-2011

Uni-Body, Subframe and Mounting System - Front Subframe2.0L Duratorq-TDCi/2.2L
Duratorq-TDCi (110kW/150PS) - Puma

Removal and Installation

Special Tool(s)

Powertrain Assembly Jack

HTJ1200-2

Removal

All vehicles

1. Remove the wheels and tires.

For additional information, refer to: 

Wheel and Tire

 (204-04 Wheels and

Tires, Removal and Installation).

2. Remove the radiator splash shield.

For additional information, refer to: 

Radiator Splash Shield

 (501-02 Front

End Body Panels, Removal and Installation).

3. Remove the exhaust flexible pipe.

For additional information, refer to: 

Exhaust Flexible Pipe - 2.0L

Duratorq-TDCi/2.2L Duratorq-TDCi (110kW/150PS) - Puma

 (309-00

Exhaust System, Removal and Installation).

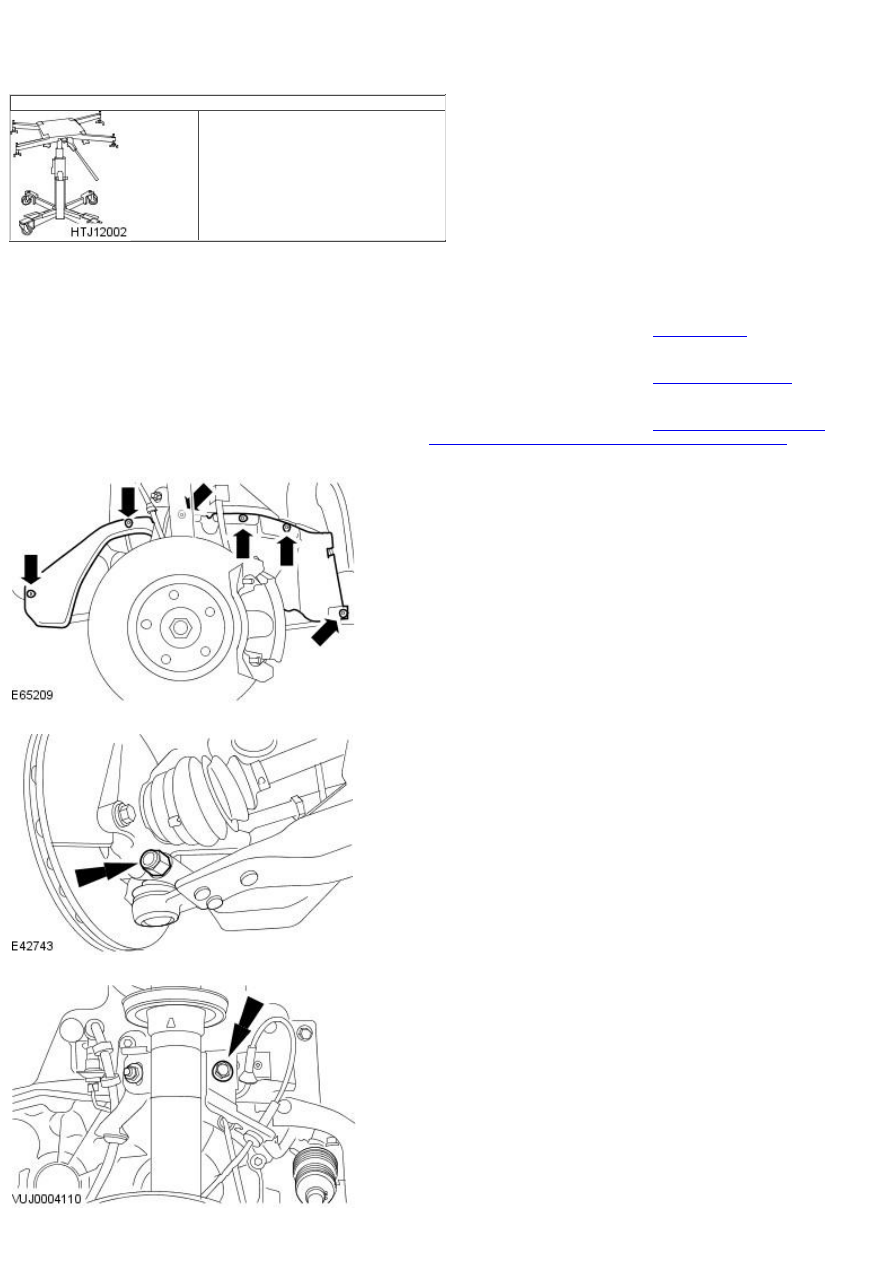
4. NOTE: Right-hand shown, left-hand similar.

Remove the wheel arch liner access cover.

5. NOTE: Right-hand shown, left-hand similar.

Remove the lower arm ball joint nut and bolt.

6. NOTE: Left-hand shown, right-hand similar.

Detach the stabilizer bar link arms.

Vehicles with high intensity discharge headlamps

7. Disconnect the high intensity discharge (H.I.D) sensor drop arm.

All vehicles

8. Detach the front of the steering gear cooling pipe.

9. Detach the rear of the steering gear cooling pipe.

Vehicles with electric booster heater

10. Detach the electric booster heater electrical connector from the

subframe retaining tang.

11. Detach the coolant hoses from the retaining clips.

12. NOTE: Clamp the hose to minimize coolant loss.

Detach the coolant hose.

Disconnect the coolant hose.

Vehicles with fuel fired booster heater

13. Detach the fuel fired booster heater electrical connector from the

subframe retaining tang.

14. Detach the coolant hose.

All vehicles

15. Detach the wiring harness.

16. Install the special tool.

17. NOTE: Left-hand shown, right-hand similar.

Position and adjust the special tool rear height adjuster.

18. NOTE: Right-hand shown, left-hand similar.

Position and adjust the special tool front height adjuster.


Content   ..  694  695  696  697   ..