Jaguar X-Type Sedan and Estate (Wagon). Manual - part 636


  Index      Jaguar     Jaguar X-Type Sedan and Estate (Wagon) (2.0 L, 2.5 L and 3.0 L Gasoline; 2.0 L and 2.2 L, Diesel) - manual 2001-2009 year


Search            


Content   ..  634  635  636  637   ..


Jaguar X-Type Sedan and Estate (Wagon). Manual - part 636


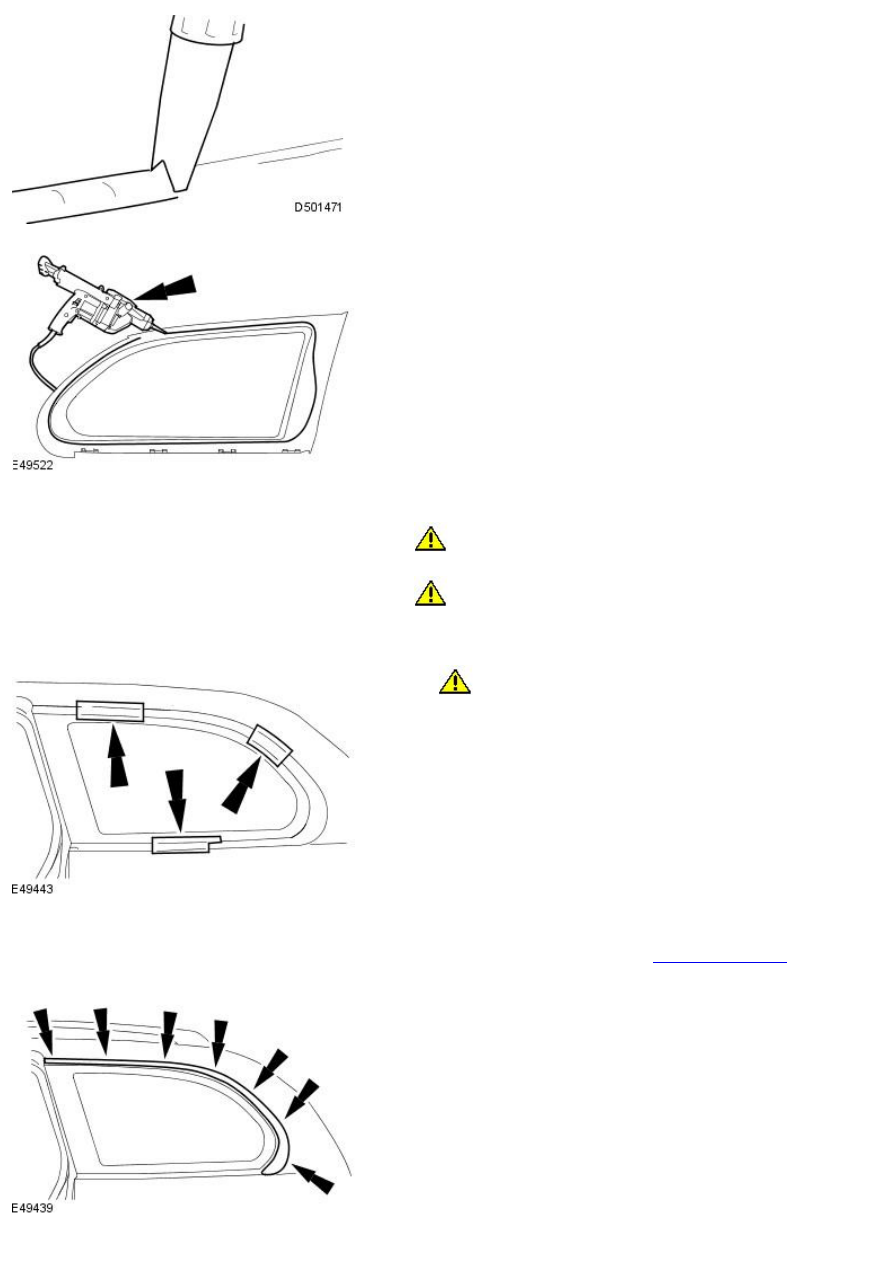
7. Cut the nozzle of the JLM20452 glass bonding adhesive to achieve a

triangular section bead 8 mm (0.32 in) wide by 10 mm (0.4 in) high.

8. Using the special tool, apply a uniform bead of adhesive to the rear

quarter window glass edge commencing at the bottom center and
overlapping the ends approximately 14 mm (0.56 in).

9. CAUTIONS:

 When installing the rear quarter window glass, do not strike it in

any way as this will crack the rear quarter window glass.

 Make sure the rear quarter window glass does not move out of

position in the body aperture.

Install the rear quarter window glass into the aperture and press firmly
in to place.

10. 

CAUTION: Make sure the rear quarter window glass does not

move out of position in the rear quarter window glass aperture.

Apply suitable tape to the rear quarter window glass.

11. Remove protective tape from the edge of the headliner.

12. Install the loadspace trim panel.

For additional information, refer to: 

Loadspace Trim Panel

 (501-05

Interior Trim and Ornamentation, Removal and Installation).

13. NOTE: Make sure the rear quarter window glass adhesive has cured
before installing the rear quarter window glass finisher trim.

Install the rear quarter window glass finisher trim.

14. NOTE: Make sure the rear quarter window glass adhesive has set
before installing the rear quarter window glass exterior weatherstrip.

Install the rear quarter window glass weatherstrip.

Published: 11-May-2011

Glass, Frames and Mechanisms - Rear Window Glass Using Cheese Wire

Removal and Installation

Removal

1. Remove the high level stop lamp. For additional information, refer to

Section

 417-01 Exterior Lighting

.

2. Detach the seat belt reel trim panels.

3. Remove the rear seat backrest latch covers.

4. Detach the parcel shelf trim panel.

5. Disconnect the electrical connectors.

6. Disconnect the electrical connectors.

7. Disconnect the electrical connector.

8. Disconnect the electrical connector.

9. Apply suitable protective tape around the windshield glass aperture.

10. Place a protective sheet over the parcel shelf and place a protective

board over the sheet.

11. Apply suitable protective tape to inner edge of the roof panel.


Content   ..  634  635  636  637   ..