Jaguar X-Type Sedan and Estate (Wagon). Manual - part 577


  Index      Jaguar     Jaguar X-Type Sedan and Estate (Wagon) (2.0 L, 2.5 L and 3.0 L Gasoline; 2.0 L and 2.2 L, Diesel) - manual 2001-2009 year


Search            


Content   ..  575  576  577  578   ..


Jaguar X-Type Sedan and Estate (Wagon). Manual - part 577


Published: 11-May-2011

Remote Convenience - Universal Transmitter Programming

General Procedures

WARNING: A garage door opening system that cannot stop or reverse itself after detecting an object in its path does not meet current

federal safety standards. To decrease the risk of serious injury or death, do not use this HomeLink transmitter with a door opening system
that lacks stop and reverse features as required by federal standards. This includes any garage door opening system manufactured before
April 1, 1982. For more information, call HomeLink customer assistance at 1-800-355-3515.

1. 

CAUTION: During this procedure, the system that you are

programming will be made to operate. Make sure that people or objects
are clear of the garage door or gate being programmed.

Verify the hand-held transmitter is operative.

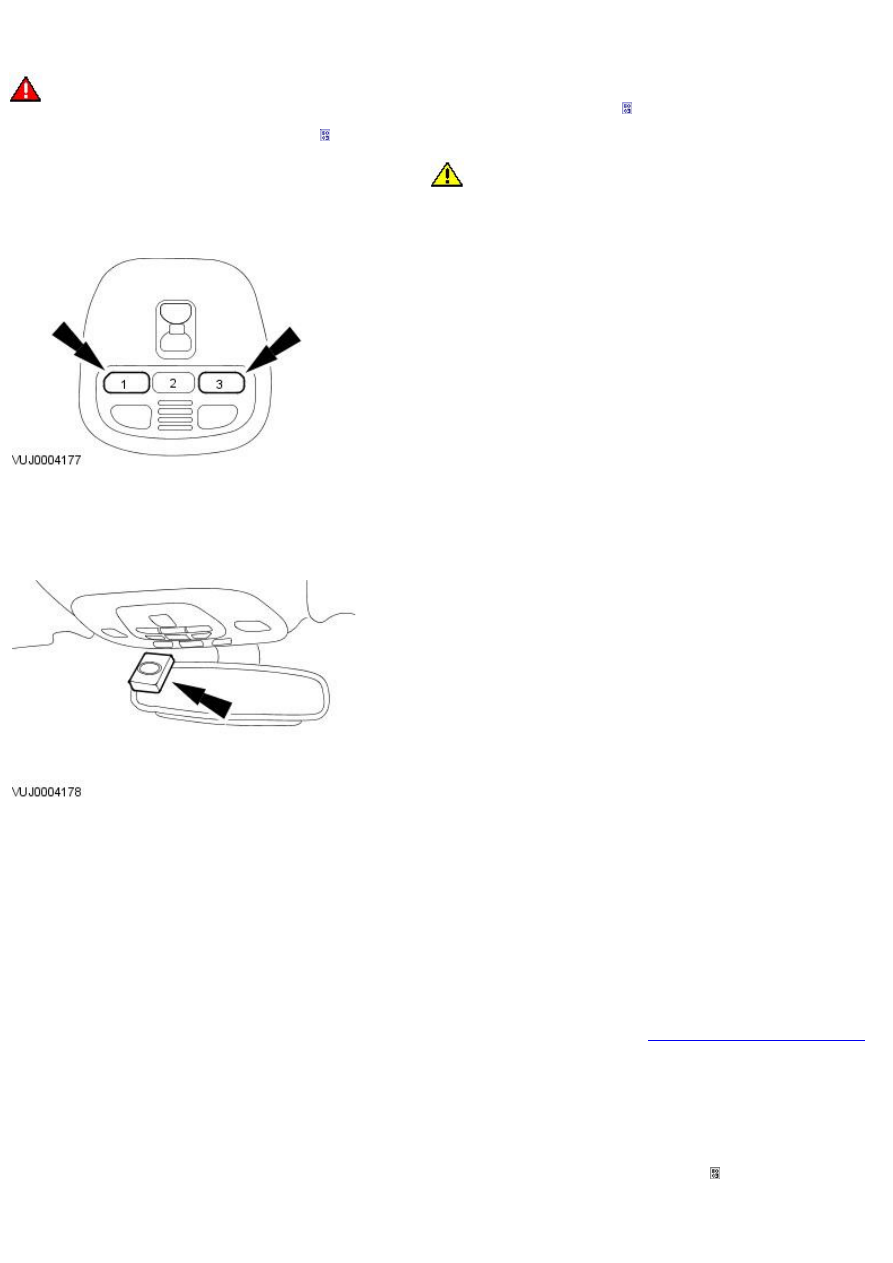
2. Prepare for programming the universal transmitter by erasing all three

channels by holding down the two outside buttons until the red light
begins to flash (20-30 seconds). Release both buttons.

3. Select one of the three universal transmitter channels to be

programmed by pressing the desired button.

4. Hold the end of the hand-held transmitter 50-150mm (2-6 in) from the

front surface of the universal transmitter so that the red light can still
be seen.

5. NOTE: During programming, the hand-held transmitter may
automatically stop transmitting after two seconds, which may not be long
enough to program the universal transmitter. If programming this type of
hand-held transmitter, continue to hold the button on the universal
transmitter while re-pressing the hand-held transmitter button every two
seconds (Canada only).

Use both hands to press the hand-held transmitter button and the
desired button on the universal transmitter. Do not release either
button.

6. Hold down both buttons until the red light on the universal transmitter

flashes, first slowly and then rapidly. Release both buttons when the
rapid flashing begins. The universal transmitter has successfully learned
the new frequency signal and can be used in place of the hand-held
transmitter(s).

7. NOTE: If the hand-held transmitter appears to program the universal
transmitter but does not open the garage door, the garage door opener
may have a "code protected" or "rolling code" feature.

To operate, simply press the appropriate button on the universal
transmitter. The red light is on while the signal is being transmitted.

Training a Garage Door Opener Equipped With "Rolling Codes"

1. Program the hand-held transmitter to the universal transmitter.

For additional information, refer to 

Universal Transmitter Programming

in this section.

2. Train the garage door opener receiver to recognize the universal

transmitter.

1. Remove the cover panel from the garage door opener receiver.

2. Locate the training button on the garage door opener receiver.

Location and color of the button may vary by garage door
opener manufacturer. Refer to the garage door opener
instruction manual or call HomeLink customer assistance at
1-800-355-3515.

3. Press the training button on the garage door opener receiver

for 1-2 seconds.

4. Press the programmed universal transmitter button for as long

as the universal transmitter red light flashes (1-2 seconds).
Release the button and re-press the button to confirm that the
universal transmitter is trained to the receiver.

5. The garage door opener should recognize the universal

transmitter.

Erasing Channels

1. NOTE: Individual channels cannot be erased, but can be reprogrammed
using the procedures for programming.
For additional information, refer to 

Universal Transmitter Programming

 in

this section.

To erase all three programmed channels, hold down the two outside
buttons until the red light begins to flash (20-30 seconds). Release both
buttons.

Published: 11-May-2011

Navigation System - Navigation System

Description and Operation

4-Door

Item

Part Number

Description

1

Roof pod antenna module (from 2009MY)

2

Navigation GPS antenna (up to 2009MY)

3

Navigation computer

4

-

Navigation system display

Wagon

Item

Part Number

Description

1

-

Roof pod antenna module (from 2009MY)

2

-

Navigation GPS antenna (up to 2009MY)

3

-

Navigation computer

4

-

Navigation system display

The navigation system utilizes the following functions.

Voice guidance volume controlled via audio head unit
Screen brightness controlled via on screen menus
Any key turns system "ON"
Language choice controlled via on screen menus

The navigation head unit comprises of a 7" full color screen which also provides control of the phone, audio system, climate control, vehicle
emergency messaging system (VEMS), voice control, and TV. The navigation computer is situated in the luggage compartment on the 

LH

(left-hand)

 side and is covered by a protective trim panel.

On vehicles up to 2009MY, the 

GPS (global positioning system)

 antenna is located beneath the parcel shelf trim on a 4-door vehicle and

beneath the rear spoiler on wagon.

On vehicles from 2009MY, the 

GPS

 antenna is located in the roof pod antenna module on both the 4-door and the wagon.

The system utilizes signals from the 

GPS

 antenna, speed messages from the instrument cluster, 

ABS (anti-lock brake system)

 unit and the

GYRO sensor's signals to enable the navigation computer to calculate, with the aid of 

DVD (digital versatile disc)

 map data, the position of

the vehicle. After entering the required destination, the driver is guided along by both visual guidance and voice instructions. Even if the
driver strays off the route, the system calculates a new route showing the easiest way back to the original destination. On route, it can also
point out useful landmarks such as, petrol stations, restaurants, hotels, Jaguar dealers, and car parks.

Japanese market vehicles have a navigation computer with integrated voice recognition for control of the navigation system. The Japanese
system also has the addition of Vehicle Information and Communication System (VICS) which provides real time traffic information.


Content   ..  575  576  577  578   ..