Jaguar X-Type Sedan and Estate (Wagon). Manual - part 472


  Index      Jaguar     Jaguar X-Type Sedan and Estate (Wagon) (2.0 L, 2.5 L and 3.0 L Gasoline; 2.0 L and 2.2 L, Diesel) - manual 2001-2009 year


Search            


Content   ..  470  471  472  473   ..


Jaguar X-Type Sedan and Estate (Wagon). Manual - part 472


6. Lower the vehicle.

7. Fill the fuel tank with fuel.

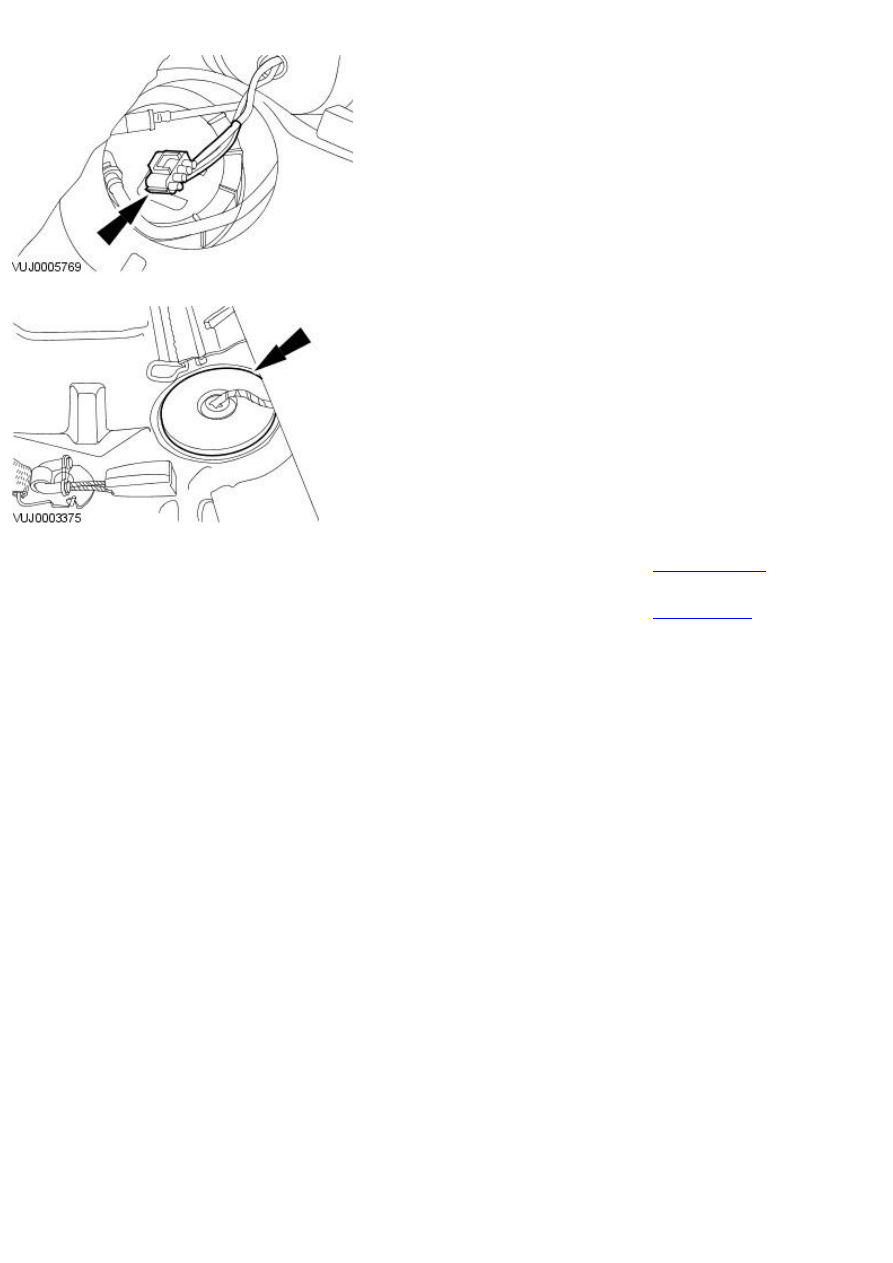
8. Connect the electrical connector.

9. Attach the wiring harness grommet.

10. Install the rear seat cushion.

For additional information, refer to: 

Rear Seat Cushion

 (501-10 Seating,

Disassembly and Assembly).

11. Connect the battery ground cable.

For additional information, refer to: 

Battery Connect

 (414-01 Battery,

Mounting and Cables, General Procedures).

Published: 11-May-2011

Fuel Tank and Lines - Fuel Tank2.5L NA V6 - AJV6/3.0L NA V6 - AJ27

Removal and Installation

Special Tool(s)

Powertrain Assembly Jack

HTJ1200-2

Removal

• W ARNINGS:

 Place the vehicle in a well ventilated, quarantined area and arrange No Smoking/Petrol Fumes signs about the vehicle.

 Before any work is carried out on the fuel system, ground the vehicle to earth and maintain the ground connection until the work is

complete.

 Do not smoke or carry lighted tobacco or an open flame of any type when working on or near any fuel related components. Highly

flammable vapors are always present and may ignite. Failure to follow these instructions may result in personal injury.

 Do not carry or operate cellular phones when working on or near any fuel related components. Highly flammable vapors are always

present and may ignite. Failure to follow these instructions may result in personal injury.

 This procedure involves fuel handling. Be prepared for fuel spillage at all times and always observe fuel handling precautions. Failure

to follow these instructions may result in personal injury.

• NOTE: Non federal market vehicles, refer to steps 29 and 32.

• NOTE: Federal market vehicles, refer to steps 23, 24, 28 and 31.

1. NOTE: All vehicles

Disconnect the battery ground cable.
For additional information, refer to: 

Battery Disconnect and Connect

(414-01 Battery, Mounting and Cables, General Procedures).

2. Remove the fuel filler cap.

3. De-pressurize the fuel system.

For additional information, refer to: Fuel System Pressure Release
(310-00 Fuel System - General Information, General Procedures).

4. Remove the rear seat cushion.

For additional information, refer to: 

Rear Seat Cushion

 (501-10 Seating,

Removal and Installation).

5. Detach the wiring harness grommet.

6. Detach the electrical connector.

7. Disconnect the electrical connector.

8. Using a suitable suction device drain the fuel tank filler pipe.

9. NOTE: To prevent the vehicle becoming unstable when the fuel tank has
been removed, install the vehicle tie down straps.

Raise and support the vehicle.
For additional information, refer to: 

Lifting

 (100-02 Jacking and Lifting,

Description and Operation).

10. Remove the driveshaft.

For additional information, refer to: Driveshaft (205-01 Driveshaft,
Removal and Installation).

11. Remove the front muffler.

For additional information, refer to: 

Front Muffler - 2.0L NA V6 -

AJV6/2.5L NA V6 - AJV6/3.0L NA V6 - AJ27

 (309-00 Exhaust System,

Removal and Installation).

12. Using the special tool, support the axle assembly.

13. Remove the axle assembly rear retaining bolt.

14. Remove the axle assembly front retaining bolts.

15. Using the special tool, lower the axle assembly approximately 75 mm

(2.95 inches).

16. Install the chain supplied with the special tool HTJ1200-2 to the axle

assembly front support bracket.

17. Install the securing strap supplied with the special tool HTJ1200-2 to

the axle assembly.


Content   ..  470  471  472  473   ..