Jaguar X-Type Sedan and Estate (Wagon). Manual - part 270
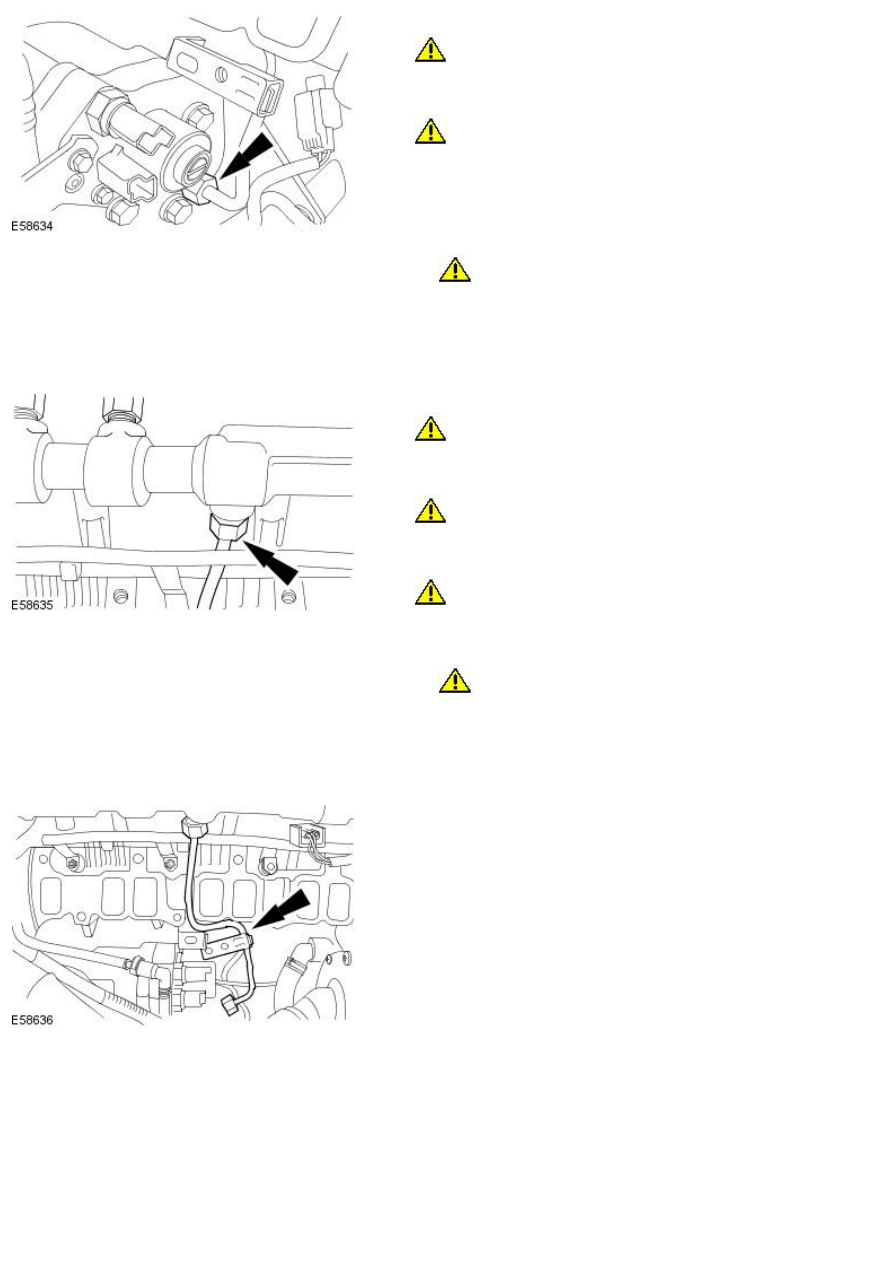
11. CAUTIONS:
Make sure the tool used to loosen the high pressure fuel supply line
union is used at the top of the union as this is where there is most
material. Failure to follow this instruction may result in damage to the
union.
Maintain pressure on the high pressure fuel supply line to keep the
olive in contact with the fuel injection pump cone while unscrewing the
union. Failure to follow this instruction may result in foreign matter
ingress to the fuel injection system.
Loosen the high-pressure fuel supply line at the fuel injection pump.
12.
CAUTION: Make sure that the high pressure fuel supply line
remains in contact with both the fuel injection pump and the fuel injection
supply manifold until both unions have been detached and cleaned. Failure
to follow this instruction may result in foreign matter ingress to the fuel
injection system.
Using the pneumatic vacuum gun, vacuum foreign material from the
high-pressure fuel supply line and the fuel injection pump.
13. CAUTIONS:
Make sure the tool used to loosen the high pressure fuel supply line
union is used at the top of the union as this is where there is most
material. Failure to follow this instruction may result in damage to the
union.
Maintain pressure on the high pressure fuel supply line to keep the
olive in contact with the fuel injection supply manifold cone while
unscrewing the union. Failure to follow this instruction may result in
foreign matter ingress to the fuel injection system.
While maintaining the pressure on the high pressure fuel supply
line, clean and vacuum foreign material from the line and union.
Loosen the high-pressure fuel supply line at the fuel injection supply
manifold.
14.
CAUTION: Make sure that the high pressure fuel supply line
remains in contact with both the fuel injection pump and the fuel injection
supply manifold until both unions have been detached and cleaned. Failure
to follow this instruction may result in foreign matter ingress to the fuel
injection system.
Using the pneumatic vacuum gun, vacuum foreign material from the high
pressure fuel supply line and the fuel injection supply manifold.
15. Remove and discard the high-pressure fuel supply line.
16. Using the pneumatic vacuum gun, vacuum foreign material from the
fuel injection pump and the fuel injection supply manifold.
17. Install blanking caps to the open threaded ports on the fuel injection
pump and the fuel injection supply manifold.
Vehicles built up to VIN:E43868