Isuzu Trooper (1998-2002 year). Manual - part 581
6C – 20 ENGINE FUEL
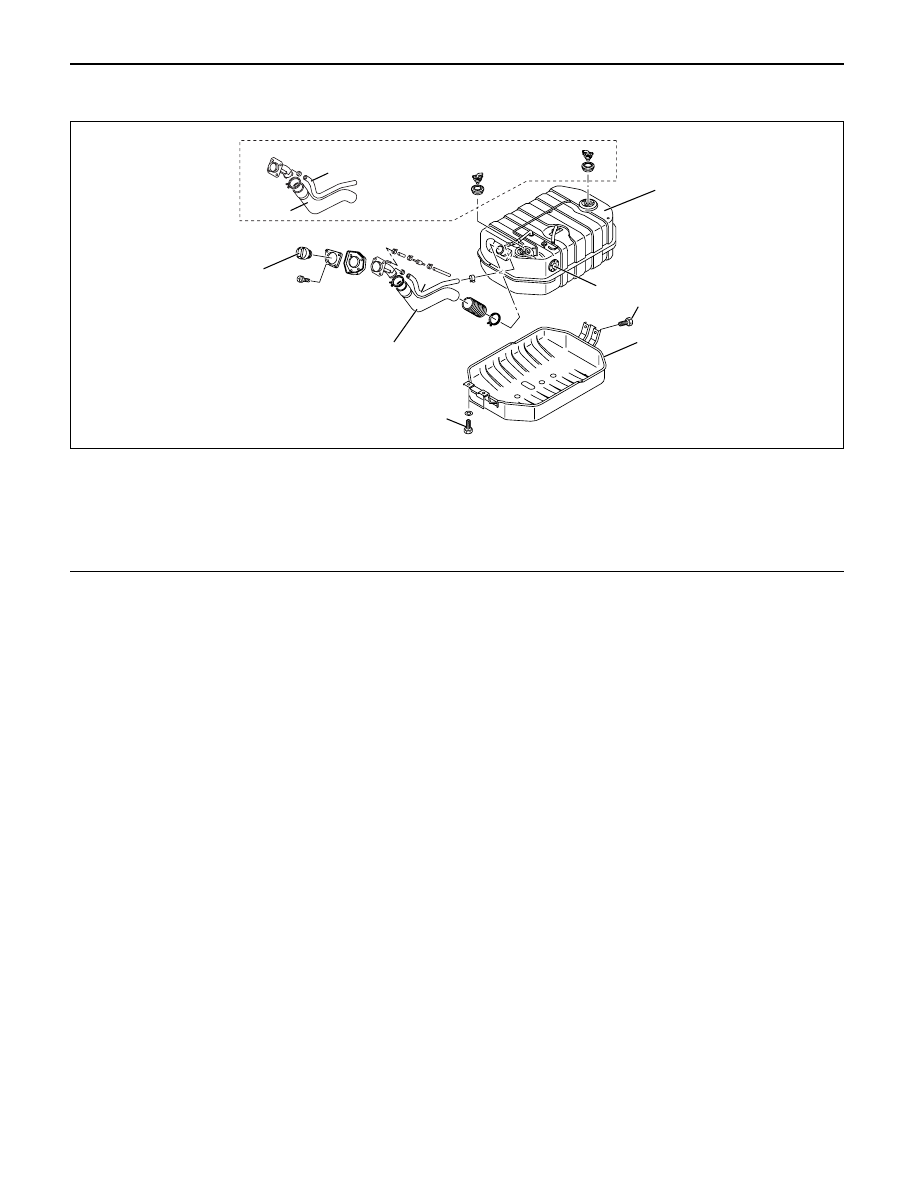
FUEL TANK
REMOVAL
1. Disconnect battery ground cable.
2. Remove fuel filler cap.
3. Drain fuel.
After drain the fuel tighten the drain plug with
specified torque.
Torque : 20 N·m (2.0 kg·m/14 lb ft)
4. Remove fuel filler hose and let air pull off hose.
5. Remove breather hose.
6. Remove fuel feed hose and fuel return hose.
7. Disconnect harness connector from fuel gauge unit.
8. Remove under cover.
9. Remove fuel tank assembly.
INSTALLATION
1. Fuel tank assembly.
1) Place a flange on right side of tank on the
bracket.
2) Install a flange to left side of the bracket from the
bottom, and tighten bolts to the specified torque.
Torque : 36 N·m (3.7 kg·m/27 lb ft)
2. Install fuel hose and fuel return hose.
3. Install the breather hose.
4. Reconnect harness connector to fuel gauge unit.
5. Install under cover.
6. Install fuel filler hose and let air pull off hose.
7. Fill fuel tank with fuel and tighten filler cap.
8. Reconnect battery ground cable.
1
2
4
8
6
7
8
Europe, Nicaragua, Argentina, Philippin
6
5
3
Legend
(1)
Fuel Tank Assembly
(2)
Gauge Unit
(3)
Bolt
(4)
Under Cover
(5)
Bolt
(6)
Fuel Filler Hose
(7)
Fuel Filler Cap
(8)
Breather Hose
140R200032