Content .. 1060 1061 1062 1063 ..
Isuzu Trooper (1998-2002 year). Manual - part 1062
SUN ROOF/CONVERTIBLE TOP
8I–5
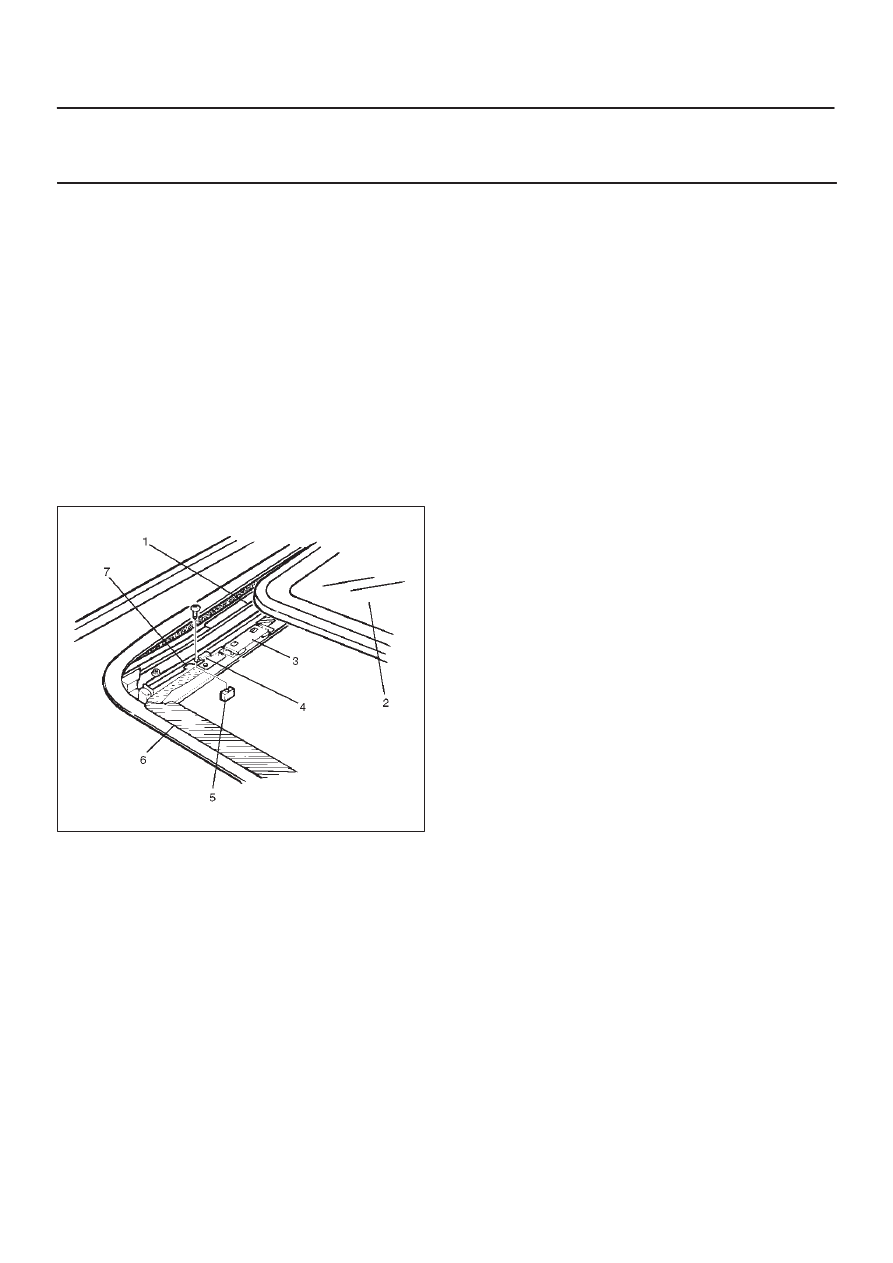
Legend
(1) Sunshade
(2) Sunshade Stopper
(3) Decoration Cover
(4) Sun Roof Deflector
Removal
1. Remove the decoration cover.
2. Open the sun roof half position, remove the sunshade
stopper screw and pull out the sunshade(6) until its
front side protrudes a little from the sun roof glass(2)
to remove the sunshade stopper.
3. Remove the sun roof deflector.
D
Refer to the Sun Roof Deflector in this section.
4. Open the sun roof completely.
5. Remove the sunshade guide rail stopper(5), and pull
out the sunshade up to the rail edge.
6. Remove the guide pin(4) in the sunshade through the
notch(7) of guide rail(1) and then draw the sunshade
out of the roof by pushing inward the retaining clips(3)
on both sides.
665RS008
Installation
To install, follow the removal steps in the reverse order.