Infiniti Q60 Coupe (2014 year). Manual - part 8
2-52
Instruments and controls
SIC4043
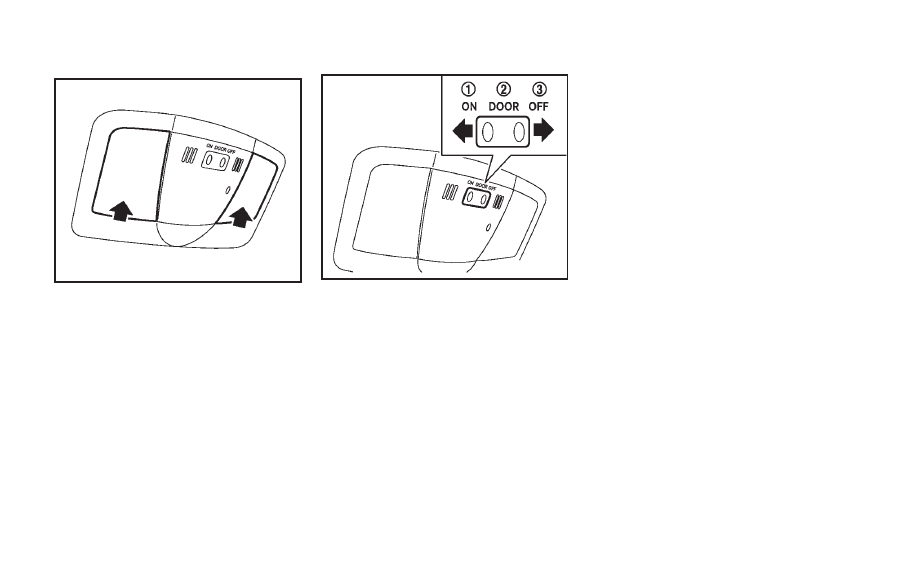
MAP LIGHTS
Push the button as illustrated to turn the
light on or off.
SIC4044
INTERIOR LIGHT CONTROL SWITCH
The interior light control switch has three
positions: ON, DOOR and OFF.
ON position
When the switch is in the ON position
*
1
the map lights will illuminate.
DOOR position
When the switch is in the DOOR position
*
2
, the map lights will illuminate under
the following conditions:
. ignition switch is switched to the OFF or
LOCK position
— remain on for about 15 seconds.
. doors are unlocked by pushing the
UNLOCK button on the Intelligent Key
or door handle request switch with the
ignition switch in the LOCK position
— remain on for about 15 seconds.
. any door is opened and then closed
with the ignition switch in the LOCK
position
— remain on for about 15 seconds.
. any door is opened with the ignition
switch in the ACC or ON position
— remain on while the door is opened.
When the door is closed, the lights
go off.
The lights will also turn off after a period
of time when the lights remain illuminated
after the ignition switch has been pushed
to the OFF or LOCK position to prevent the
battery from becoming discharged.
When the auto interior illumination is set
to the OFF position (see
“Vehicle informa-
tion and settings
” (P.4-9)), the lights will
illuminate under the following condition:
. any door is opened with the ignition
switch in any position
— remain on while the door is opened.
When the door is closed, the lights
INTERIOR LIGHTS