Infiniti QX56 (Z62). Manual - part 773
COOLER PIPE AND HOSE
HA-33
< REMOVAL AND INSTALLATION >
C
D
E
F
G
H
J
K
L
M
A
B
HA
N
O
P
COOLER PIPE AND HOSE
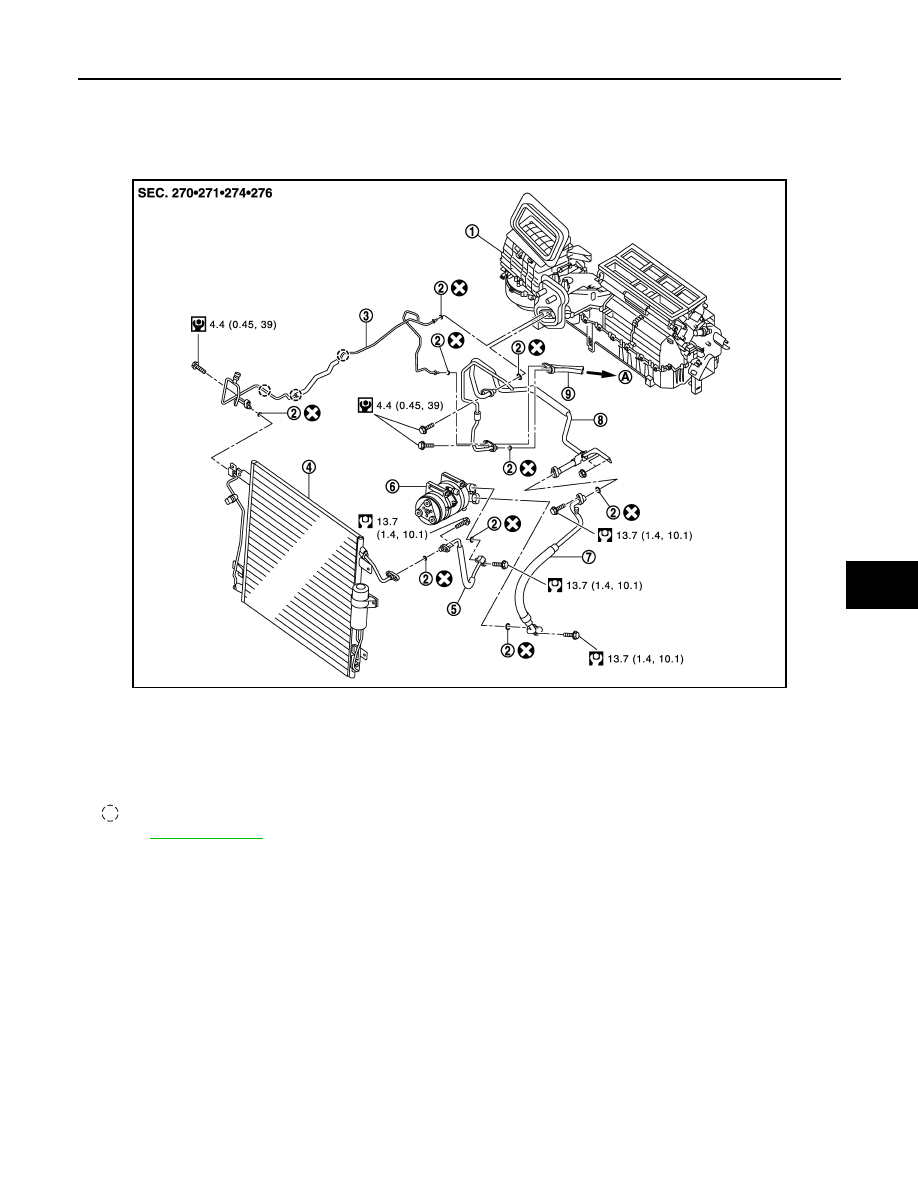
Exploded View
INFOID:0000000006276172
FRONT
JMIIA0623GB
1.
A/C unit assembly
2.
O-ring
3.
High-pressure pipe
4.
Condenser
5.
High-pressure flexible hose
6.
Compressor
7.
Low-pressure flexible hose
8.
Low-pressure pipe
9.
Rear cooler and heater pipe assem-
bly
A.
To rear A/C unit
:Clip
Refer to