Infiniti G37 Coupe. Manual - part 821
BODY SIDE TRIM
INT-15
< ON-VEHICLE REPAIR >
C
D
E
F
G
H
I
K
L
M
A
B
INT
N
O
P
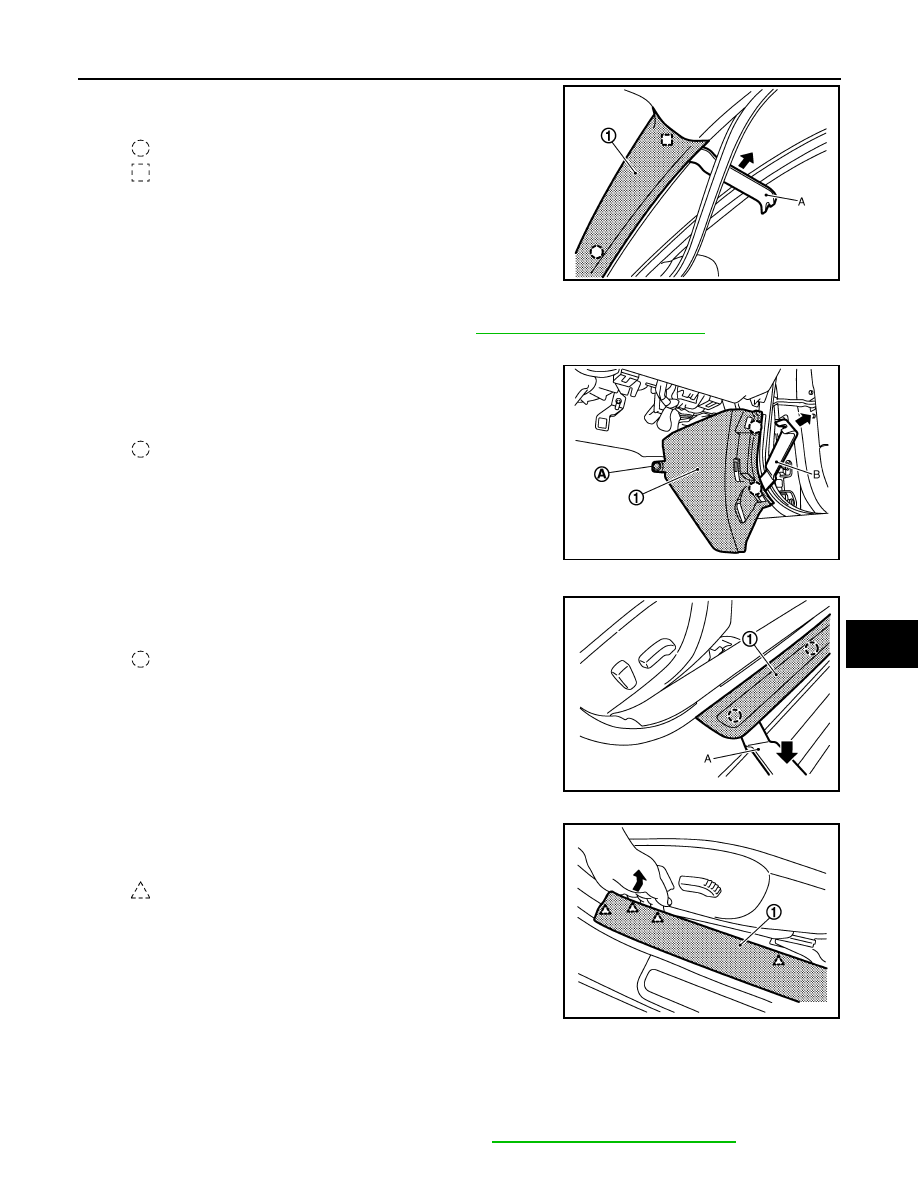
2.
Remove front pillar garnish fixing clip and metal clip with a
remover tool (A), and then remove front pillar garnish (1).
DASH SIDE FINISHER
1.
Remove instrument passenger lower cover. Refer to
IP-12, "Removal and Installation"
.
2.
Remove kicking plate inner.
3.
Remove clip (A).
4.
Remove dash side finisher fixing clips with a remover tool (B),
and then remove dash side finisher (1).
KICKING PLATE OUTER
Remove kicking plate outer fixing clips with a remover tool (A), and
then remove kicking plate outer (1).
KICKING PLATE INNER
1.
Pull up kicking plate inner, and disconnect pawls.
2.
Remove kicking plate inner (1).
BODY SIDE WELT
1.
Remove kicking plate inner.
2.
Remove body side welt.
REAR SIDE FINISHER
1.
Remove rear seat cushion and rear seatback. Refer to
SE-160, "Removal and Installation"
.
: Clip
: Metal clip
JMJIA0960ZZ
: Clip
JMJIA0961ZZ
: Clip
JMJIA0082GB
: Pawl
JMJIA0962ZZ