Infiniti G35 (V35) Sedan. Manual - part 819
INL-104
< SERVICE DATA AND SPECIFICATIONS (SDS)
SERVICE DATA AND SPECIFICATIONS (SDS)
SERVICE DATA AND SPECIFICATIONS (SDS)
SERVICE DATA AND SPECIFICATIONS (SDS)
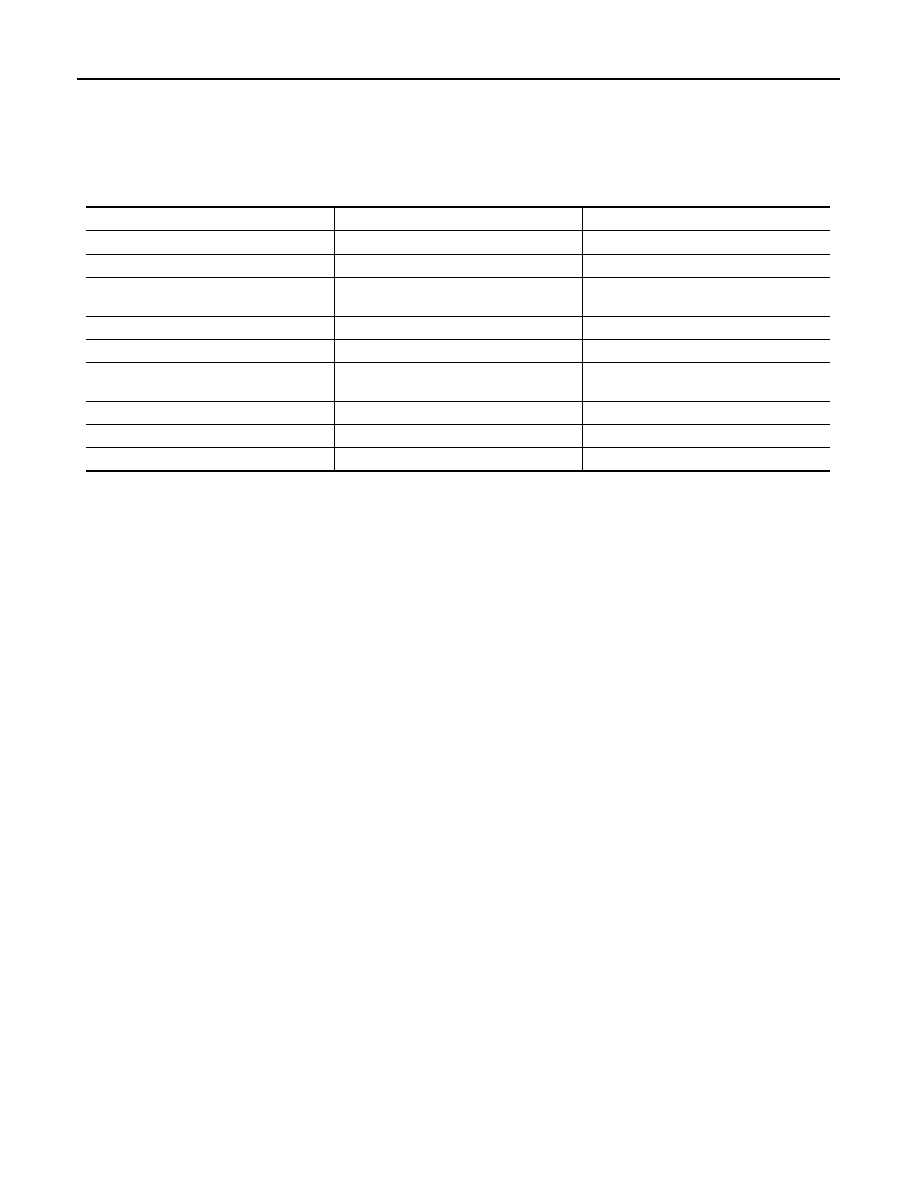
Bulb Specifications
INFOID:0000000000962628
Item
Type
Wattage (W)
Push-button ignition switch illumination
LED
—
Map lamp
Wedge
8
Center console indirect illumination
(Integrated into the map lamp assembly)
LED
—
Vanity mirror lamp
—
2
Glove box lamp
—
1.4
Cigarette lighter illumination
(Shared with ash tray illumination)
—
1.4
Step lamp-
Wedge
8
Personal lamp
Wedge
8
Trunk room lamp
Wedge
3.4