Infiniti FX35 / FX45. Manual - part 216
DOOR
BL-131
< SERVICE INFORMATION >
C
D
E
F
G
H
J
K
L
M
A
B
BL
N
O
P
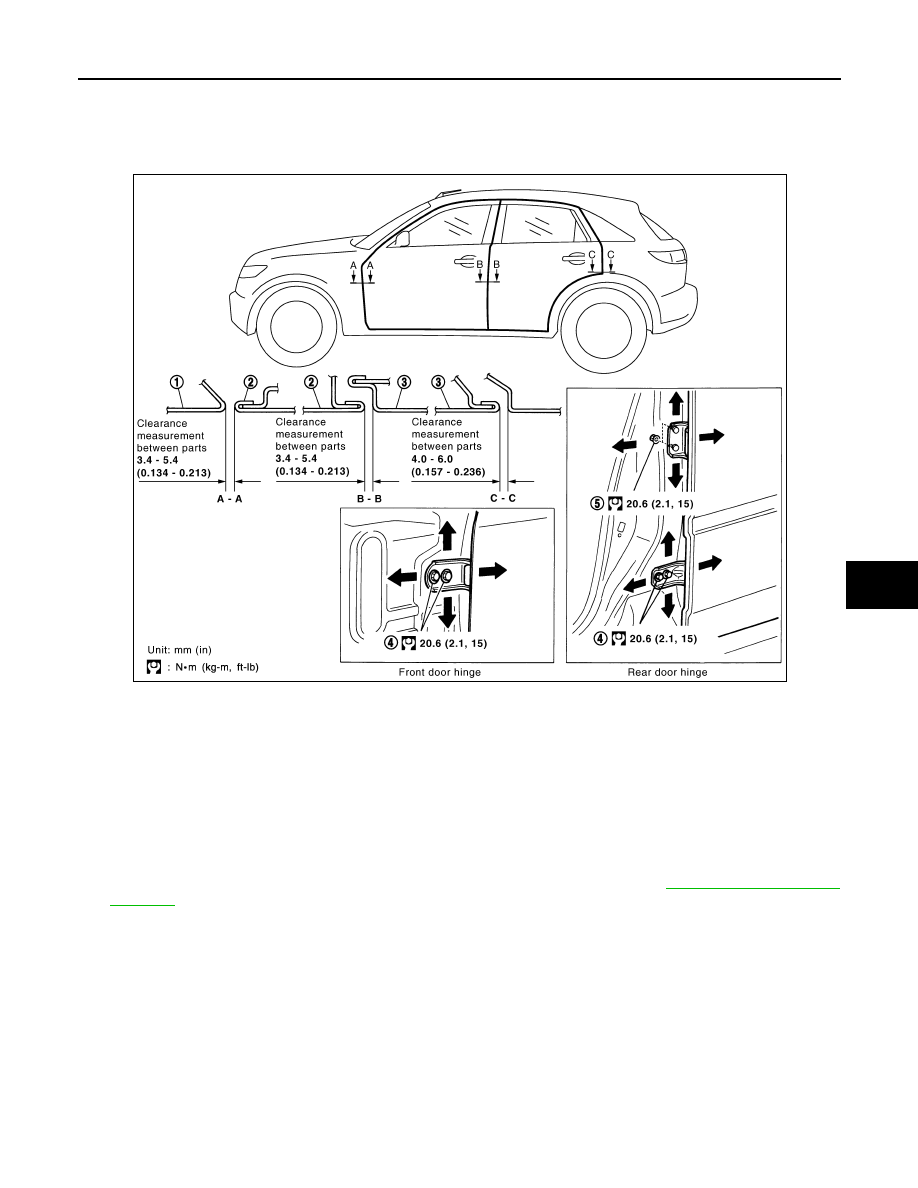
DOOR
Fitting Adjustment
INFOID:0000000001327873
FRONT DOOR
Longitudinal Clearance and Surface Height Adjustment at Front End.
Loosen the hinge mounting bolts. Raise the front door at rear end to adjust.
REAR DOOR
Longitudinal Clearance and Surface Height Adjustment at Front End.
1.
Remove the center pillar upper garnish and center pillar lower garnish. Refer to
2.
Accessing from inside the vehicle, loosen the mounting nuts. Open the rear door, and raise the rear door
at rear end to adjust.
STRIKER ADJUSTMENT
1.
Front fender
2.
Front door outer
3.
Rear door outer
4.
Bolt 5.
Nut
PIIA6059E