Infiniti FX35, FX50 (S51). Manual - part 1255


  Index      Infiniti     Infiniti FX35, FX50 (S51) - service repair manual 2010 year


Search            


Content   ..  1253  1254  1255  1256   ..


Infiniti FX35, FX50 (S51). Manual - part 1255


INT-22

< REMOVAL AND INSTALLATION >

FLOOR TRIM

5.

Remove foot grille (LH/RH). Refer to 

VTL-17, "FOOT GRILLE : Removal and Installation"

.

6.

Remove front seat belt floor anchor bolt (LH/RH). Refer to 

SB-8, "SEAT BELT BUCKLE : Exploded View"

.

7.

Remove center console assembly. Refer to 

IP-22, "Removal and Installation"

.

8.

Remove rear floor duct 1. Refer to 

VTL-19, "REAR FLOOR DUCT 1 : Removal and Installation"

.

9.

Remove instrument lower cover (LH/RH), instrument lower panel (LH/RH) and instrument side finisher
(LH/RH). Refer to 

IP-12, "Removal and Installation"

.

10. Remove yaw rate/side G sensor. Refer to 

BRC-136, "Removal and Installation"

.

11. Remove diagnosis sensor unit. Refer to 

SR-25, "Removal and Installation"

.

12. Remove console rear bracket. Refer to 

IP-22, "Removal and Installation"

.

13. Remove floor harness mounting clamps.

14. Remove dash side finisher (LH/RH), front and rear kicking plate inner (LH/RH) and center pillar lower gar-

nish (LH/RH). Refer to 

INT-17, "Removal and Installation"

.

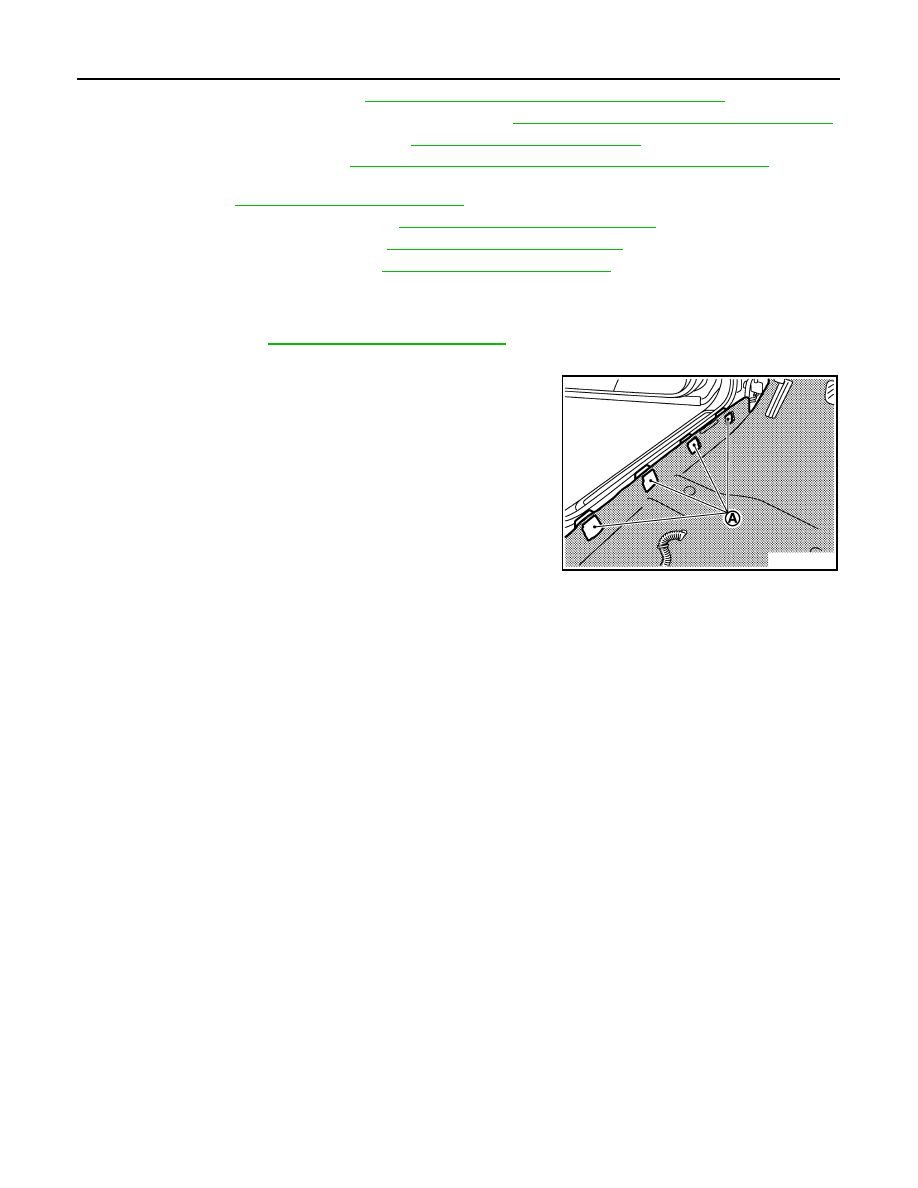
15. Remove floor trim mounting clips and fixing nuts.
16. Remove floor trim from floor trim fixing clips (A) and remove floor

trim.

INSTALLATION

Install in the reverse order of removal.

JMJIA1560ZZ

HEADLINING

INT-23

< REMOVAL AND INSTALLATION >

C

D

E

F

G

H

I

K

L

M

A

B

INT

N

O

P

HEADLINING

Exploded View

INFOID:0000000005240801

1.

Headlining assembly

2.

Assist grip

3.

Front roof finisher

4.

Lane camera cover

5.

Sun-visor assembly (RH)

6.

Sun-visor holder

7.

Sun-visor cap

8.

Sun-visor assembly (LH)

9.

Rear monitor assembly

JMJIA2064ZZ

INT-24

< REMOVAL AND INSTALLATION >

HEADLINING

Removal and Installation

INFOID:0000000005240802

REMOVAL

1.

Remove the rear seat cushion. Refer to 

SE-94, "Removal and Installation"

.

2.

Remove the rear seatback. Refer to 

SE-94, "Removal and Installation"

.

3.

Remove front seat belt anchor bolt (LH/RH). Refer to 

SB-8, "SEAT BELT BUCKLE : Exploded View"

.

4.

Remove rear seat belt anchor bolt (LH/RH). Refer to 

SB-15, "SEAT BELT BUCKLE : Exploded View"

.

5.

Remove front pillar garnish (LH/RH), front kicking plate inner (LH/RH), center pillar lower garnish (LH/RH),
center pillar upper garnish (LH/RH), front body side welt (LH/RH), rear body side welt (LH/RH), rear kick-
ing plate inner (LH/RH). Refer to 

INT-17, "Removal and Installation"

.

6.

Remove luggage side lower finisher (LH/RH), luggage side upper finisher (LH/RH). Refer to 

INT-29,

"Removal and Installation"

.

7.

Remove the sun-visor (LH). 
• Remove sun-visor cap. 
• Remove mounting screws.
• Disconnect vanity mirror lamp harness connector (with vanity mirror lamp)

8.

With a remover tool, disengage the driver side front roof finisher
(1) fixing pawls and metal clips, disconnect the harness connec-
tor (A) and then remove the front roof finisher.

9.

Remove the lane camera cover mounting pawls with a remover
tool (A), then remove the lane camera cover (1).

10. Disconnect inside mirror harness connectors.

11. Remove the sun-visor (RH). 

• Remove sun-visor cap. 
• Remove mounting screws.
• Disconnect vanity mirror lamp harness connector (with vanity mirror lamp)

10. Rear hidden clip

11. Roof insulator

12. Dual lock fastener

13. Roof console assembly

14. Roof console bracket

15. Sunroof module plate

16. Roof console

17. Map lamp assembly

18. Map lamp bulb (LH/RH)

19. Map lamp lens (LH/RH)

20. Personal lamp bracket (LH/RH)

21. Personal lamp bulb (LH/RH)

22. Personal lamp finisher (LH/

RH)

23. Personal lamp lens (LH/RH)

: Clip

: Pawl

: Metal clip

: Vehicle front

: Pawl

: Metal clip

: Vehicle front

JMJIA2073ZZ

: Pawl

JMJIA1567ZZ

HEADLINING

INT-25

< REMOVAL AND INSTALLATION >

C

D

E

F

G

H

I

K

L

M

A

B

INT

N

O

P

12. Remove the passenger side front roof finisher mounting pawls

and metal clips with a remover tool (A), then remove the front
roof finisher (1).

13. Remove assist grips.

• With a small flat-bladed screwdriver (A), press the upper side

mounting assist grip cap (1) and pull up to remove the mount-
ing assist grip cap from assist grip (2).

• Once the mounting assist grip cap (1) is removed, pull out the

assist grip (2) to remove.

14. Disengage the rear monitor finisher fixing clips and pawls with a

remover tool (A), disconnect the harness and then remove the
rear monitor finisher (1). (With rear monitor assembly only)

: Pawl

: Metal clip

JMJIA1564ZZ

JMJIA1379ZZ

JMJIA1380ZZ

JMJIA2300ZZ


Content   ..  1253  1254  1255  1256   ..