Infiniti EX35. Manual - part 787
EXL-192
< ON-VEHICLE REPAIR >
[XENON TYPE]
FRONT COMBINATION LAMP
ON-VEHICLE REPAIR
FRONT COMBINATION LAMP
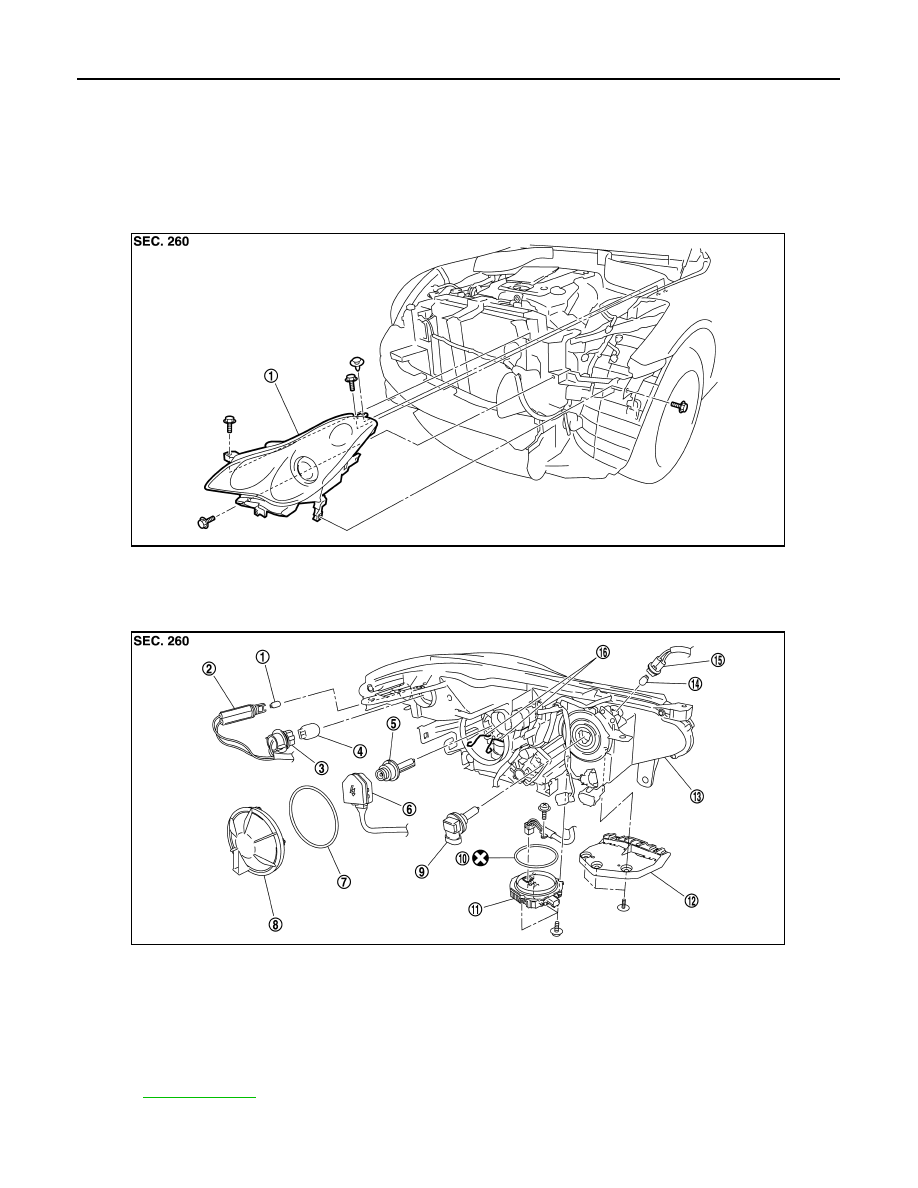
Exploded View
INFOID:0000000003135395
REMOVAL
DISASSEMBLY
1.
Front combination lamp
JPLIA0916ZZ
1.
Front side marker lamp bulb
2.
Front side marker lamp bulb socket
3.
Front turn signal lamp bulb socket
4.
Front turn signal lamp bulb
5.
Xenon bulb
6.
Xenon bulb socket
7.
Seal packing
8.
Resin cap
9.
Headlamp (HI) bulb
10.
Seal packing
11. HID control unit
12. Bumper bracket
13.
Headlamp housing assembly
14. Parking lamp bulb
15. Parking lamp bulb socket
16.
Retaining spring
Refer to
for symbols not described above.
JPLIA0917ZZ