Honda Odyssey 2004. Manual - part 373
02
01
S0X4AZAJ18533231701KBAT00
’02-04 models
20-134
20-134
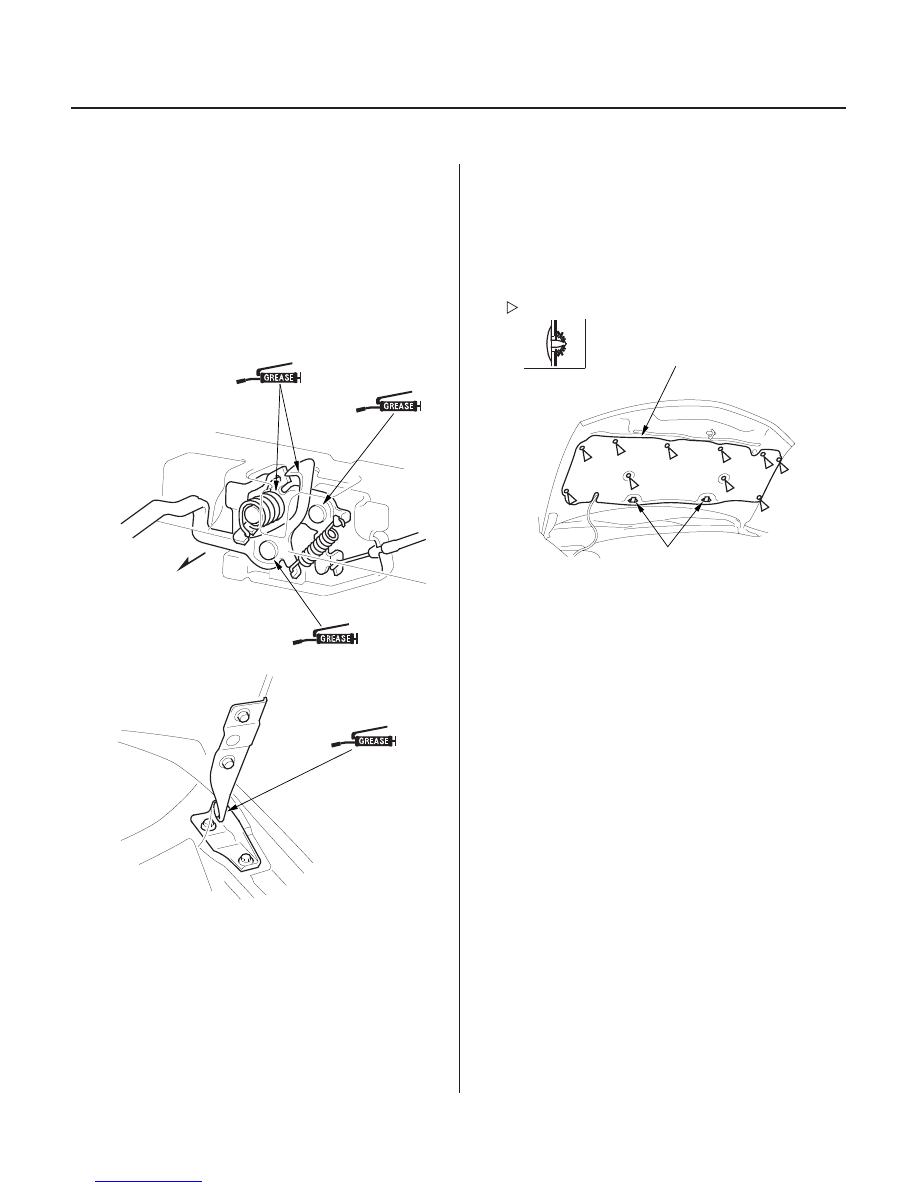
Hood
Adjustment (cont’d)
Hood Insulator Replacement
Forward
Fastener Locations
: Clip, 10
A
B
4. Tighten each bolt securely.
5. Check that the hood opens properly and locks
securely.
6. Apply touch-up paint to the hinge mounting bolts
and around the hinges.
7. Remove the front bulkhead cover (see page 20-142),
and Apply multipurpose grease to the hood latch
and hood hinge as indicated by the arrows.
1. Using a clip remover, detach the clips, then release
the hood insulator (A) from the hooks (B). Take care
not to bend the insulator and not to scratch the
hood.
2. Install the insulator in the reverse order of removal,
and note thses items:
• Replace any damaged clips.
• Push the clips into place securely.
03/07/29 10:03:35 61S0X050_200_0136