Dodge Caliber. Manual - part 1095


  Index      Dodge     Dodge Caliber - service repair manual 2007 year


Search            


Content   ..  1093  1094  1095  1096   ..


Dodge Caliber. Manual - part 1095


49. Remove maniverter/exhaust manifold bolts.

50. Remove maniverter/exhaust manifold to left of engine.

51. Hoist up.

52. Remove front mount through bolt.

53. Remove crossmember.

54. Remove front mount bracket.

55. Remove rear mount through bolt.

56. Remove rear mount.

57. Remove rear mount bracket.

58. Pull engine forward and support.

59. Remove PTU assembly if equiped (Refer to 21 - TRANSMISSION/TRANSAXLE/POWER TRANSFER UNIT -

REMOVAL).

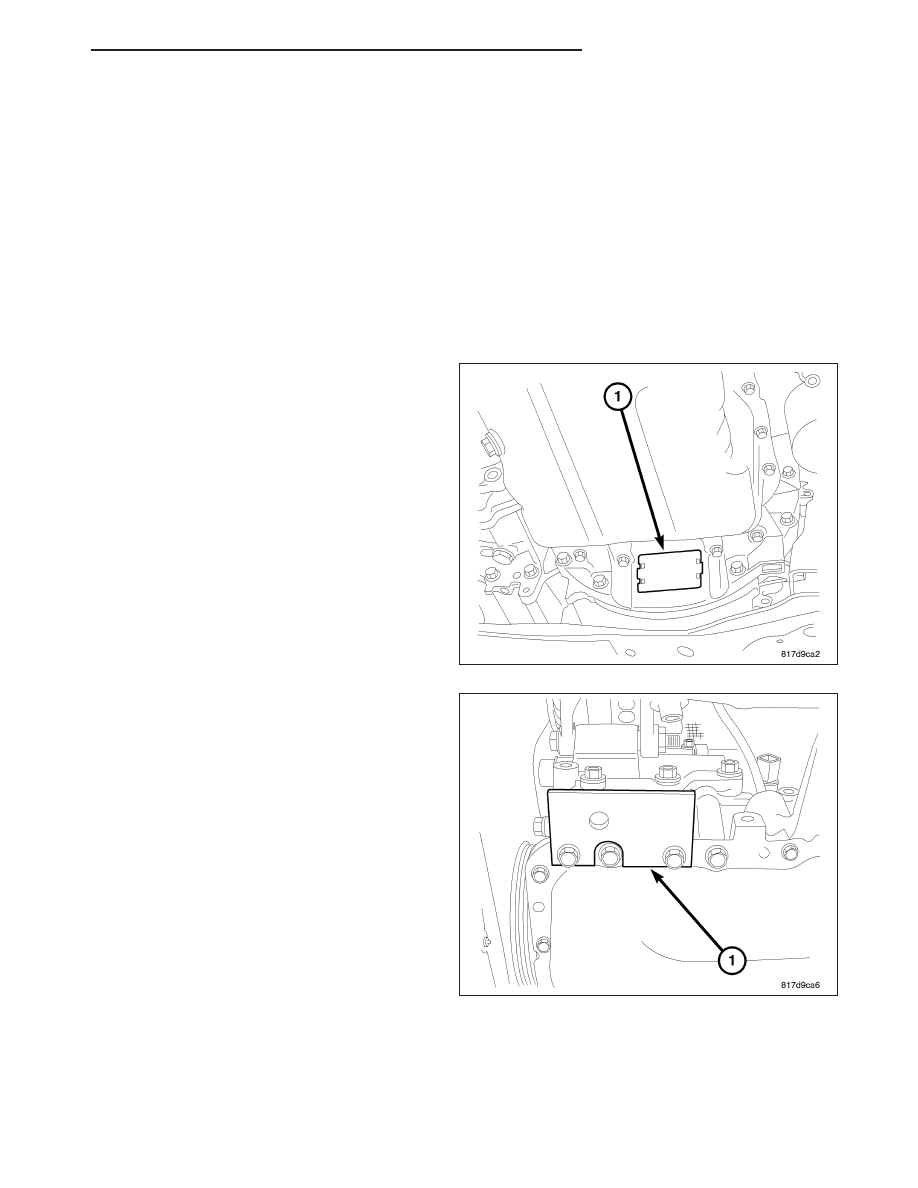
60. Remove inspection cover (1) and mark torque

converter to flywheel.

61. Remove torque converter bolts.

62. Remove lower bellhousing bolts.

63. Remove A/C lines from compressor and remove

A/C compressor.

64. Remove A/C mounting bracket.

65. Install Adapter 9704 (1).

66. Remove generator and lower idler pulley.

67. Disconnect transmission electrical connector.

68. Disconnect CKP electrical connector.

69. Remove coolant hoses at transaxle cooler.

70. Remove transaxle cooler lines from cooler.

PM

ENGINE 2.4L WORLD

9 - 1667

71. Position dolly (4,8) under engine and lower vehicle.

WARNING: Safety straps MUST be used.

72. Install safety straps (6,9).

73. Remove PCM bracket and set aside.

74. Remove left engine mount through bolt (3).

9 - 1668

ENGINE 2.4L WORLD

PM

75. Remove right engine mount through bolt (4).

76. Raise vehicle away from engine and transaxle.

77. Separate engine from transaxle.

INSTALLATION - ENGINE ASSEMBLY

1. Position engine and transmission assembly under vehicle and slowly lower the vehicle over the engine/transaxle

assembly.

2. Continue lowering vehicle until engine/transaxle aligns to mounting locations. Install mounting bolts at the right

and left engine/transaxle mount bolts and Tighten bolts to 118 N·m (87 ft. lbs.).

3. Remove safety straps from engine/transaxle assembly. Slowly raise vehicle enough to remove the engine dolly

and cradle.

PM

ENGINE 2.4L WORLD

9 - 1669

4. Remove Adapter 9704 (1).

5. Install pcm bracket.

6. Install maniverter assembly and upper lower heat

shields.

7. Install oxygen sensor and connect electrical con-

nector.

8. Install coolant manifold assembly.

9. Install transaxle linkage and adjust as necessary.

10. Install transaxle vent hose.

11. Connect transaxle electrical connectors.

12. Install Ground strap near right strut tower.

13. Raise vehicle.

14. Pull engine forward and restrain engine.

NOTE: Be sure to install O-ring prior to installing
PTU assembly.

15. Install PTU.

16. Remove engine restraint.

17. Install front mount bracket and tighten bolts.

18. Install frame cross member.

19. Install front engine mount.

20. Install rear mount bracket.

21. Install rear mount and tighten bolts.

22. Connect CKP electrical connector.

23. Install maniverter to exhaust pipe bolts (1) and

tighten bolts.

24. Align driveshaft marks and install and heat shield.

25. Install generator

26. Install A/C bracket.

27. Install A/C lines on compressor and install com-

pressor.

28. Install lower bell housing bolts and tighten bolts.

29. Align torque converter and flex plate mark. Install

torque converter bolts and tighten.

9 - 1670

ENGINE 2.4L WORLD

PM


Content   ..  1093  1094  1095  1096   ..