Content .. 1082 1083 1084 1085 ..
Dodge Caliber. Manual - part 1084
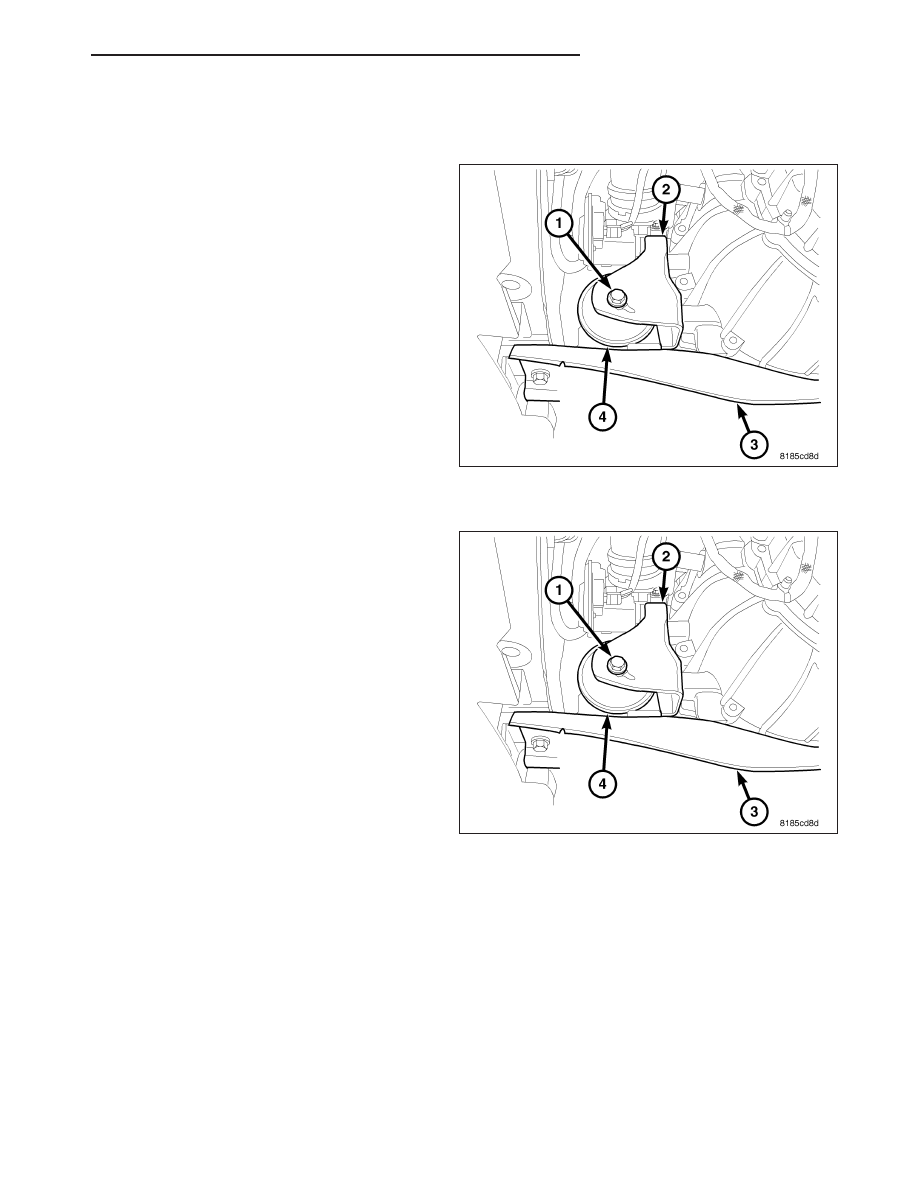
MOUNT-FRONT
REMOVAL
1. Raise vehicle.
2. Remove fore aft member (3) to mount (4) bolts.
3. Remove mount through bolt (1).
4. Remove fore aft member (3) mounting bolts and
remove.
5. Remove front mount (4).
INSTALLATION
1. Install mount (4) and tighten bolts.
2. Install fore aft member (3) and tighten bolts.
3. Install mount through bolt (1) and tighten.
4. Lower vehicle.
PM
ENGINE 2.0L WORLD
9 - 1623