Dodge Caliber. Manual - part 1075


  Index      Dodge     Dodge Caliber - service repair manual 2007 year


Search            


Content   ..  1073  1074  1075  1076   ..


Dodge Caliber. Manual - part 1075


INSTALLATION

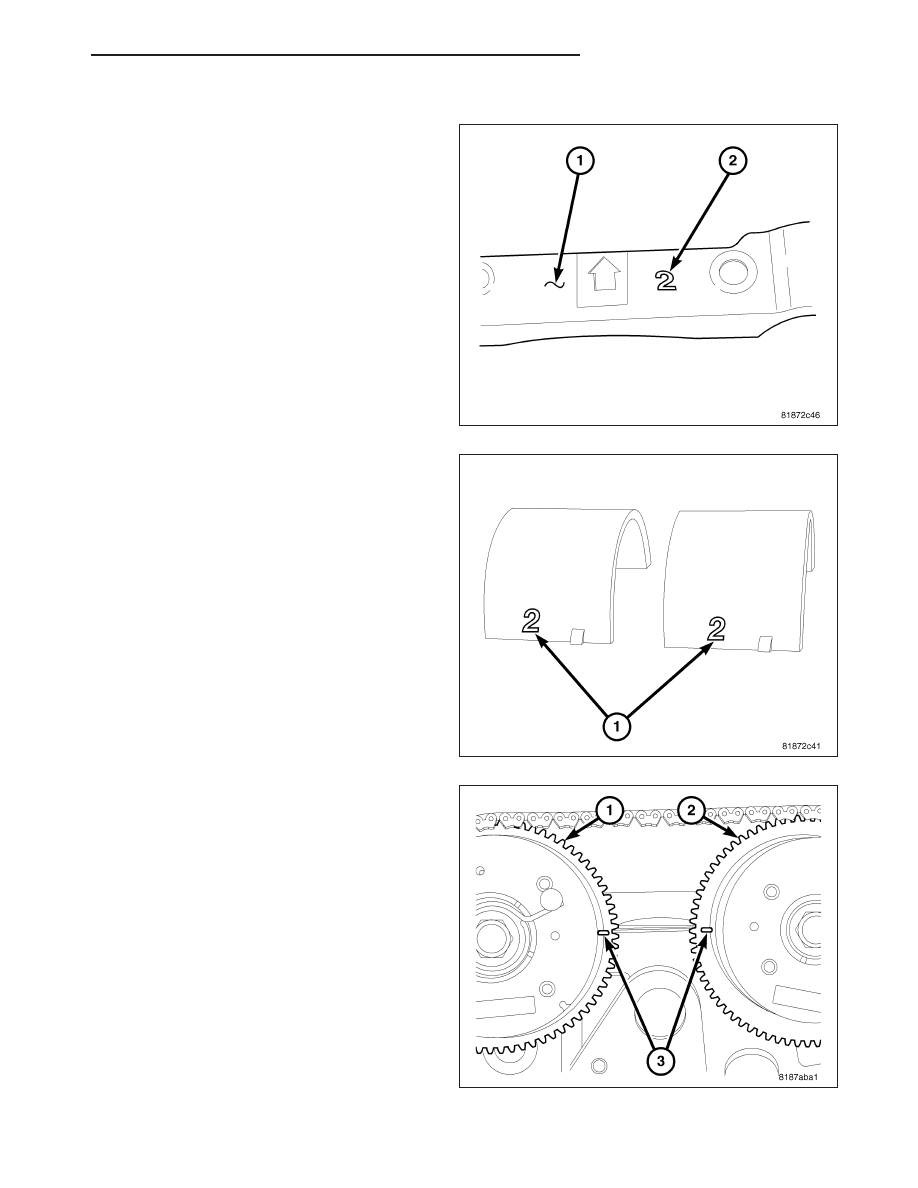
1. Identify which front cam cap (1) is installed on the

engine you are working on.

2. The cam cap (1) is numbered (2) either one, two,

or three, this corresponds to the select fit bearing
to use.

3. Install the corresponding select fit bearing that will

also be numbered (1) one, two, or three.

4. Oil all of the camshaft journals with clean engine

oil.

5. Install exhaust camshaft and position on bearing

journals in the cylinder head.

6. Align exhaust cam timing mark so it is parallel to

the cylinder head as shown.

PM

ENGINE 2.0L WORLD

9 - 1587

7. Install timing chain onto exhaust cam sprocket

making sure that the timing marks (1) on the
sprocket and chain are aligned.

8. Install intake camshaft by raising the rear of the

camshaft upward and roll the sprocket into the
chain.

9. Align the timing marks (1) on the intake cam

sprocket with the mark in the chain.

10. Position the intake camshaft into the bearing jour-

nals in the cylinder head.

11. Verify that the timing marks (1) are aligned on

both camshafts and that the timing marks (3) are
parallel with the cylinder head.

CAUTION: Install the front intake and exhaust camshaft bearing cap last. Ensure that the dowels are seated
and follow torque sequence or damage to engine could result.

9 - 1588

ENGINE 2.0L WORLD

PM

NOTE: If the front camshaft bearing cap is broken, the cylinder head MUST be replaced.

12. Install intake and exhaust camshaft bearing caps

slowly torque bolts in the sequence shown.

13. Install the front intake and exhaust bearing cap

and torque bolts in the sequence shown.

14. Verify that all timing marks are aligned.

15. Remove allen wrench from timing chain tensioner.

16. Remove locking wedge 9701.

17. Apply MOPAR

T

thread sealant to timing tensioner

plug and Install.

18. Install right splash shield.

19. Install cylinder head cover (Refer to 9 - ENGINE/

CYLINDER HEAD/CYLINDER HEAD COVER(S) -
INSTALLATION).

20. Install engine cover.

21. Connect negative battery cable.

22. Fill cooling system.

23. Fill with oil.

24. Start engine and check for leaks.

PM

ENGINE 2.0L WORLD

9 - 1589

COVER-CYLINDER HEAD

REMOVAL

1. Remove engine cover.

2. Disconnect ignition coil electrical connectors.

3. Disconnect PCV and make-up air hoses from cylin-

der head cover.

4. Use compressed air to blow dirt and debris off the

cylinder head cover prior to removal.

5. Remove cylinder head cover bolts.

6. Remove cylinder head cover from cylinder head.

INSTALLATION

1.

Install new cylinder head cover gaskets (1,2).

9 - 1590

ENGINE 2.0L WORLD

PM


Content   ..  1073  1074  1075  1076   ..