Dodge Nitro. Manual - part 444


  Index      Dodge     Dodge Nitro - service repair manual 2007 year


Search            


Content   ..  442  443  444  445   ..


Dodge Nitro. Manual - part 444


1. Using a trim stick C-4755 or equivalent, remove the headliner molding.  

2. For the upper lift gate adjustments, loosen the hinge nuts (2) and bolts (3) but do not remove. Adjust to 

specifications, see SPECIFICATIONS.  

3. Apply body sealer on the hinge to body mating surface.  

4. Tighten the hinge bolts to 28.5 N.m (21 ft. lbs.).  

5. Tighten the hinge nuts to 28.5 N.m (21 ft. lbs.). 

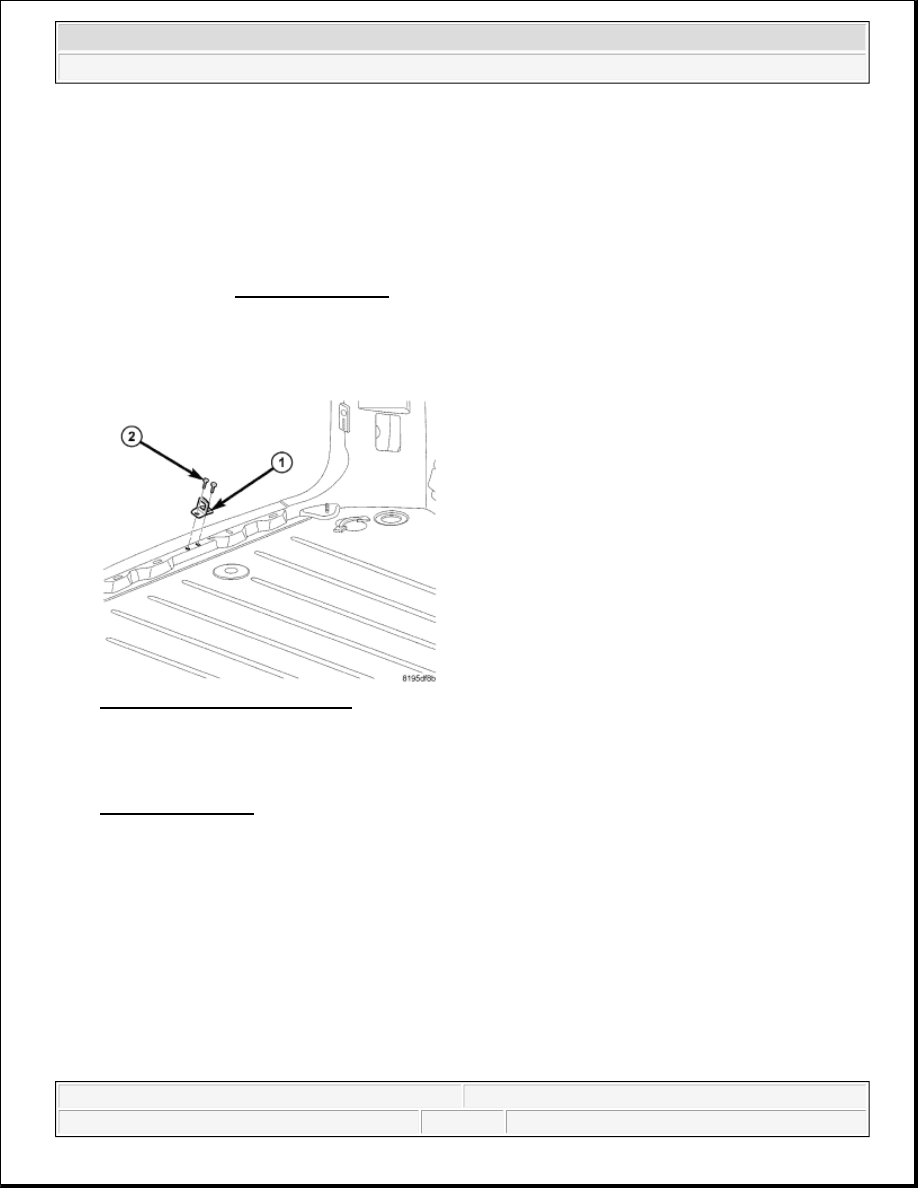
Fig. 432: Lift Gate Latch Striker 
Courtesy of CHRYSLER LLC 

6. Remove the rear door scuff plate.  

7. For the lower lift gate adjustments, loosen the striker screws (2) and adjust to specifications, see 

SPECIFICATIONS.  

8. Tighten the striker screws to 28 N.m (20.5 ft. lbs.).  

9. Install the rear door scuff plate.  

10. Position the headliner molding and seat fully.  

Up/Down and Left/Right 

NOTE:

The position of the lift gate can be adjusted upward or downward by the use of 
slots in the hinge. An inward or outward adjustment is achieved by use of slots 
in the body. If an inward or outward adjustment is needed, use a body sealer on 
the hinge to body mating surface.


2007 Dodge Nitro R/T 

2007 ACCESSORIES AND EQUIPMENT Body - Nitro


Fig. 433: Lift Gate/Hinge 
Courtesy of CHRYSLER LLC 

1. Loosen the hinge to lift gate bolts (2) but do not remove. 

Fig. 434: Lift Gate Latch Striker 
Courtesy of CHRYSLER LLC 

2. Remove the rear door scuff plate.  

3. Loosen the striker screws (2).  

4. Adjust the lift gate up/down position to specifications, see SPECIFICATIONS


2007 Dodge Nitro R/T 

2007 ACCESSORIES AND EQUIPMENT Body - Nitro


Fig. 435: Lift Gate/Hinge 
Courtesy of CHRYSLER LLC 

5. Apply body sealer on the hinge to lift gate mating surface.  

6. Tighten the hinge to lift gate bolts to 28.5 N.m (21 ft. lbs.). 

Fig. 436: Lift Gate Latch Striker 
Courtesy of CHRYSLER LLC 

7. Confirm the lower lift gate in/out position and tighten the striker screws to 28 N.m (20.5 ft. lbs.).  

8. Install the lift gate trim scuff plate and install the screws.  

PANEL - LIFTGATE TRIM 

REMOVAL 

PANEL - LIFTGATE TRIM 


2007 Dodge Nitro R/T 

2007 ACCESSORIES AND EQUIPMENT Body - Nitro


Fig. 437: Liftgate Trim Panel 
Courtesy of CHRYSLER LLC 

1. Remove two bolts (2) from the lower trim panel (3).  

2. Using a trim stick C-4755 or equivalent, release the fasteners at all of the locations around the trim panel 

(3).  

3. Lift the trim panel (3) from the lift gate (1).  

INSTALLATION 

PANEL - LIFTGATE TRIM 

Fig. 438: Liftgate Trim Panel 
Courtesy of CHRYSLER LLC 

1. Align and install the trim panel (3) to the lift gate (1), use hand pressure to seat all of the fasteners around 

the trim panel (3).  

2. Install the two bolts (2) to the lower trim panel (3) and tighten to 7 N.m (65 in. lbs.).  


2007 Dodge Nitro R/T 

2007 ACCESSORIES AND EQUIPMENT Body - Nitro


Content   ..  442  443  444  445   ..