DAF CF65, CF75, CF85 Series . Manual - part 223


  Index      DAF     DAF CF65, CF75, CF85 Series - service repair manual


Search            


Content   ..  221  222  223  224   ..


DAF CF65, CF75, CF85 Series . Manual - part 223


©

 200324

4-7

Removal and installation

PE ENGINE

CF65/75/85 series

2

5

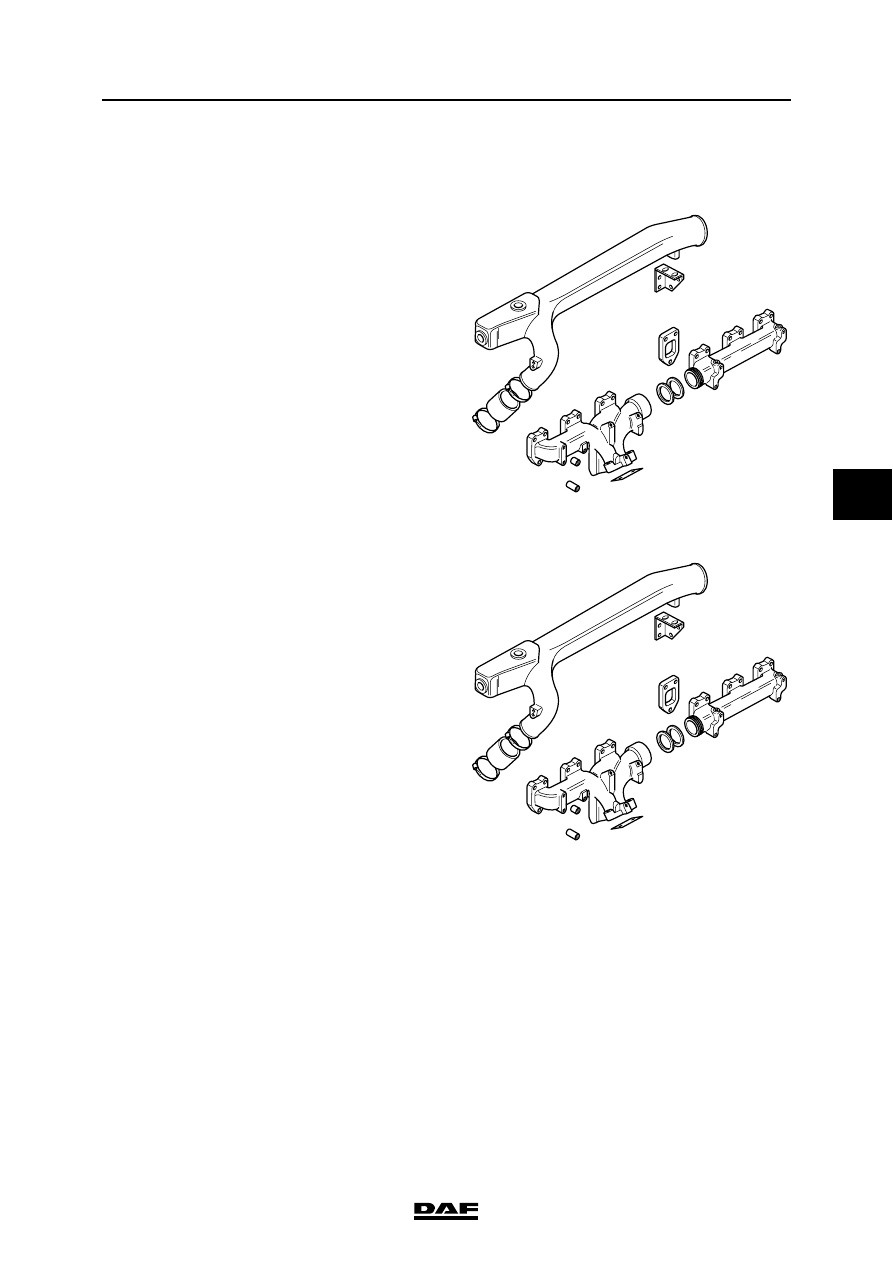
4.7 REMOVAL AND INSTALLATION, EXHAUST MANIFOLD

Removing the exhaust manifold
1.

Remove the intake air pipe between the 

turbocharger and the air cooler.

2.

Remove the compressor pipe.

3.

Remove the turbocharger heat shields.

4.

Remove the air inlet hose.

5.

Remove the exhaust brake.

6.

Remove the heat shields from the exhaust 

manifold.

7.

Remove the oil supply and oil discharge 

pipes from the turbocharger.

8.

Remove the attachment bolts from the 

exhaust manifold and remove it.

Installing the exhaust manifold
1.

Fit new gaskets to the exhaust manifold and 

install the manifold. Fit the gasket with the 

steel side towards the manifold. Tighten the 

attachment bolts with the spacer sleeves to 

the specified torque. See "Technical data".

2.

Fit the heat shields of the exhaust manifold 

and tighten the attachment bolts to the 

specified torque. See "Technical data".

3.

Fit the oil discharge pipe for the 

turbocharger.

4.

Spray clean engine oil into the oil supply of 

the turbocharger and fit the oil supply pipe.

5.

Fit the compressor pipe.

6.

Fit the inlet air pipe between the 

turbocharger and the air cooler.

7.

Fit the exhaust brake.

8.

Fit the air inlet hose.

9.

Fit the heat shields for the turbocharger. 

Tighten the attachment bolts to the specified 

torque. See "Technical data". 

M200964

M200964

PE ENGINE

4-8

©

 200324

Removal and installation

5

CF65/75/85 series

2

4.8 REMOVAL AND INSTALLATION, CYLINDER HEAD

}

When the engine or parts thereof are 

opened, dirt may enter. This may 

cause serious damage to the engine. 

Therefore, the engine should be 

cleaned thoroughly before any parts 

are opened.

Removing the cylinder heads
1.

Disconnect any wiring around the engine 

which is relevant for the removal of the 

cylinder heads.

2.

Disconnect the inlet pipe from the 

turbocharger to the air cooler.

3.

Disconnect the compressor pipe from the air 

intake pipe to the compressor.

4.

Slacken the tensioner of the air-conditioning 

compressor, if fitted.

5.

Remove the attachment bolts of the air-

conditioning compressor mounting bracket, if 

fitted.

6.

Remove the heat shields from the exhaust 

manifold.

7.

Remove the attachment bolts from the 

exhaust manifold and remove the manifold 

and the turbocharger from the cylinder 

heads.

8.

Remove the coolant filter, if fitted.

9.

Disconnect the fuel leak-off pipe between the 

fuel filter and the fuel leak-off pipe on the inlet 

manifold.

10. Disconnect the fuel filter assembly from the 

coolant pipe.

11. Disconnect both sets of injector pipes.

12. Remove the coolant pipe together with the 

thermostat housing.

13. Remove the inlet manifold attachment bolts 

and remove the entire manifold from the 

cylinder heads.

14. Remove the valve covers.

15. To remove the injectors and the clamping 

pieces, only use the special tool 

(DAF no. 1329412).

©

 200324

4-9

Removal and installation

PE ENGINE

CF65/75/85 series

2

5

16. Remove the valve gear.

17. Remove the push rods.

18. Remove the valve sleeve.

Note:

Due to the sealant used on the cylinder head 

bolts, the untightening torque of the cylinder 

head bolts can be substantial!

19. Remove the cylinder head bolts in the 

reverse order to that shown.

20. Remove the cylinder heads from the cylinder 

block.

21. Remove any remnants of gasket from the 

cylinder heads and the cylinder block.

22. Check the sealing surfaces of the cylinder 

block.

23. Check the threaded holes in the cylinder 

block for damage and cracking.

24. Using the special tool (DAF no. 0694795), 

check that the amount the cylinder liner 

protrudes above the cylinder block is within 

tolerance. See "Technical data".

25. Check the cylinder head. See "Inspection 

and adjustment".

Installing the cylinder heads
1.

Clean the threaded holes in the cylinder 

block using a screw tap.

Note:

Threaded holes not properly cleaned may 

lead to too low a pre-tension of the cylinder 

head bolts, causing leakage.

2.

Clean and degrease the sealing surfaces of 

the cylinder heads and the cylinder block.

3.

Insert both guide pins (DAF no. 0694912) 

into the threaded holes of the cylinder block.

12

1

7

3

8

9

4

5

10

11

13

14

16

17

15

6

M200734

2

M2 00 100

PE ENGINE

4-10

©

 200324

Removal and installation

5

CF65/75/85 series

2

4.

Place the new gasket(s) on the cylinder 

block, making sure that the letters TOP (1) 

are visible. The cylinder head gasket must 

not be retightened.

Note:

Always replace the cylinder head bolts. See 

"Technical data".

5.

Place the cylinder head(s) on the cylinder 

block and hand-tighten a few new cylinder 

head bolts.

Note:

To prevent the inlet and exhaust manifolds 

from being installed under tension, they must 

be installed before the cylinder head bolts 

are tightened.

6.

Fit the inlet and exhaust manifolds with new 

gaskets and tighten the attachment bolts to 

the specified torque. See "Technical data".

7.

Fit the remaining M16 and M12 bolts and 

apply a drop of oil to the bearing surface of 

the bolt heads.

8.

Remove the two guide pins and replace 

them with the two remaining cylinder head 

bolts.

9.

Tighten the cylinder head bolts to the 

specified torque and in the correct sequence. 

See "Technical data".

10. Fit the valve sleeve.

11. Fit the push rods

12. Fit the valve gear.

13. Fit the injectors.

14. Fit the valve covers.

15. Fit the coolant pipe, fit new gaskets to the 

thermostat housing and install the 

thermostat housing.

16. Fit the injector pipes in sets.

17. Fit the fuel filter onto the coolant pipe.

18. Fit the fuel leak-off pipe between the fuel 

filter and the inlet manifold.

M200561


Content   ..  221  222  223  224   ..