DAF CF65, CF75, CF85 Series . Manual - part 215


  Index      DAF     DAF CF65, CF75, CF85 Series - service repair manual


Search            


Content   ..  213  214  215  216   ..


DAF CF65, CF75, CF85 Series . Manual - part 215


©

 200351

4-1

Removal and installation

CE-ENGINE LUBRICATION SYSTEM

ΧΦ65/75/85 series

2

4

4. REMOVAL AND INSTALLATION

4.1 REMOVAL AND INSTALLATION, LUBRICATING OIL FILTER

}

To prevent skin injury, avoid 
unnecessary contact with the 
drained lubricating oil. Be careful 
when changing the oil. Hot oil may 
cause serious injuries.

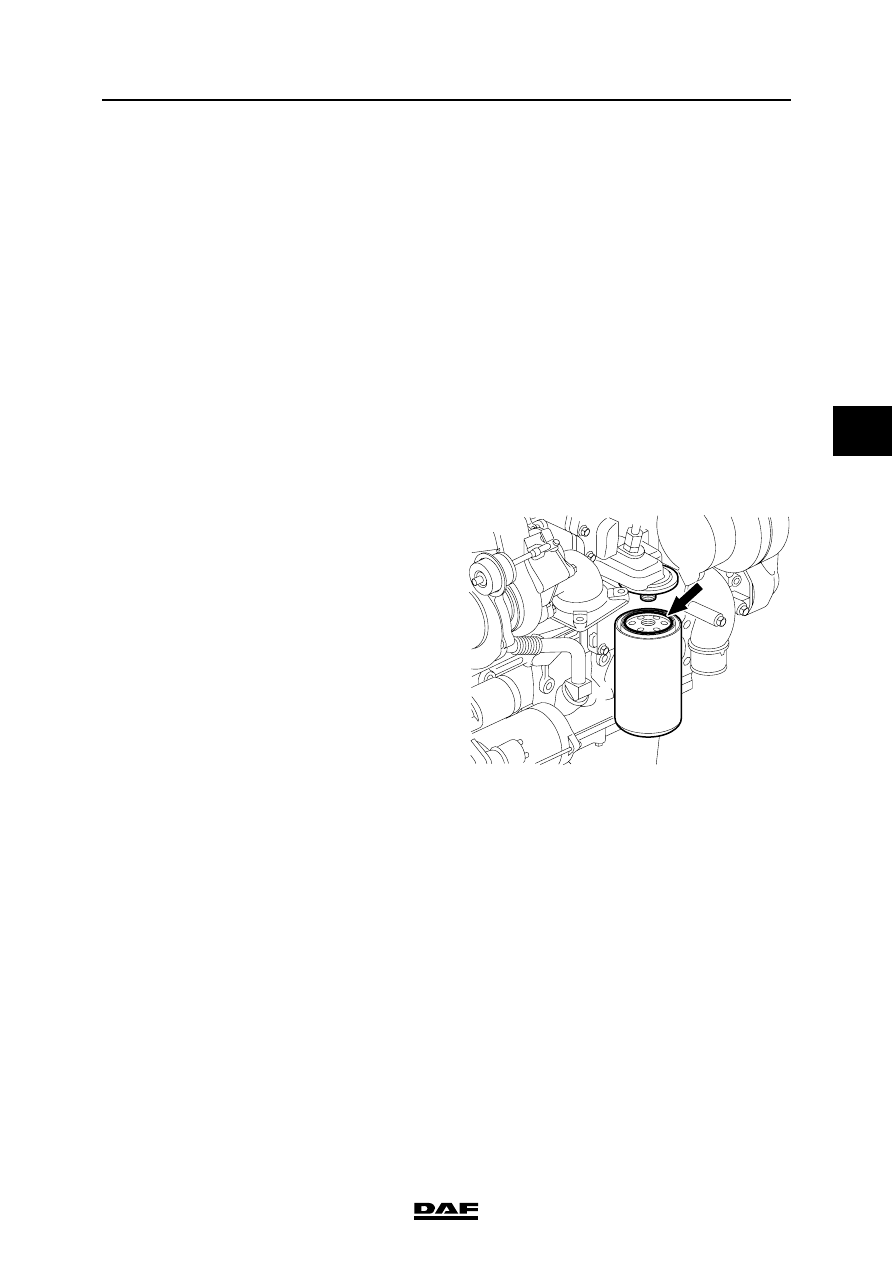
Removing the oil filter
1.

Clean the location and the area surrounding 
the filter element if extremely fouled.

2.

Remove the filter element by turning it anti-
clockwise. Collect any oil that is flowing out.

3.

Remove the O-ring if it has not been 
removed already.

Installing the oil filter
1.

Lightly oil the filter element sealing ring.

2.

Fill the filter element with clean oil. Use the 
specified oil.

3.

Fit the filter until the seal abuts, and tighten it 
by hand another 

• to a full turn.

4.

Run the engine for a short time and check 
whether the oil filter is correctly sealed.

5.

Check the oil level and correct if necessary. 
Use the specified oil.

G0 00 207

CE-ENGINE LUBRICATION SYSTEM

4-2

©

 200351

Removal and installation

4

ΧΦ65/75/85 series

2

4.2 REMOVAL AND INSTALLATION, OIL COOLER

Removing the oil cooler
1.

Drain the coolant. See "Draining and filling".

2.

Remove the lubricating oil filter.

3.

Remove the turbocharger oil supply pipe.

4.

Remove the attachment bolts from the oil 
cooler and remove it.

Installing the oil cooler
1.

Fit the oil cooler with new gaskets and 
tighten the attachment bolts to the specified 
torque and in the specified sequence. 
See"Technical data".

2.

Tighten the oil supply pipe to the specified 
torque. See "Technical data".

3.

Fit the lubricating oil filter.

4.

Fill the cooling system.

5.

Run the engine briefly, and check that the oil 
cooler does not leak.

6.

Check the lubricating oil level.

7.

Check the coolant level.

©

 200351

4-3

Removal and installation

CE-ENGINE LUBRICATION SYSTEM

ΧΦ65/75/85 series

2

4

4.3 REMOVAL AND INSTALLATION, OIL SUMP

Removing the oil sump
1.

Remove the under-engine noise 
encapsulation.

2.

Drain the engine oil. See "Draining and 
filling".

3.

Support the oil sump.

4.

Remove the attachment bolts all around.

5.

Remove the oil sump (1) with sealing rubber 
(2) and flange (3).

Installing the oil sump
1.

Thoroughly clean the sealing surfaces of the 
oil sump and the cylinder block.

2.

Check the oil sump sealing rubber (2). 
Damaged sealing rubbers must be replaced.

3.

Fit the oil sump (1) with sealing rubber (2) 
and flange (3) upright.

4.

Install the attachment bolts in the specified 
sequence and tighten them to the specified 
torque. See "Technical data".

5.

Fill the engine with the correct amount of 
lubricating oil. See "Draining and Filling".

6.

Run the engine briefly, and check that the oil 
sump does not leak. Then check the oil level.

7.

Fit the under-engine noise encapsulation.

M201139

1

2

3

11

1

3

9

12

4

2

10

M201079

16

14

13

15

5

7

6

8

CE-ENGINE LUBRICATION SYSTEM

4-4

©

 200351

Removal and installation

4

ΧΦ65/75/85 series

2

4.4 REMOVAL AND INSTALLATION, LUBRICATING OIL PUMP

Removing the lubricating oil pump
1.

Remove the fan.

2.

Remove the poly-V-belt.

3.

Remove the vibration damper and the 
crankshaft pulley.

4.

Remove the front crankshaft seal.

5.

Remove the front engine panel.

6.

Remove the attachment bolts from the 
lubricating oil pump crosswise and remove it.

Installing the lubricating oil pump
1.

Check the lubricating oil pump.

2.

Fill the lubricating oil pump with engine oil 
and position the lubricating oil pump in the 
cylinder block.

3.

Fit the attachment bolts and tighten them 
crosswise to the specified torque. See 
"Technical data".

Note:
The rear plate of the lubricating oil pump is at 
the back of the bore; if the lubricating oil 
pump is fitted correctly, the flange will not 
touch the cylinder block.

4.

Fit the front engine panel.

5.

Fit the front crankshaft seal.

6.

Fit the crankshaft pulley and the vibration 
damper.

7.

Fit the poly-V-belt.

8.

Fit the fan.

M201124


Content   ..  213  214  215  216   ..