Citroen C5 Dag (2010 year). Instruction - part 8
VI
!
98
F I T T I N G S
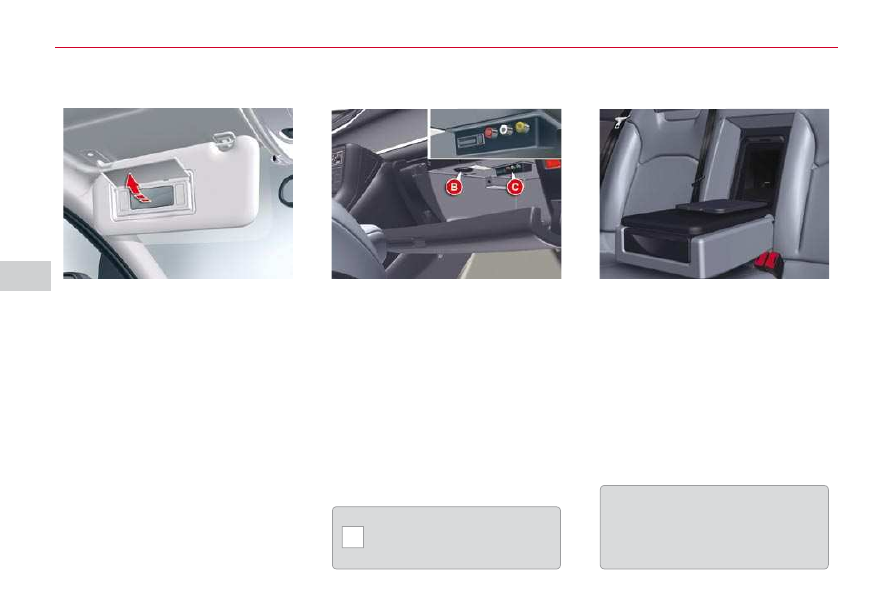
SUN VISOR
SKI FLAP
A fl ap in the backrest, located to the
rear of the armrest, facilitates the
carrying of long objects.
With the ignition on, lift the fl ap;
the mirror is illuminated automat-
ically.
To prevent dazzle from ahead, fold
the visor downwards.
It can be disengaged from its central
fi xing and pivoted over to the side
windows if required.
COOLED GLOVE BOX
To open the glove box, pull on
the handle and lower the lid.
The glove box has a manually clos-
able air conditioning vent B .
It has 2 or 3 sockets C to connect
audio/video equipment, and a slot
for a SIM card (see "Audio and
Telematics" section).
It has automatic illumination.
To open
Lower the rear armrest.
Pull the fl ap handle down.
Lower the fl ap.
Load the objects from inside the
boot.
Ensure that the objects are well se-
cured and that they do not impede
the operation of the gear lever.
Whilst driving, the glove
box should be kept closed.