Citroen Nemo (2015 year). Instruction - part 10


  Index      Citroen     Citroen Nemo - instruction 2015 year in english


Search            


Content   ..  8  9  10  11   ..


Citroen Nemo (2015 year). Instruction - part 10


 143

8

CHECKS

Fuel

Resetting

To set off again, restore the fuel supply and 

the electrical supply manually:

-  with the key in the STOP position, turn 

the key to the RUNNING position,

-  push the direction indicator control stalk 

fully upwards,

-  place it in the "Off" position,
-  press the direction indicator control stalk 

fully downwards,

-  return it to the "Off" position,
-  push it fully upwards again,
-  return it to the "Off" position,
-  press it fully downwards again,
-  return it to the "Off" position,
-  turn the key to the STOP position.

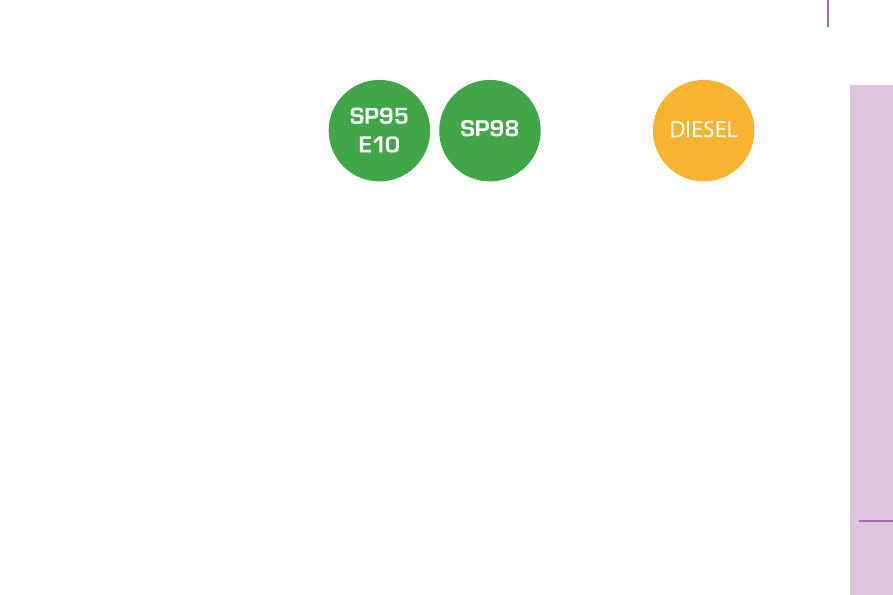
Fuel used for petrol engines

The petrol engines are compatible with 

E10 bio-petrol (containing 10 % ethanol), 

conforming to European standards EN 228 

and EN 15376.

E85 type fuels (containing up to 85 % 
ethanol) are reserved exclusively for 
vehicles marketed for the use of this type 
of fuel (bioFlex vehicles). The quality of 
the ethanol must comply with European 
standard EN 15293.

Fuel used for Diesel engines

The Diesel engines are perfectly with 
biofuels which conform to current and future 
European standards (diesel fuel which 
complies with standard EN 590 mixed  
with a biofuel which complies with standard  
EN 14214) available at the pumps 

(containing up to 7 % Fatty Acid Methyl 
Ester).
The B30 biofuel can be used in certain 

Diesel engines; however, this use is subject 

to strict application of the special servicing 
conditions indicated in the maintenance and 
warranty guide. Contact a CITROËN dealer 

or a qualified workshop.
The use of any other type of (bio)fuel 
(vegetable or animal oils, pure or diluted, 

domestic fuel...) is strictly prohibited (risk of 

damage to the engine and fuel system).

 144

Opening the bonnet

OPENING THE BONNET

On the inside

Pull the release lever below the dashboard 
towards you.

On the outside

Raise the bonnet slightly, placing your hand 

flat under the bonnet to make the operation 
easier.
Push the safety catch lever to the left, then 
open the bonnet fully.
While holding the bonnet open, check that the 

locking control A is engaged by pressing it.

To close

Lift the bonnet slightly and pull the release 
control A to release it.
Lower the bonnet and release it at the end 
of its travel. Check that the bonnet is fully 
latched.
Avoid opening the bonnet in strong winds.

Before doing anything under the 

bonnet, switch off the ignition with the 

key to avoid any risk of injury resulting from 

an automatic change to START mode.

because of the presence of electrical 
equipment under the bonnet, it is 

recommended that exposure to water (rain, 
washing, ...) be limited.

 145

8

CHECKS

Under the bonnet

DIESEL ENGINE

Take care when doing anything under 
the bonnet.

1.  Screenwash reservoir.

2. Fusebox.

3.

  Engine coolant header tank.

4.

  Brake and clutch fluid reservoir.

5.  air filter.

6.

  Dipstick.

7.

  Engine oil filler cap.

8.

  Power steering fluid reservoir.

 146

Under the bonnet

PETROL ENGINE

Take care when doing anything under 
the bonnet.

1.  Screenwash reservoir.

2. Fusebox.

3.

  Engine coolant header tank.

4.

  Brake and clutch fluid reservoir.

5.  air filter.

6.

  Dipstick.

7.

  Engine oil filler cap.

8.

  Power steering fluid reservoir.

 147

8

CHECKS

Levels

These regular maintenance operations will 

keep your vehicle in good working order. 

Ask for advice from a CITROËN dealer 

or a qualified workshop or refer to the 

maintenance and warranty guide provided in 

the handbook pack.

LEVELS

Oil level

Check the level regularly and top up 

between changes. The maximum oil 
consumption is 0.5 litre per 600 miles  
(1 000 km). Check the level with the vehicle 

level, engine cold, using the dipstick.

Dipstick

There are two marks on the 

dipstick:

A= maximum
If you fill past this mark, 
contact a CITRoËn dealer 
or a qualified workshop.

B= minimum
never allow the level to fall 
below this mark.

To preserve the reliability of engines and 
emission control systems, the use of 
additives in engine oil is prohibited.

Oil change

Brake fluid level

The brake fluid must be changed at 

the specified interval, as given in the 

manufacturer's servicing schedule.
Use fluids recommended by the 
manufacturer, which meets the DOT4 
standard.
The level must be between the MIN and 
MAX

 marks on the reservoir.

If fluid has to be added frequently, this 
indicates a fault which must be checked by a 

CITROËN dealer or a qualified workshop as 
soon as possible.

Warning lamps

Checking by means of the warning 
lamps in the instrument panel is 
described in the "Ready to go - 
Instruments and controls" section.

This must be carried out at the specified 
interval and the viscosity grade of the oil 
selected must fulfil the requirements of the 
manufacturer's servicing schedule. Ask for 
advice from a CITRoËn dealer or a qualified 
workshop.

Remove the dipstick before filling.

Check the level after filling (never exceed 

the maximum mark).

Refit the filler cap before closing the bonnet.

 148

Levels

Engine coolant level

only use the fluid recommended by the 
manufacturer. Otherwise, you risk seriously 

damaging your engine. When the engine 
is warm, the temperature of the coolant is 
controlled by the engine cooling fan. As 

this fan can operate with the ignition key 

removed and because the cooling system is 
pressurised, wait for at least one hour after 
the engine has stopped before carrying out 

any work.

Topping up

The level must be between the MIN and 
MAX

 marks on the header tank. If more than 

1 litre of fluid is required to top up the level, 

have the system checked by a CITROËN 

dealer or a qualified workshop.

Power steering fluid level

The vehicle must be parked on level ground 

with the engine cold. Unscrew the cap with 

integral gauge and check the level which 
must be between the MIN and MAX

 marks.

Screenwash fluid level

For optimum cleaning and to avoid freezing, 

topping up or replacement of this fluid 

should never be with plain water; we 
recommend the use of products available 
from CITRoËn dealers.
Capacity of the reservoir: approximately 

3 litres.

Slacken the cap by two turns to release the 

pressure to prevent any risk of scalding. 
When the pressure has dropped, remove the 
cap and top up the level with coolant.
If fluid has to be added frequently, this 
indicates a fault which must be checked by a 

CITROËN dealer or a qualified workshop as 
soon as possible.

Used products

Avoid prolonged contact of used oil with the 

skin.

Brake fluid is harmful to health and very 
corrosive.
Do not dispose of used oil, brake fluid or 

coolant into drains or into the ground, but 
into the containers provided for this purpose 
at CITRoËn dealers (France) or at an 
authorised waste disposal site.

 149

8

CHECKS

Checks

CHECKS

Bleeding water from the Diesel  
filter

If this warning lamp comes 

on, you must bleed the filter; 
otherwise bleed the filter 
regularly, every time the engine 

oil is changed.
To remove the water, unscrew the bleed 
screw or the water in diesel sensor, located 
at the base of the filter. operate until all of 
the water has flowed out. Then tighten the 
bleed screw or the water sensor.

Battery

at the start of winter, have your battery 
checked by a CITROËN dealer or a qualified 

workshop.

Air filter and passenger compartment filter

A blocked passenger compartment filter 
may reduce the performance of the 
air conditioning system and generate 
undesirable odours. The replacement 
intervals for these components are indicated 
in the maintenance and warranty guide.

Depending on the environment (dusty 
atmosphere...) and the use of the vehicle 
(urban driving...), change them twice as 
often if necessary.

Brake pads

Brake pad wear depends on the type of 

driving, in particular for vehicles which are 
used in town, over short distances. It may 
be necessary to check the brake pad wear, 
even between services.
Unless there is a leak on the system, a drop 

in the brake fluid level indicates that the 

brake pads are worn.

Brake disc / drum wear

For all information on checking the brake 

disc / drum wear, contact a CITROËN dealer 

or a qualified workshop.

Parking brake

Where the parking brake travel is too great 
or there is a reduction in the performance 
of the system, the parking brake should be 

adjusted, even between services.

Have the system checked by a CITROËN 

dealer or a qualified workshop.

Oil filter

Change the filter regularly, in accordance 

with the manufacturer's servicing schedule.

The presence of this label, in particular 
with the Stop & Start system, indicates the 
use of a specific 12 V lead-acid battery 

with special technology and specification. 
The involvement of a CITRoËn dealer 
or a qualified workshop is essential when 

replacing or disconnecting the battery.

Refer to the "Checks - Under the 
bonnet" section.

HDi engines use advanced 

technology. All work requires 

specialist knowledge, which all CITROËN 
dealers have.

 150

Checks

Manual gearbox

The gearbox does not require any 

maintenance (no oil change).
Refer to the maintenance and warranty 
guide for the checking interval for this 
component.

Good practice

To check the main levels and certain 
components, in accordance with the 
manufacturer's servicing schedule, refer to 

the pages of the maintenance and warranty 

guide which correspond to your vehicle's 

engine.

Electronic gearbox

The gearbox does not require any 

maintenance (no oil change).
Refer to the maintenance and warranty 
guide for details of the checking interval for 
this component.

only use products recommended by 
CITRoËn or products of equivalent 

quality and specification.
In order to optimise the operation of units as 
important as the braking system, CITROËN 
selects and offers specific products.
In order to avoid damaging the electrical 

units, high pressure washing to clean the 

engine compartment is strictly prohibited.

After washing the vehicle dampness, or in 

winter, ice may form on the brake discs and 

pads: braking efficiency may be reduced. 

Make some light brake applications to dry 

and de-ice the brakes.

 151

8

CHECKS

Checks

Particle filter (1.3 HDi 75)

an addition to the catalytic converter, this 
filter makes an active contribution to the 

preservation of air quality by the retaining 

of the unburnt pollutant particles. Black 

exhaust fumes are thus no longer emitted.
This filter, fitted to the exhaust system, 
accumulates particles of soot. The engine 

control unit manages the automatic 
periodic elimination of the soot particles 
(regeneration).

the regeneration procedure is invoked 

according to the quantity of particles 

accumulated and the driving conditions  

of the vehicle. During this phase, you  

may notice some unusual phenomena - 

increased idling speed, cooling fan running, 

increase in smoke and higher exhaust gas 

temperature - which does not affect the 
operation of the vehicle or the environment.
After prolonged idling or driving at very low 
speeds, you may occasionally notice water 
vapour being emitted from the exhaust when 

accelerating. This is of no consequence 

to the running of the vehicle or to the 
environment.

Saturation / Regeneration

If there is risk of blockage of the 

filter, this warning lamp comes on 
in the instrument panel.
This alert tells you that the 

particle filter is starting to fill up (in 

conditions of urban driving of exceptionally 

long duration: low speeds, traffic jams etc.)

To regenerate the filter, it is advised to drive 
as soon as possible, when traffic conditions 
and the law permit, at a speed of at least  
40 mph (around 60 km/h), with an engine 
speed above 2 000 rpm for about fifteen 
minutes (until the warning lamp and/or the 

message disappears).

Operating fault
If this alert persists, do not ignore the 

warning; it indicates that a fault has occurred 

in the exhaust / particle filter system.

Have it checked by a CITROËN dealer or a 

qualified workshop.

Because of the higher exhaust 

gas temperature resulting from the 

normal operation of the particle filter, it is 
recommended that you do not park the 

vehicle over inflammable materials (grass, 
dry leaves, pine needles, ...) so as to avoid 
any risk of fire.

If possible, avoid switching off the 

engine before the end of regeneration 

of the filter; repeated interruptions could 
cause premature deterioration of the 
engine oil. It is not recommended to end 

regeneration of the filter with the vehicle 
stationary.

 152

Battery

BATTERY

Models without Stop & Start

A. Positive battery terminal on your vehicle.

B. Slave battery.

C. Earth point on your vehicle.

D.

 Negative battery terminal on your vehicle.

Charging the battery using a battery charger

Starting using another battery
-  Connect the red cable to the positive 

battery terminal A on your vehicle then 
to the positive (+) terminal of the slave 
battery B.

-  Connect one end of the green or black 

cable to the negative (-) terminal of the 
slave battery B.

-  Connect the other end of the green 

or black cable to the earth point C on 

your vehicle (not to the negative battery 
terminal D on your vehicle).

-  Operate the starter, let the engine run.
-  Wait for the engine to return to idle, then 

disconnect the cables.

Never charge a battery without first 

disconnecting the terminals.

-  Disconnect the two quick-release battery 

terminals.

-  Follow the instructions for use provided by 

the battery charger manufacturer.

-  Check that the battery posts and terminals 

are clean. If they are covered with sulphate 

(white or greenish deposit), disconnect 
them and clean them.

-  Reconnect the two quick-release terminals, 

starting with the negative (-) terminal.

Some functions are not available if 
the battery is not sufficiently charged.

 153

9

QUICK HELP

Battery

Models with Stop & Start

A. Protective cover.

B. Positive battery terminal on your vehicle.

C. Slave battery.

D. Earth point on your vehicle.

E.  Connector release button.

F.

  Check sensor connector.

G.

 State of charge sensor.

H.

 Negative battery terminal on your vehicle.

Charging the battery using a battery charger

-  Follow the instructions for use provided 

by the battery charger manufacturer.

-  Check that the battery posts and 

terminals are clean. If they are covered 

with sulphate (white or greenish deposit), 
disconnect them and clean them.

-  Reconnect connector F of the check 

sensor G.

-  Refit the protective cover A to the 

positive battery terminal B.

Starting using another battery
-  Remove the protective cover A from the 

positive battery terminal B.

-  Connect the red cable to positive battery 

terminal B, then to the (+) terminal of the 
slave battery C.

-  Connect one end of the green or black 

cable to the (-) terminal of the slave 
battery C.

-  Connect the other end of the green or 

black cable to the earth point D of your 

vehicle (not to the negative battery 
terminal H of your vehicle).

-  Operate the starter, let the engine run.
-  Wait for the engine to return to idle, then 

disconnect the cables.

-  Refit the protective cover A to the 

positive battery terminal B.

Do not disconnect the battery to charge it.

-  Press the release button E to disconnect 

the connector F.

-  Disconnect the connector F from the 

check sensor G.

-  Remove the protective cover A from the 

positive battery terminal B.

-  Connect the charger cables: (+) to the 

positive battery terminal B

; (-) to the 

negative battery terminal H.

Never remove the check sensor G 

from the negative battery terminal H

except when replacing the battery.

 154

Battery

batteries contain harmful substances 
such as sulphuric acid and lead. They 

must be disposed of in accordance with the 
law and must not, in any circumstances be 
discarded with household waste.
Take used batteries to an authorised waste 
disposal site.

It is advisable to disconnect the battery 
if the vehicle is not to be used for a 
period of more than one month. To do 
this on models with Stop & Start:

-  press the release button E to 

disconnect connector F,

-  disconnect connector F of check 

sensor G.

The presence of this label, in particular 
with the Stop & Start system, indicates 

the use of a 12 V lead-acid battery with 

special technology and specification; 
the involvement of a CITRoËn dealer or 
a qualified workshop is essential when 

replacing or disconnecting the battery.
Failure to observe this recommendation may 
cause premature wear of the battery.

After refitting the battery by a 
CITRoËn dealer or a qualified 

workshop, the Stop & Start system will 
only be active after a continuous period of 
immobilisation of the vehicle, a period which 
depends on the climatic conditions and the 
state of charge of the battery (up to about  

8 hours).

Before charging
The charging operation must be carried 

out in a ventilated area away from naked 

flames or any possible sources of sparks to 

eliminate the risks of explosion and fire.

Do not attempt to charge a frozen battery: it 

must first be thawed to eliminate the risks of 
explosion. If the battery has frozen, before 

charging it have it checked by a specialist 

who will check that the internal components 

have not been damaged and that the 

container is not cracked, which could mean 

that there is a risk of a leak of toxic and 
corrosive acid.

Before disconnecting

never disconnect a terminal when the 

engine is running.

Before disconnecting the battery, you must 

wait for 2 minutes after switching off the 

ignition.
Close the windows and doors before 

disconnecting the battery.

After reconnecting

after every reconnection of the battery, 
switch on the ignition and wait 1 minute 

before starting to allow the electronic 
systems to be initialised. If difficulties are 
experienced after this, contact a CITRoËn 
dealer or a qualified workshop.
If the battery has been disconnected 
for some time, it may be necessary to 
reinitialise the following functions:

-  the display screen settings (date, time, 

language, distance and temperature 
units),

-  the radio stations,
-  the central locking.
Some settings are cleared and must be 

reprogrammed. Contact a CITROËN dealer 

or a qualified workshop.

Never remove the check sensor G from the 

negative battery terminal H, except when 

replacing the battery.

 155

9

QUICK HELP

Changing a wheel

CHANGING A WHEEL

Parking the vehicle

As far as possible, park the vehicle on level, 

stable and non-slippery ground.

Apply the parking brake, switch off the 

ignition and engage first gear (on a hill).
It is imperative that you ensure that the 
occupants get out of the vehicle and wait in 
a safe location.
If possible, place a chock under the 

wheel diagonally opposite the wheel to be 

changed.

Tools

The tools required are stored in a tool kit 

located behind the driver's seat (Light van) 
or behind the rear bench seat (Combi).
1. Wheelbrace.

2.

  Centre guide.

3. Screwdriver.

4.

  Jack with handle.

5.

  Removable towing eye.

The jack and all of the tools are specific 
to your vehicle. do not use them for other 
purposes.
Never go underneath the vehicle when it is 

raised only by the jack; use an axle stand.

Taking out the spare wheel

The spare wheel retaining bolt is located on 

the rear left part of the loading sill.
1.

  Slacken the wheel retaining bolt using the 

wheelbrace.

2.  Unscrew fully to unwind the winch cable.

3.

  Take out the spare wheel using the 

wheelbrace.

4.  Raise the cover A.

5.  Remove the cable B

 from its housing.

6.  Release the spare wheel and place it 

near the wheel to be changed.

 156

Changing a wheel

Removing a wheel

1.

  Park the vehicle on level, stable and non-

slippery ground. Apply the parking brake. 

Switch off the ignition and engage first 

gear or reverse, depending on the slope.

2.

  Detach the wheel trim (large model) using 

the wheelbrace 1

, pulling at the valve 

passage hole.


Slide the screwdriver 3 into the notch on 
the trim (small model) and use the tool as 
a lever, pressing to unclip the trim.

3.

  Slacken the wheel bolts using the 

wheelbrace.

4.

  Position the jack underneath the body, 

in accordance with the illustration, at the 
mark A (on the sill) as close as possible 

to the wheel to be changed.

5.

  Extend the jack 4 until its base is in 

contact with the ground. Ensure that the 

centreline of the jack base is vertical in 
relation to the location used.

6.  Raise the vehicle.

7.  Remove the bolts and detach the wheel.

Putting the wheel back in place

1.  Install the support on the wheel.

2.  Place the cable B in position.

3.  Lower the cover A.

4.  Position the wheel.

5.

  Turn the wheelbrace clockwise to fully 

raise the spare wheel.

 157

9

QUICK HELP

Changing a wheel

Fitting a wheel

6.

  Put the trim back in place, starting by 

placing its notch facing the valve, and 
press with the palm of your hand.

7.  Stow the tools and the wheel.

8.

  Check the tyre pressure and have the 

balance checked.

Refer to the "Technical data - 

Identification markings" section for 

the location of the tyres sticker bearing the 
recommended tyre pressures.

1.

  Put the wheel in place using the centre 

guide 2 to assist you.

2.

  Screw in the 3 bolts by hand and remove 

the centre guide. Position the 4th bolt.

3.

  Pre-tighten using the wheelbrace 1.

4.

  Fold the jack 4 and detach it.

5.

  Tighten the wheel bolts using the 

wheelbrace.

Have the tightening of the bolts and 
the pressure of the spare wheel 

checked by a CITROËN dealer or a qualified 

workshop without delay.

Also, have the original wheel repaired and 
refitted by a CITRoËn dealer or a qualified 
workshop as soon as possible.

 158

Changing a wheel

TEMPORARY PUNCTURE REPAIR KIT

This kit is located at the front of the 

passenger compartment. It consists of:

-  a repair cartridge A, containing the 

sealant, equipped with:

●  a filling pipe B,
●  a sticker C indicating "max. 80 km/h", 

which the driver must affix to the 

dashboard in a visible position after 

repairing the tyre,

-  a compressor D equipped with a pressure 

gauge and unions,

-  adaptors for the inflation of various items,
-  a pair of protective gloves,
-  a quick guide to use of the temporary 

puncture repair kit.

Repair procedure

-  Apply the parking brake and place the 

gear lever in neutral.

-  Unscrew the valve cap of the tyre to be 

repaired.

-  Take out the filling pipe B and screw the 

ring E onto the tyre valve.

-  Check that the on/off switch F on the 

compressor is in position "0" (off).

-  Start the engine.
-  Insert the connector G in the nearest  

12 V accessory socket in the vehicle.

-  Place the compressor's on/off switch F in 

position "1" (on).

-  Inflate the tyre to a pressure of 3 bars.
To obtain a more accurate reading, you are 

advised to check the pressure value on the 

pressure gauge H, with the compressor off.

This temporary puncture repair kit is 
available from CITRoËn dealers.

It is provided for the repair of holes of 
a maximum diameter of 4 mm, located 
exclusively on the tread or side wall of the 
tyre. Avoid removing any foreign bodies 
which have penetrated into the tyre.


Content   ..  8  9  10  11   ..