Citroen C3 Pluriel (2008 year). Instruction - part 2
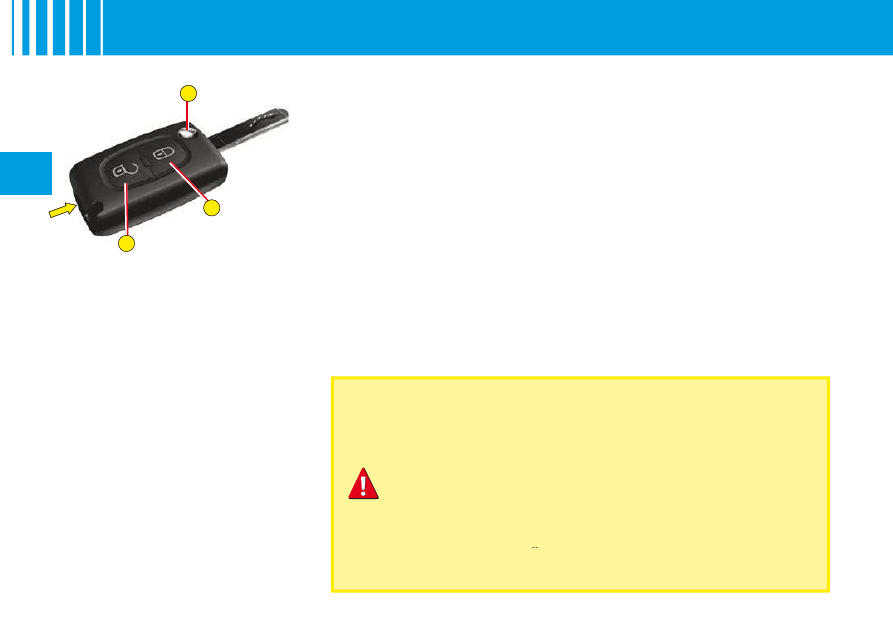
A
C
B
II
20
R E M O T E C O N T R O L
Changing the remote control battery
First, retract the key-carrier if necessary.
Unclip the housing by lifting at the rear (see diagram).
Battery:
CR 0523 of 3 V.
Re-initialisation of the remote control
After a change of battery, it may be necessary to re-initialise the remote
control. To do that, switch on the ignition and immediately action button A
on your remote control to trigger the action desired. This may take some ten
seconds.
Note: Make a careful note of the numbers for the keys and for the remote
control on the ASSISTANCE card. Keep this in a safe place.
Do not throw away the old batteries. They should be returned to a CITROËN
dealer or deposited at a recognised collection point (a camera shop, for
example).
Except when reinitialising, the remote control cannot function
while the key is in the ignition, even when switched off.
Warning: by inadvertently actioning the remote control, when
for example it is in your pocket, you can unlock the vehicle
without your realising it.
However, if none of the doors is opened within thirty seconds
following an unlocking, the doors will automatically relock.
Warning: there is a risk of damage if the replacement battery
is not the correct one.
Only use batteries that are identical or equivalent to those
approved by CITROËN.
Only use batteries that
ies tha
Locating of the vehicle
To locate the vehicle on a carpark,
press button A, the interior lamps
come on and the direction indica-
tors fl ash for a few seconds. The
vehicle remains locked.
Folding and ejecting the key
Button C is for folding and eject-
ing the key from its housing in the
remote control.
If you do not press on button C,
you could damage the key mecha-
nism.